Filtering by Author: Austin Hoke
LS Engine Installation
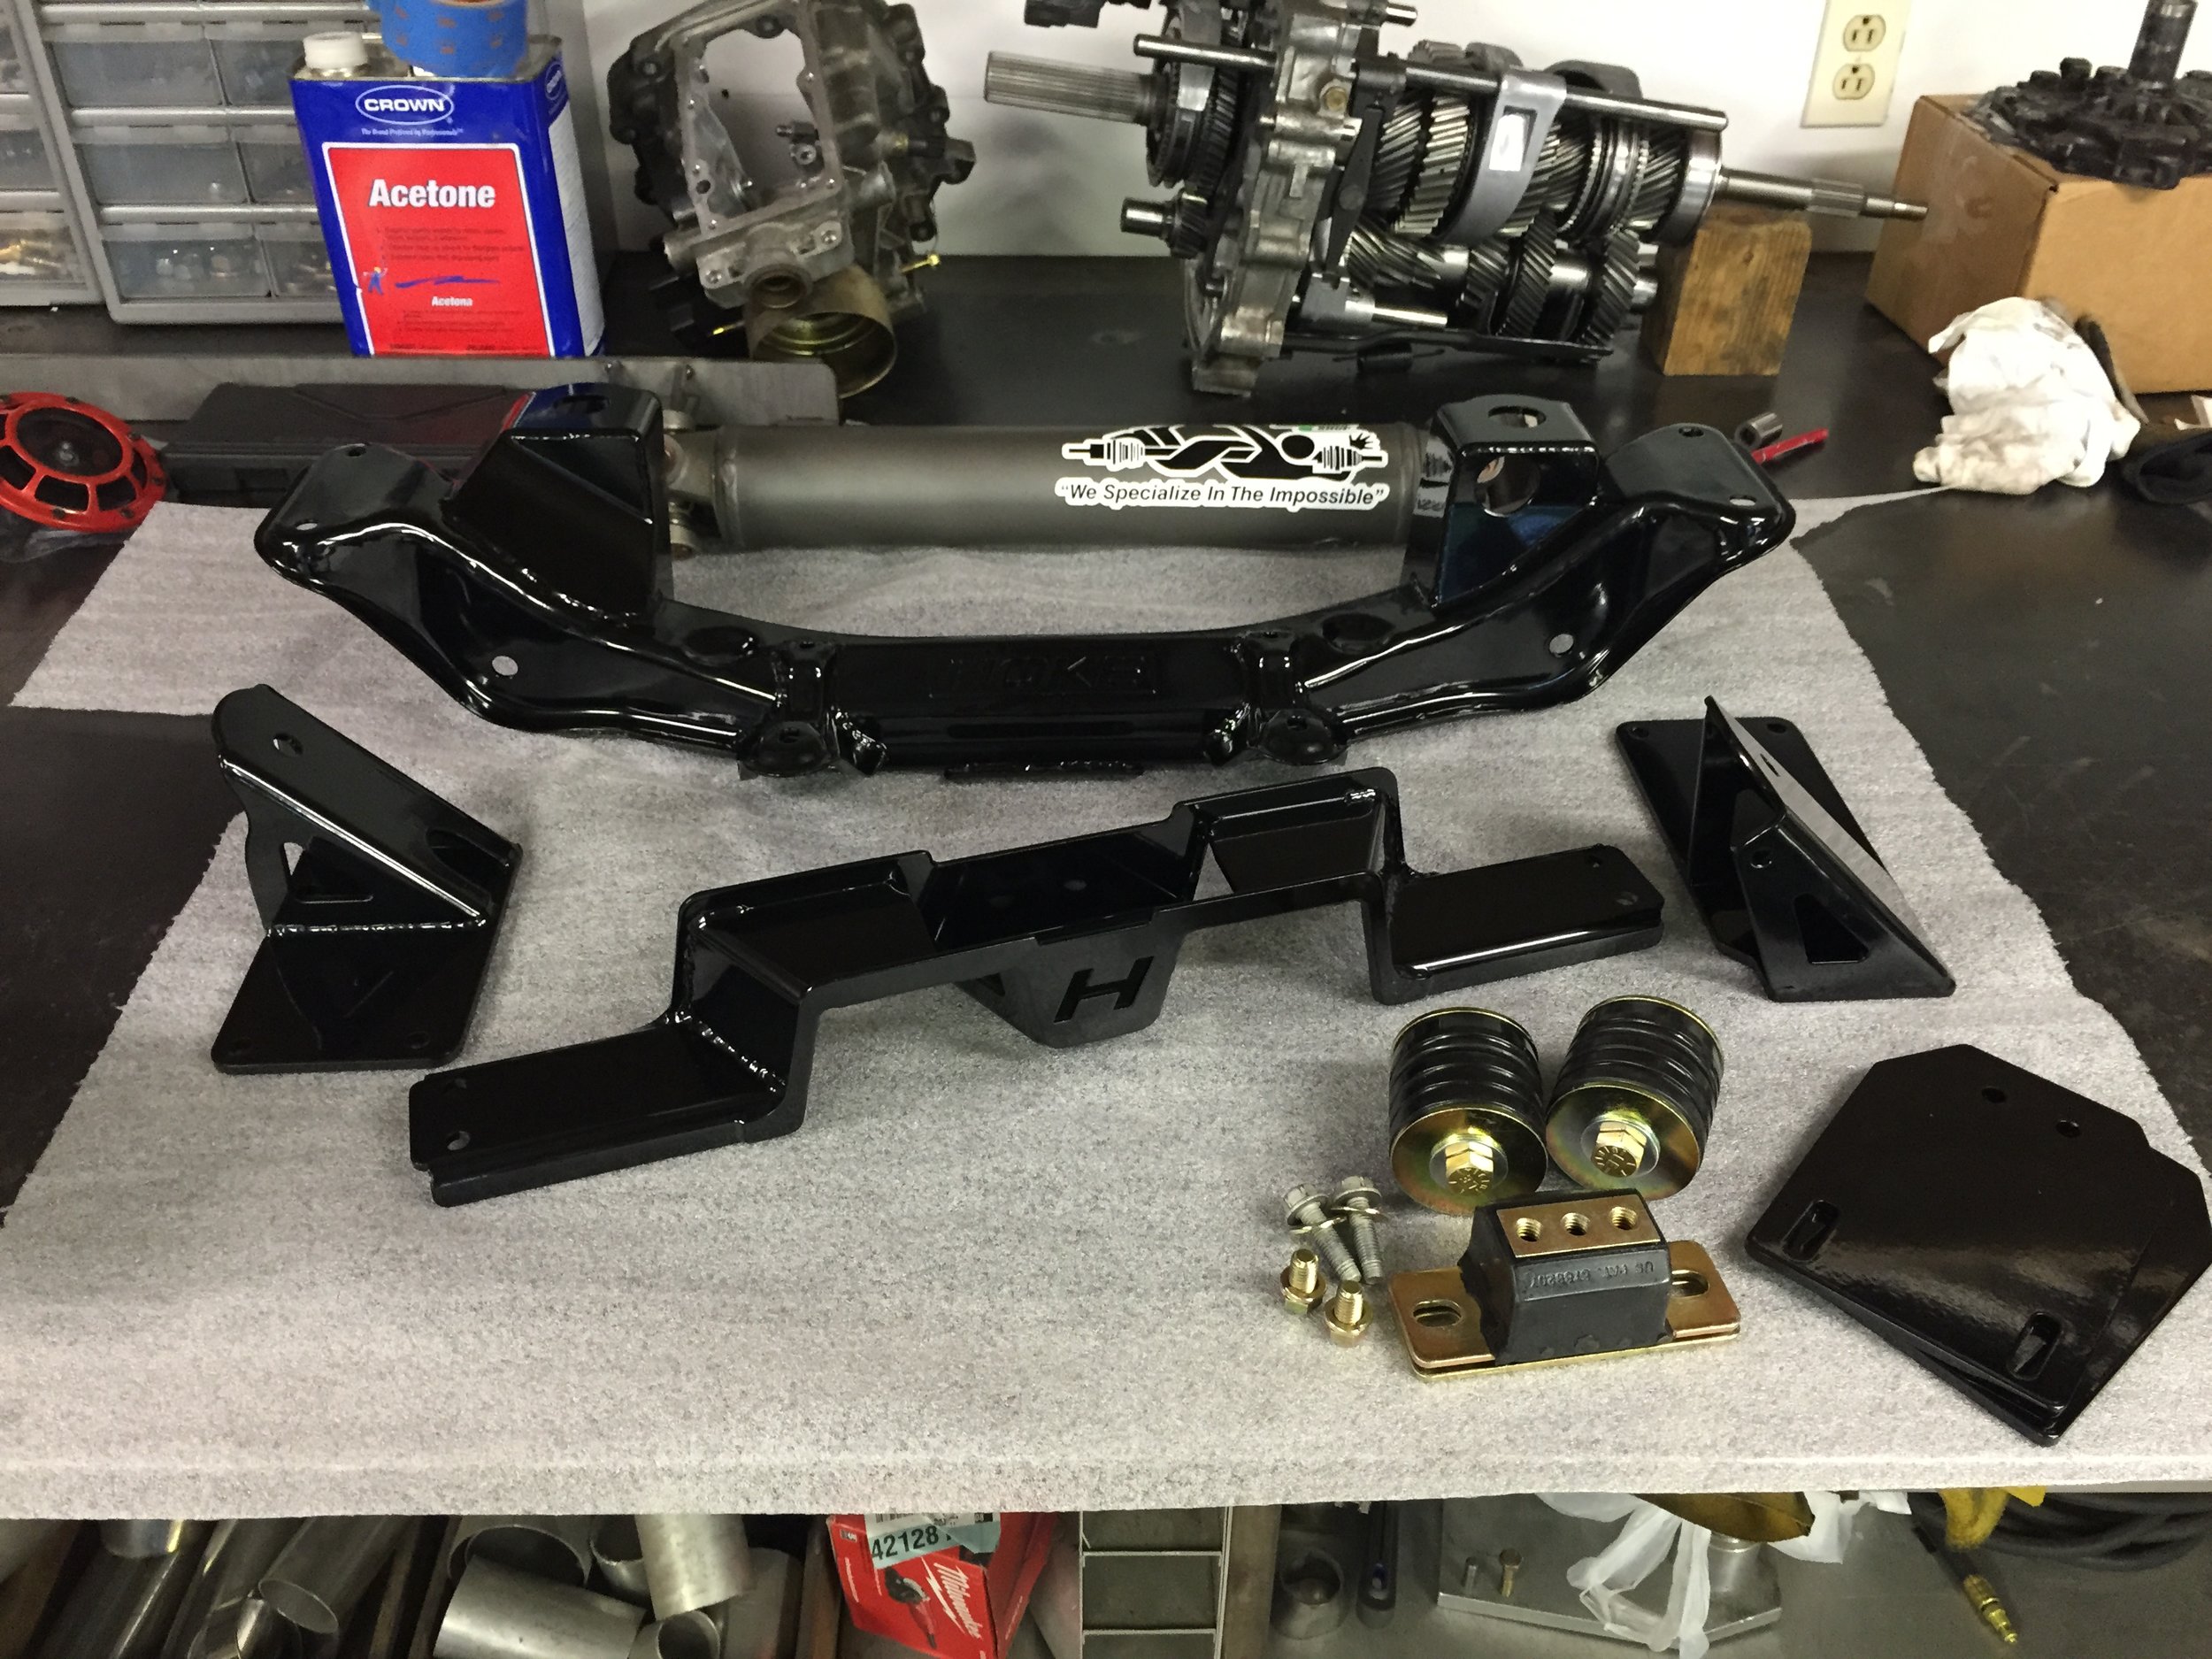
Please check out the product development page to see details on the LS mounting kit design, Im picking up here with pictures of the final engine installation.
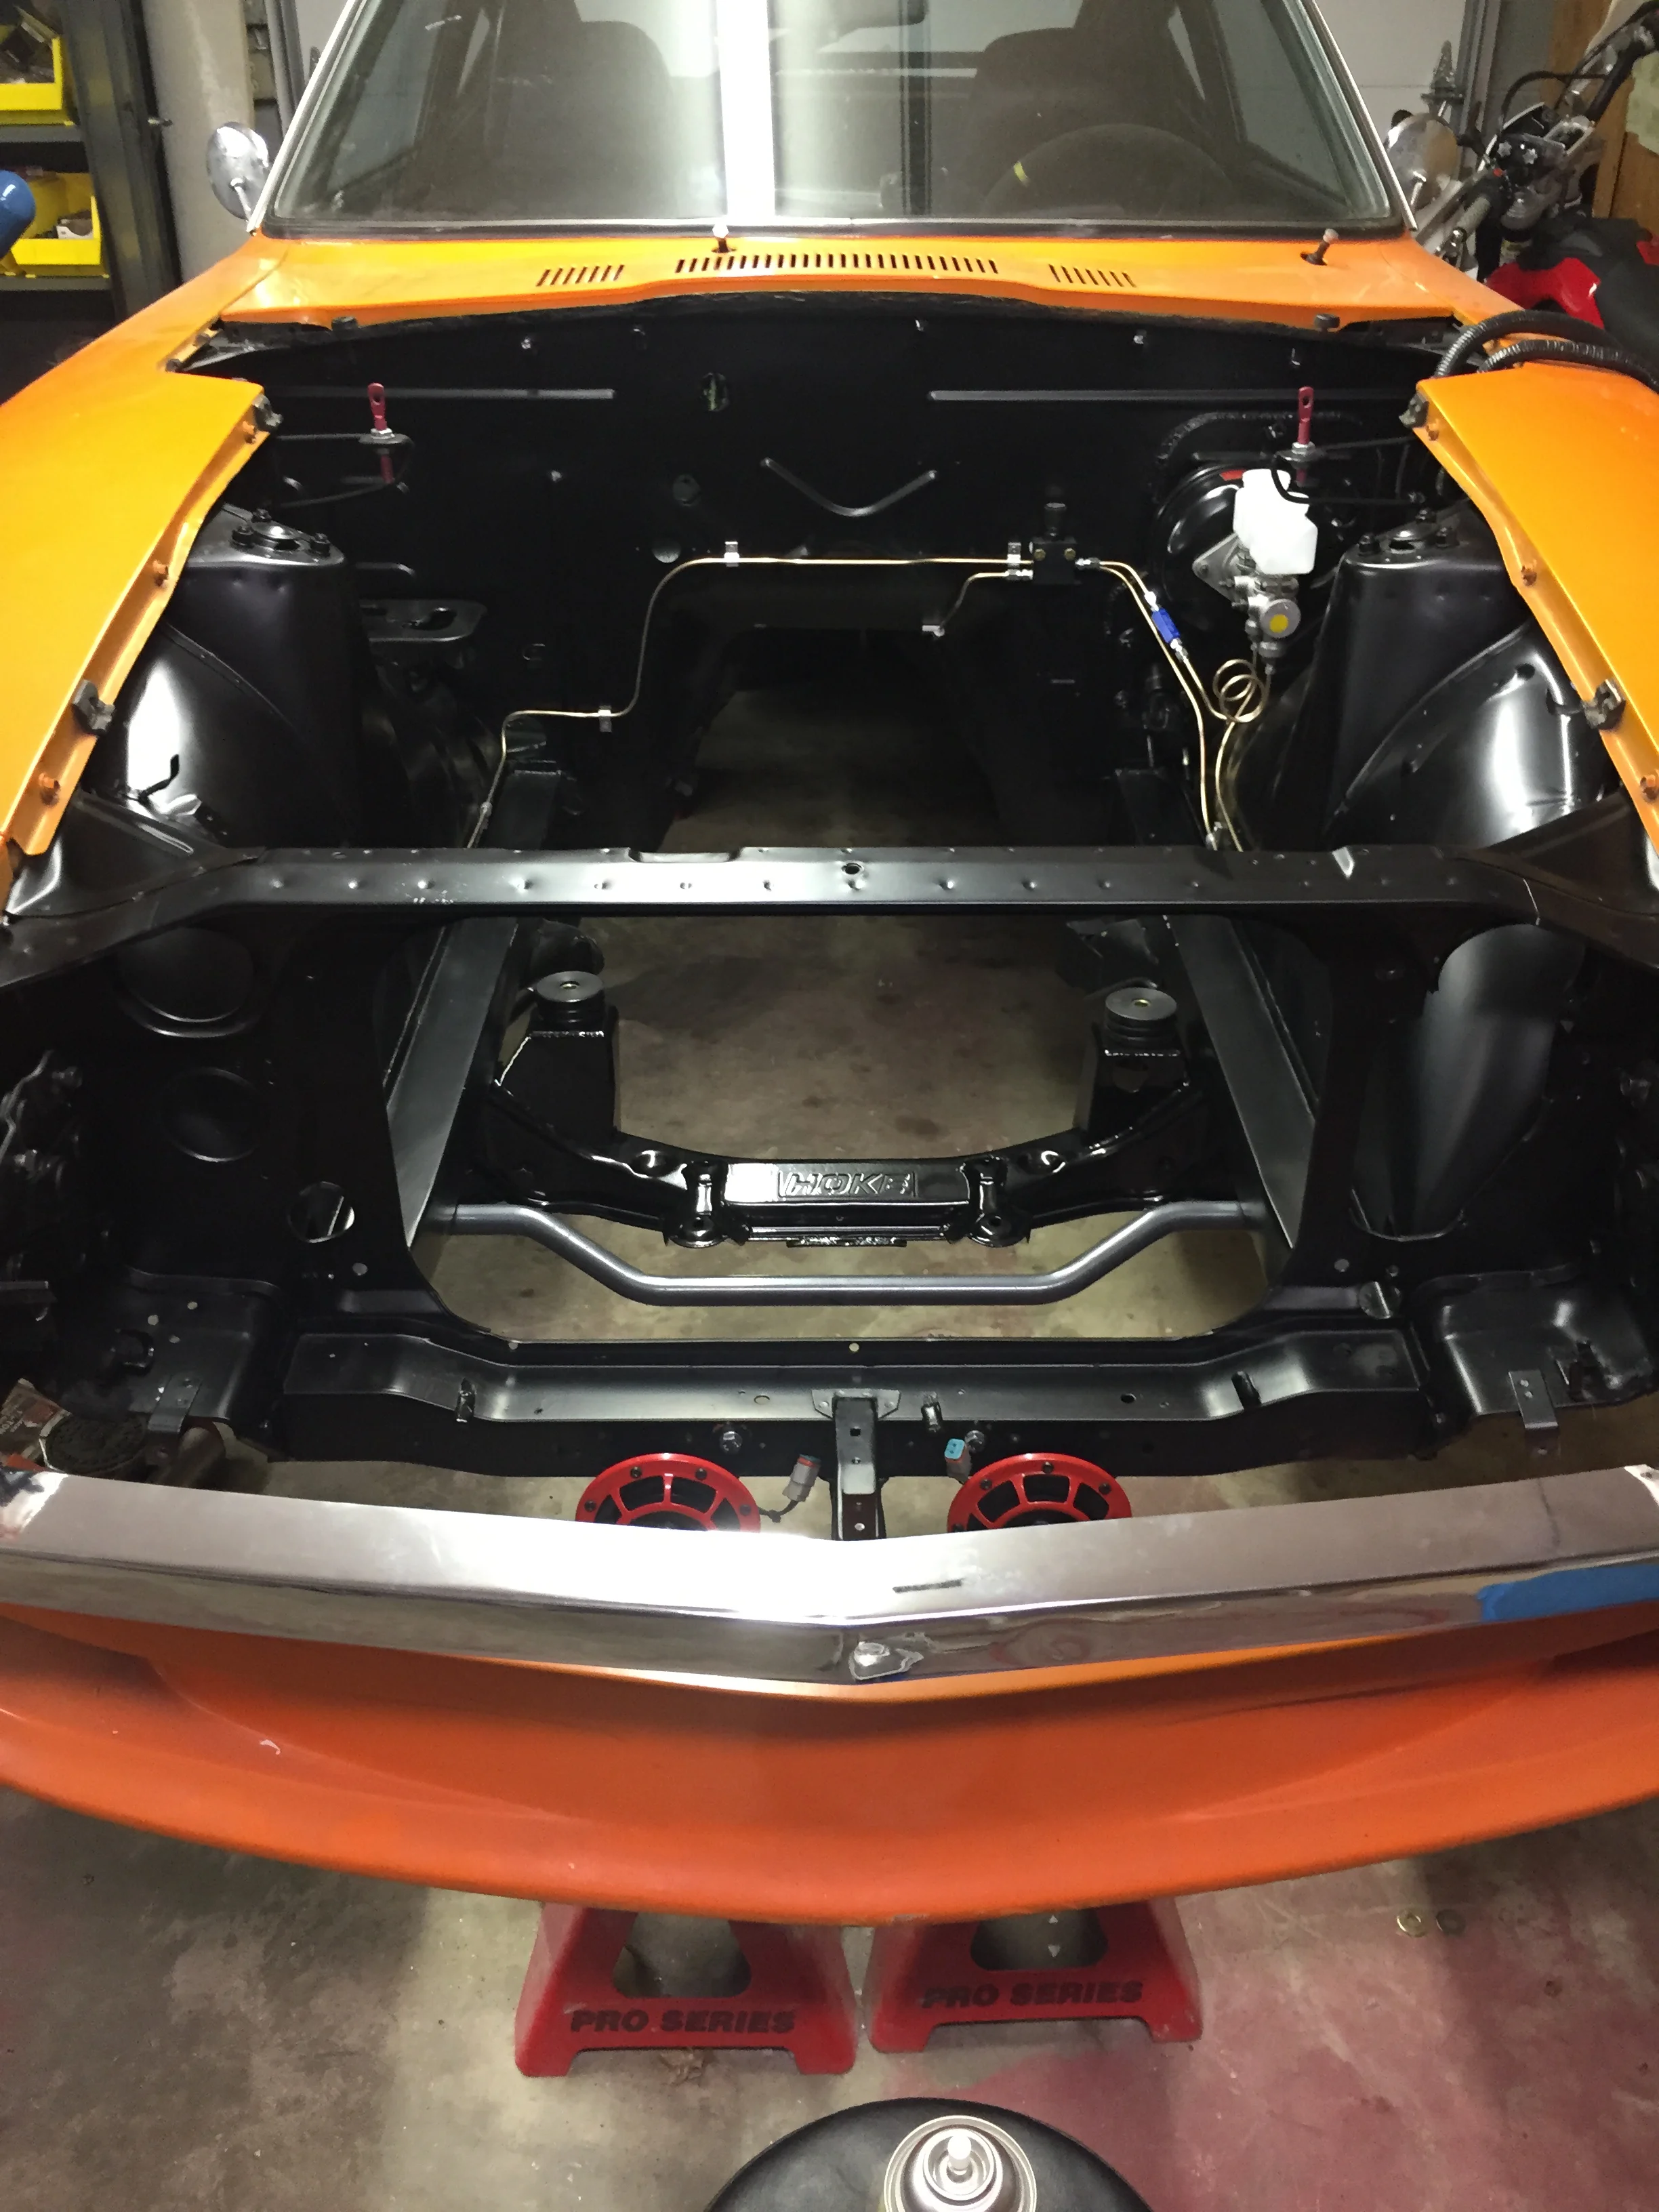
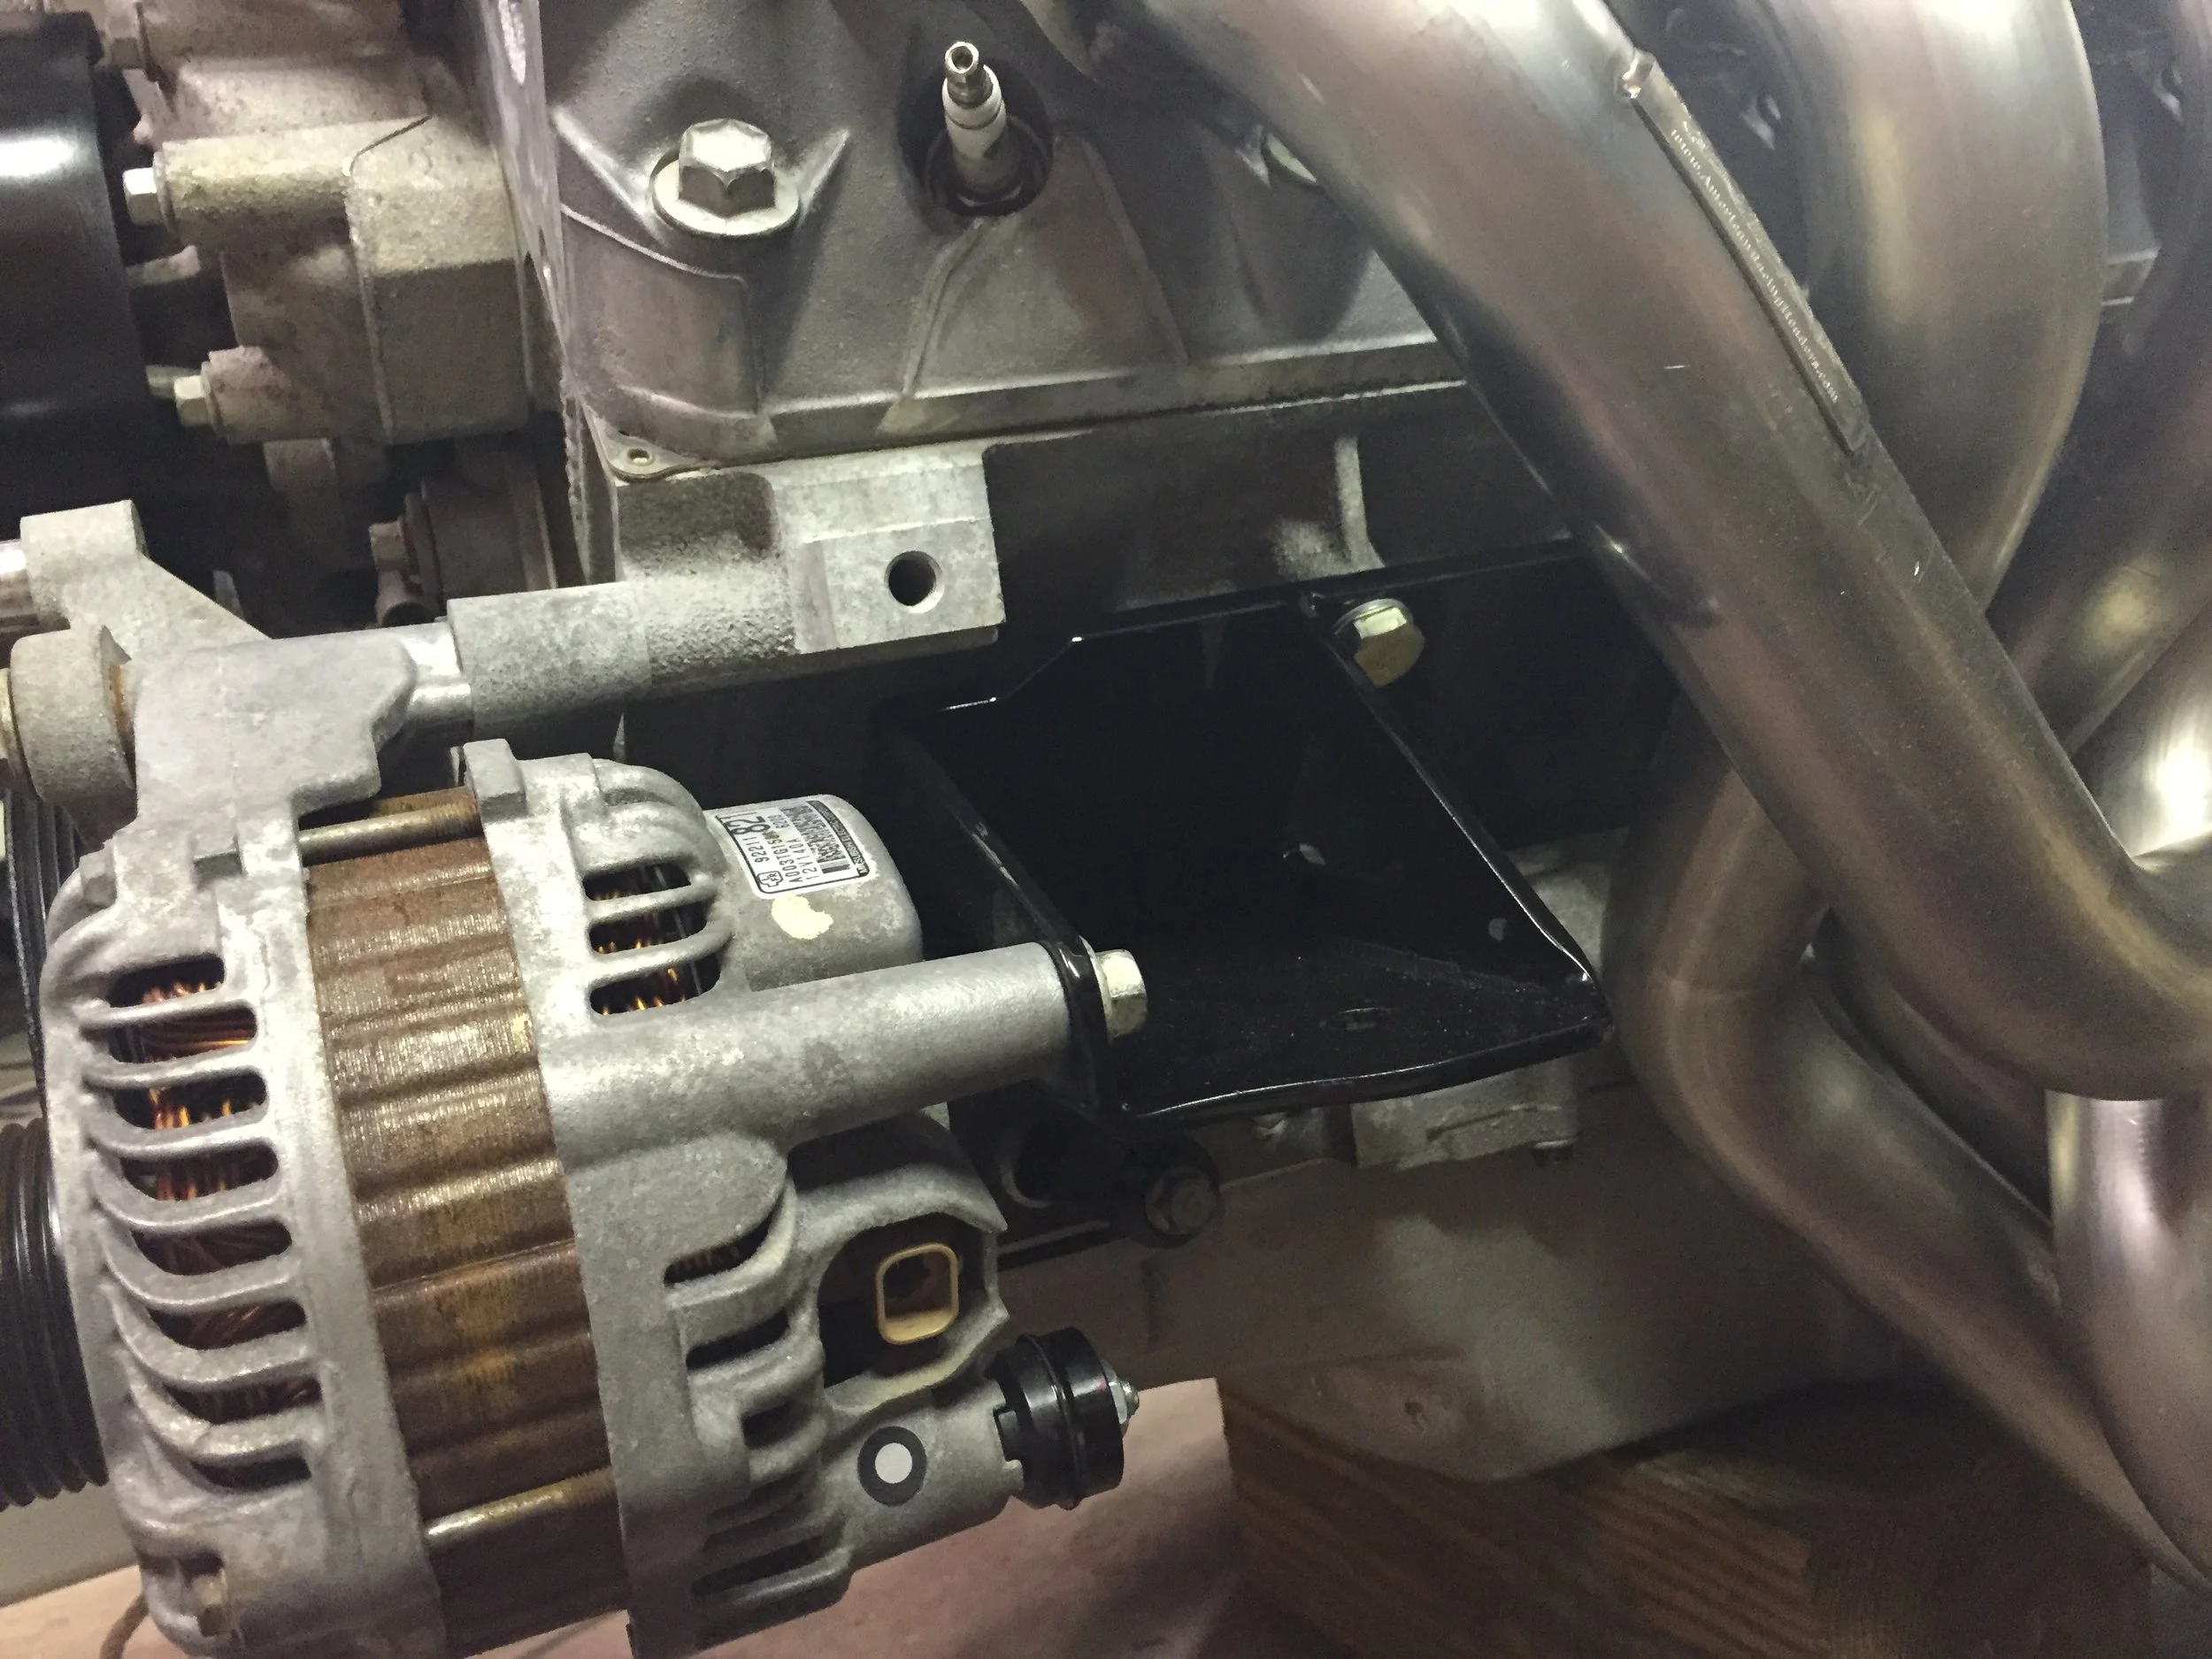
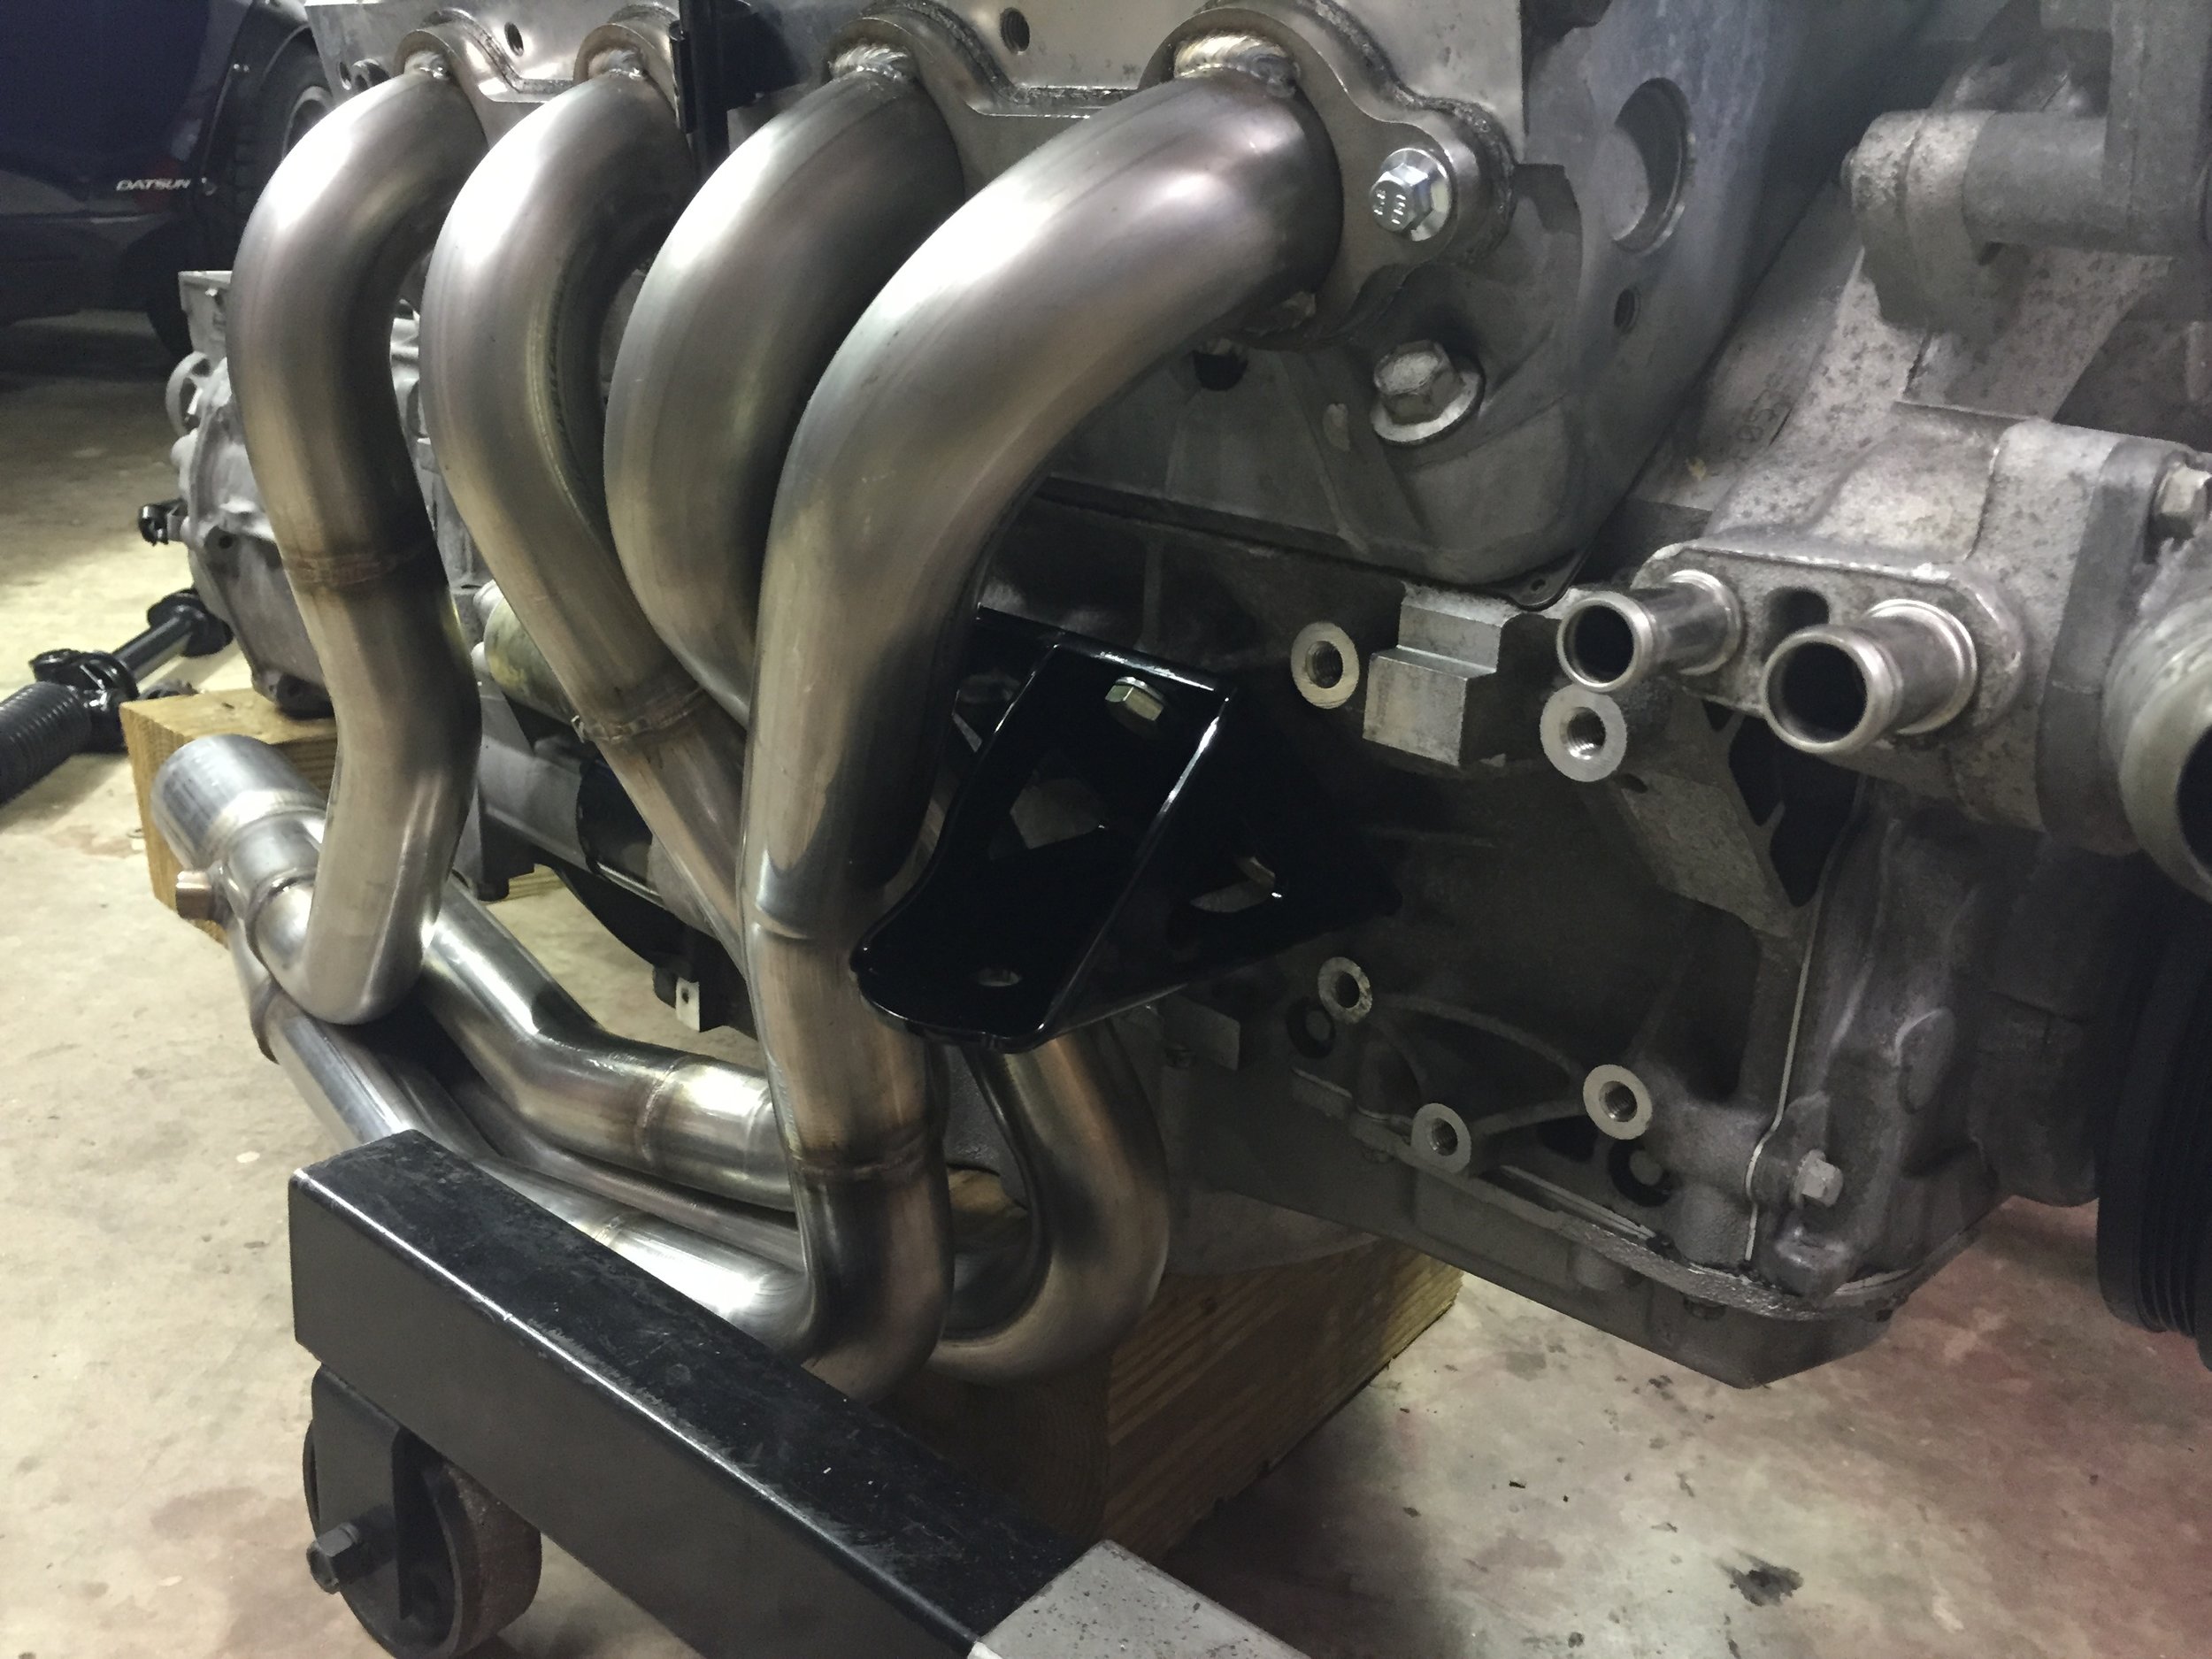
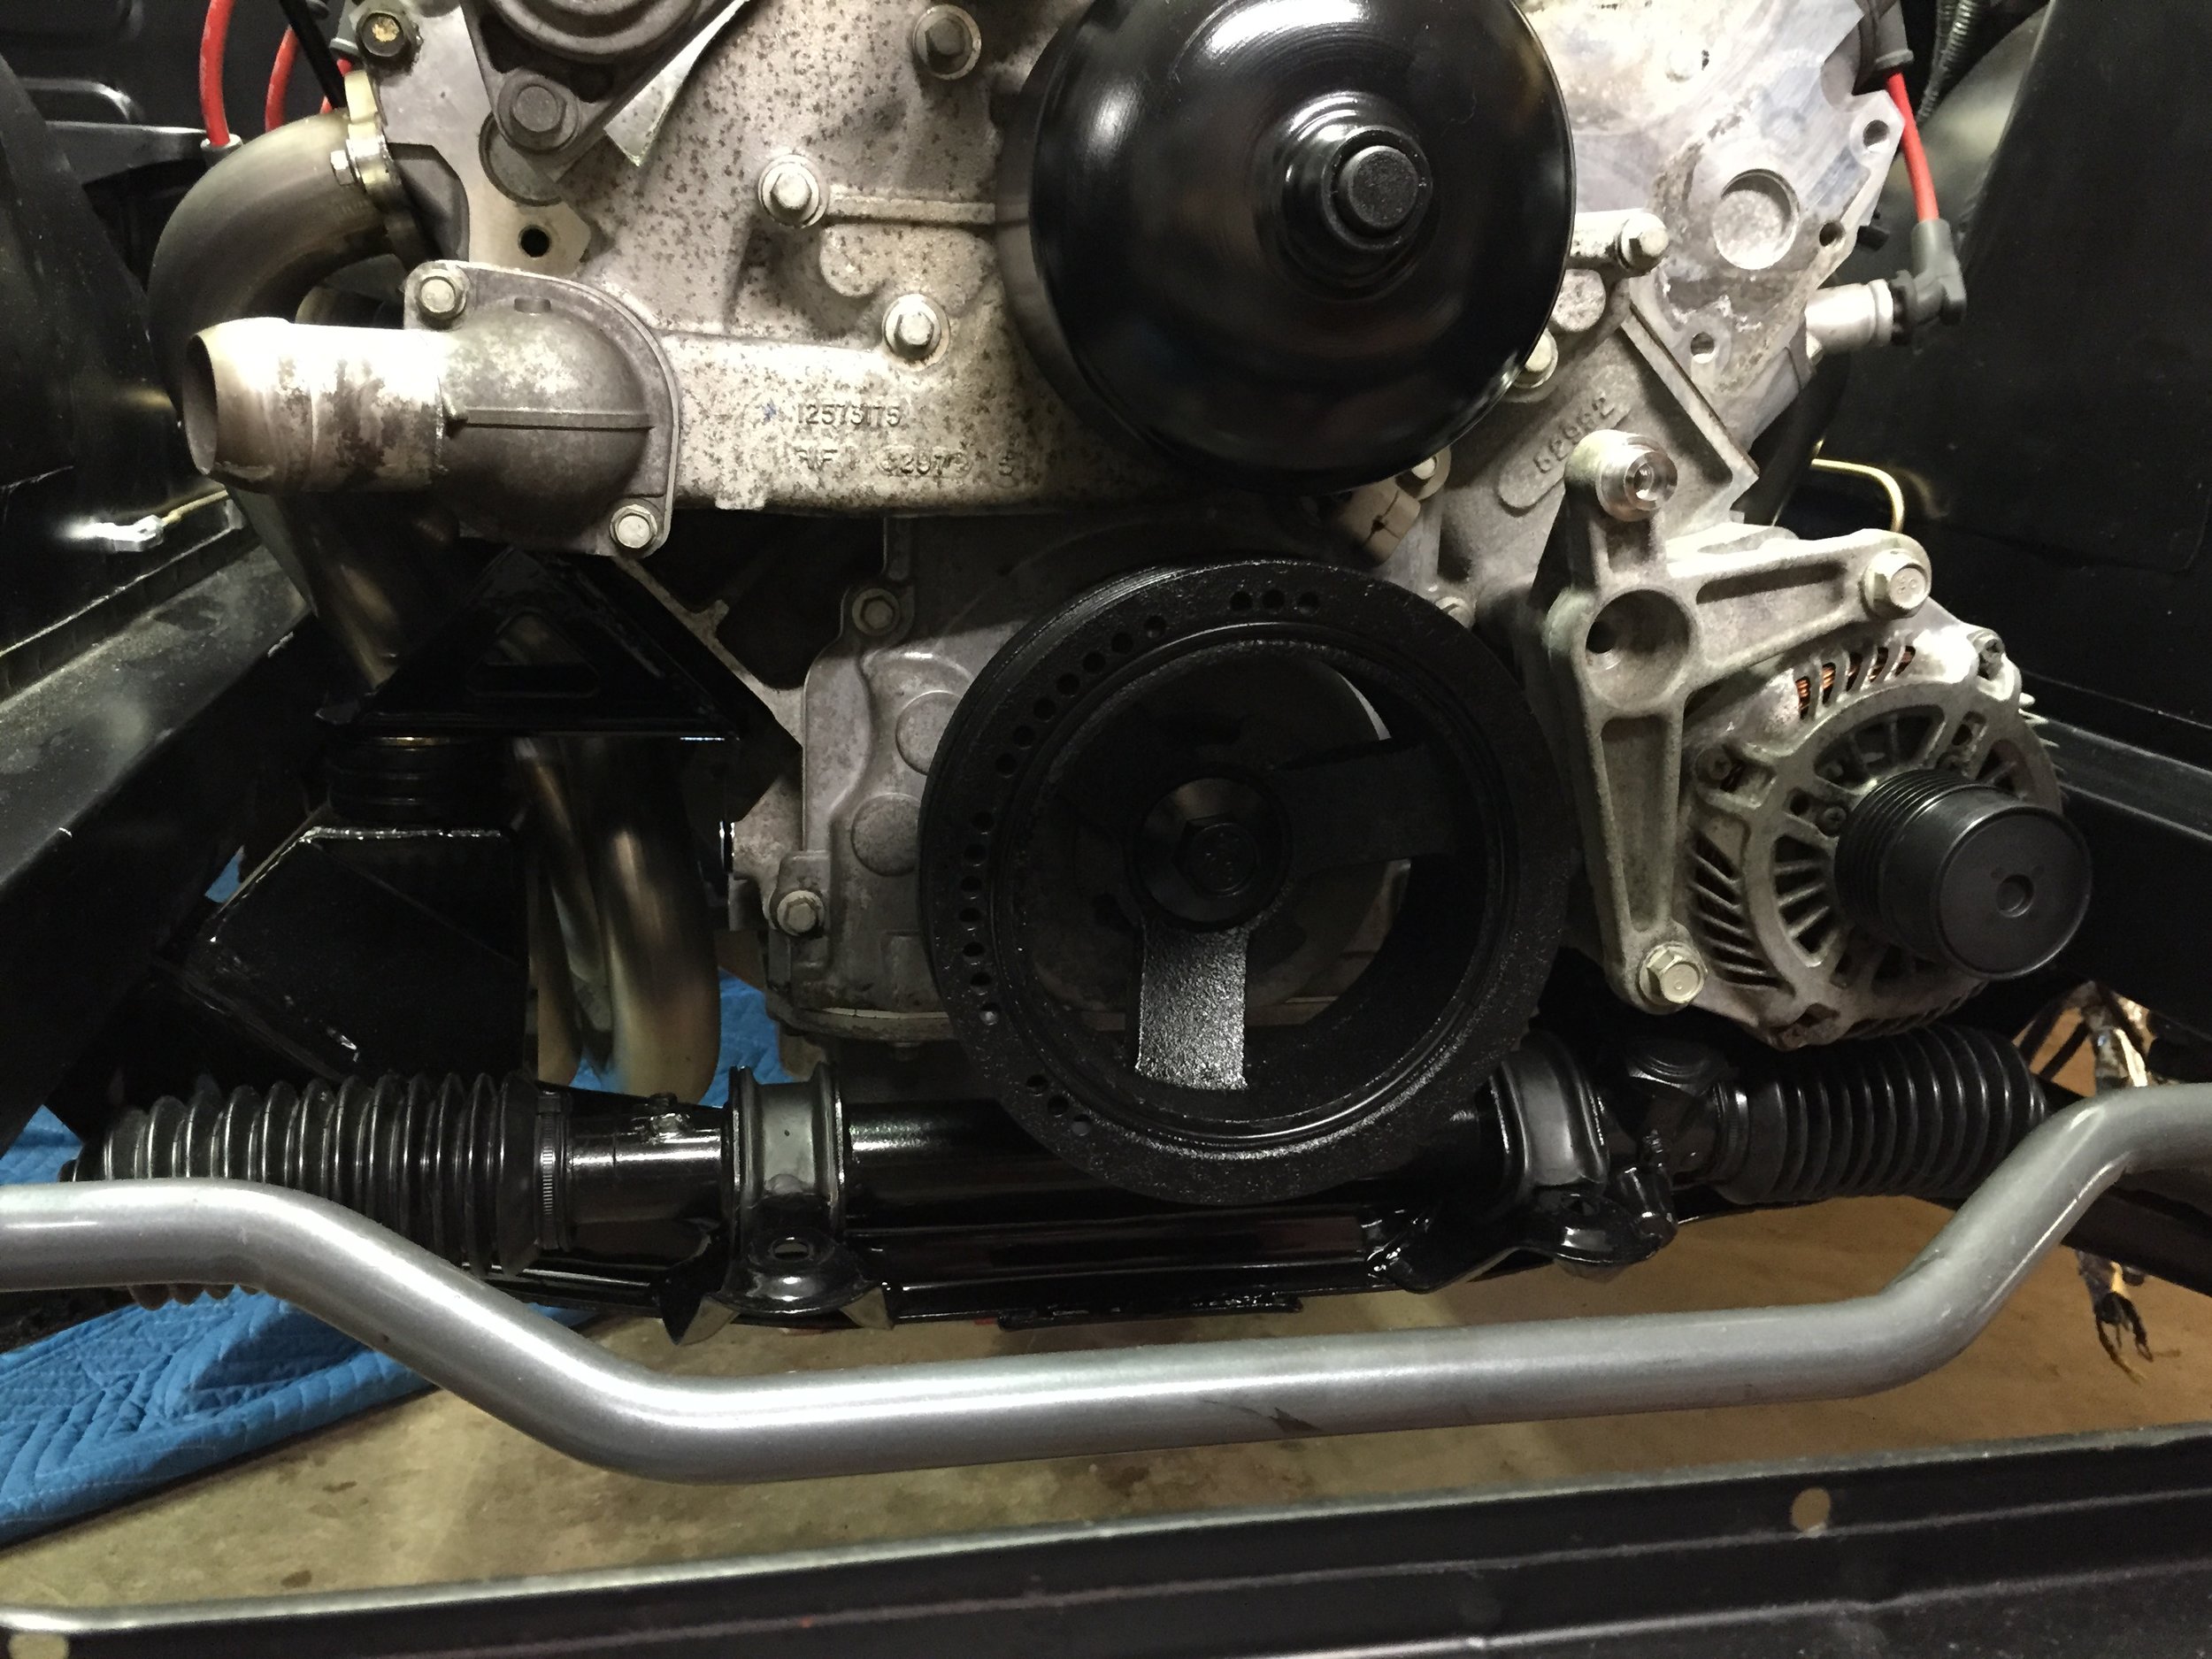
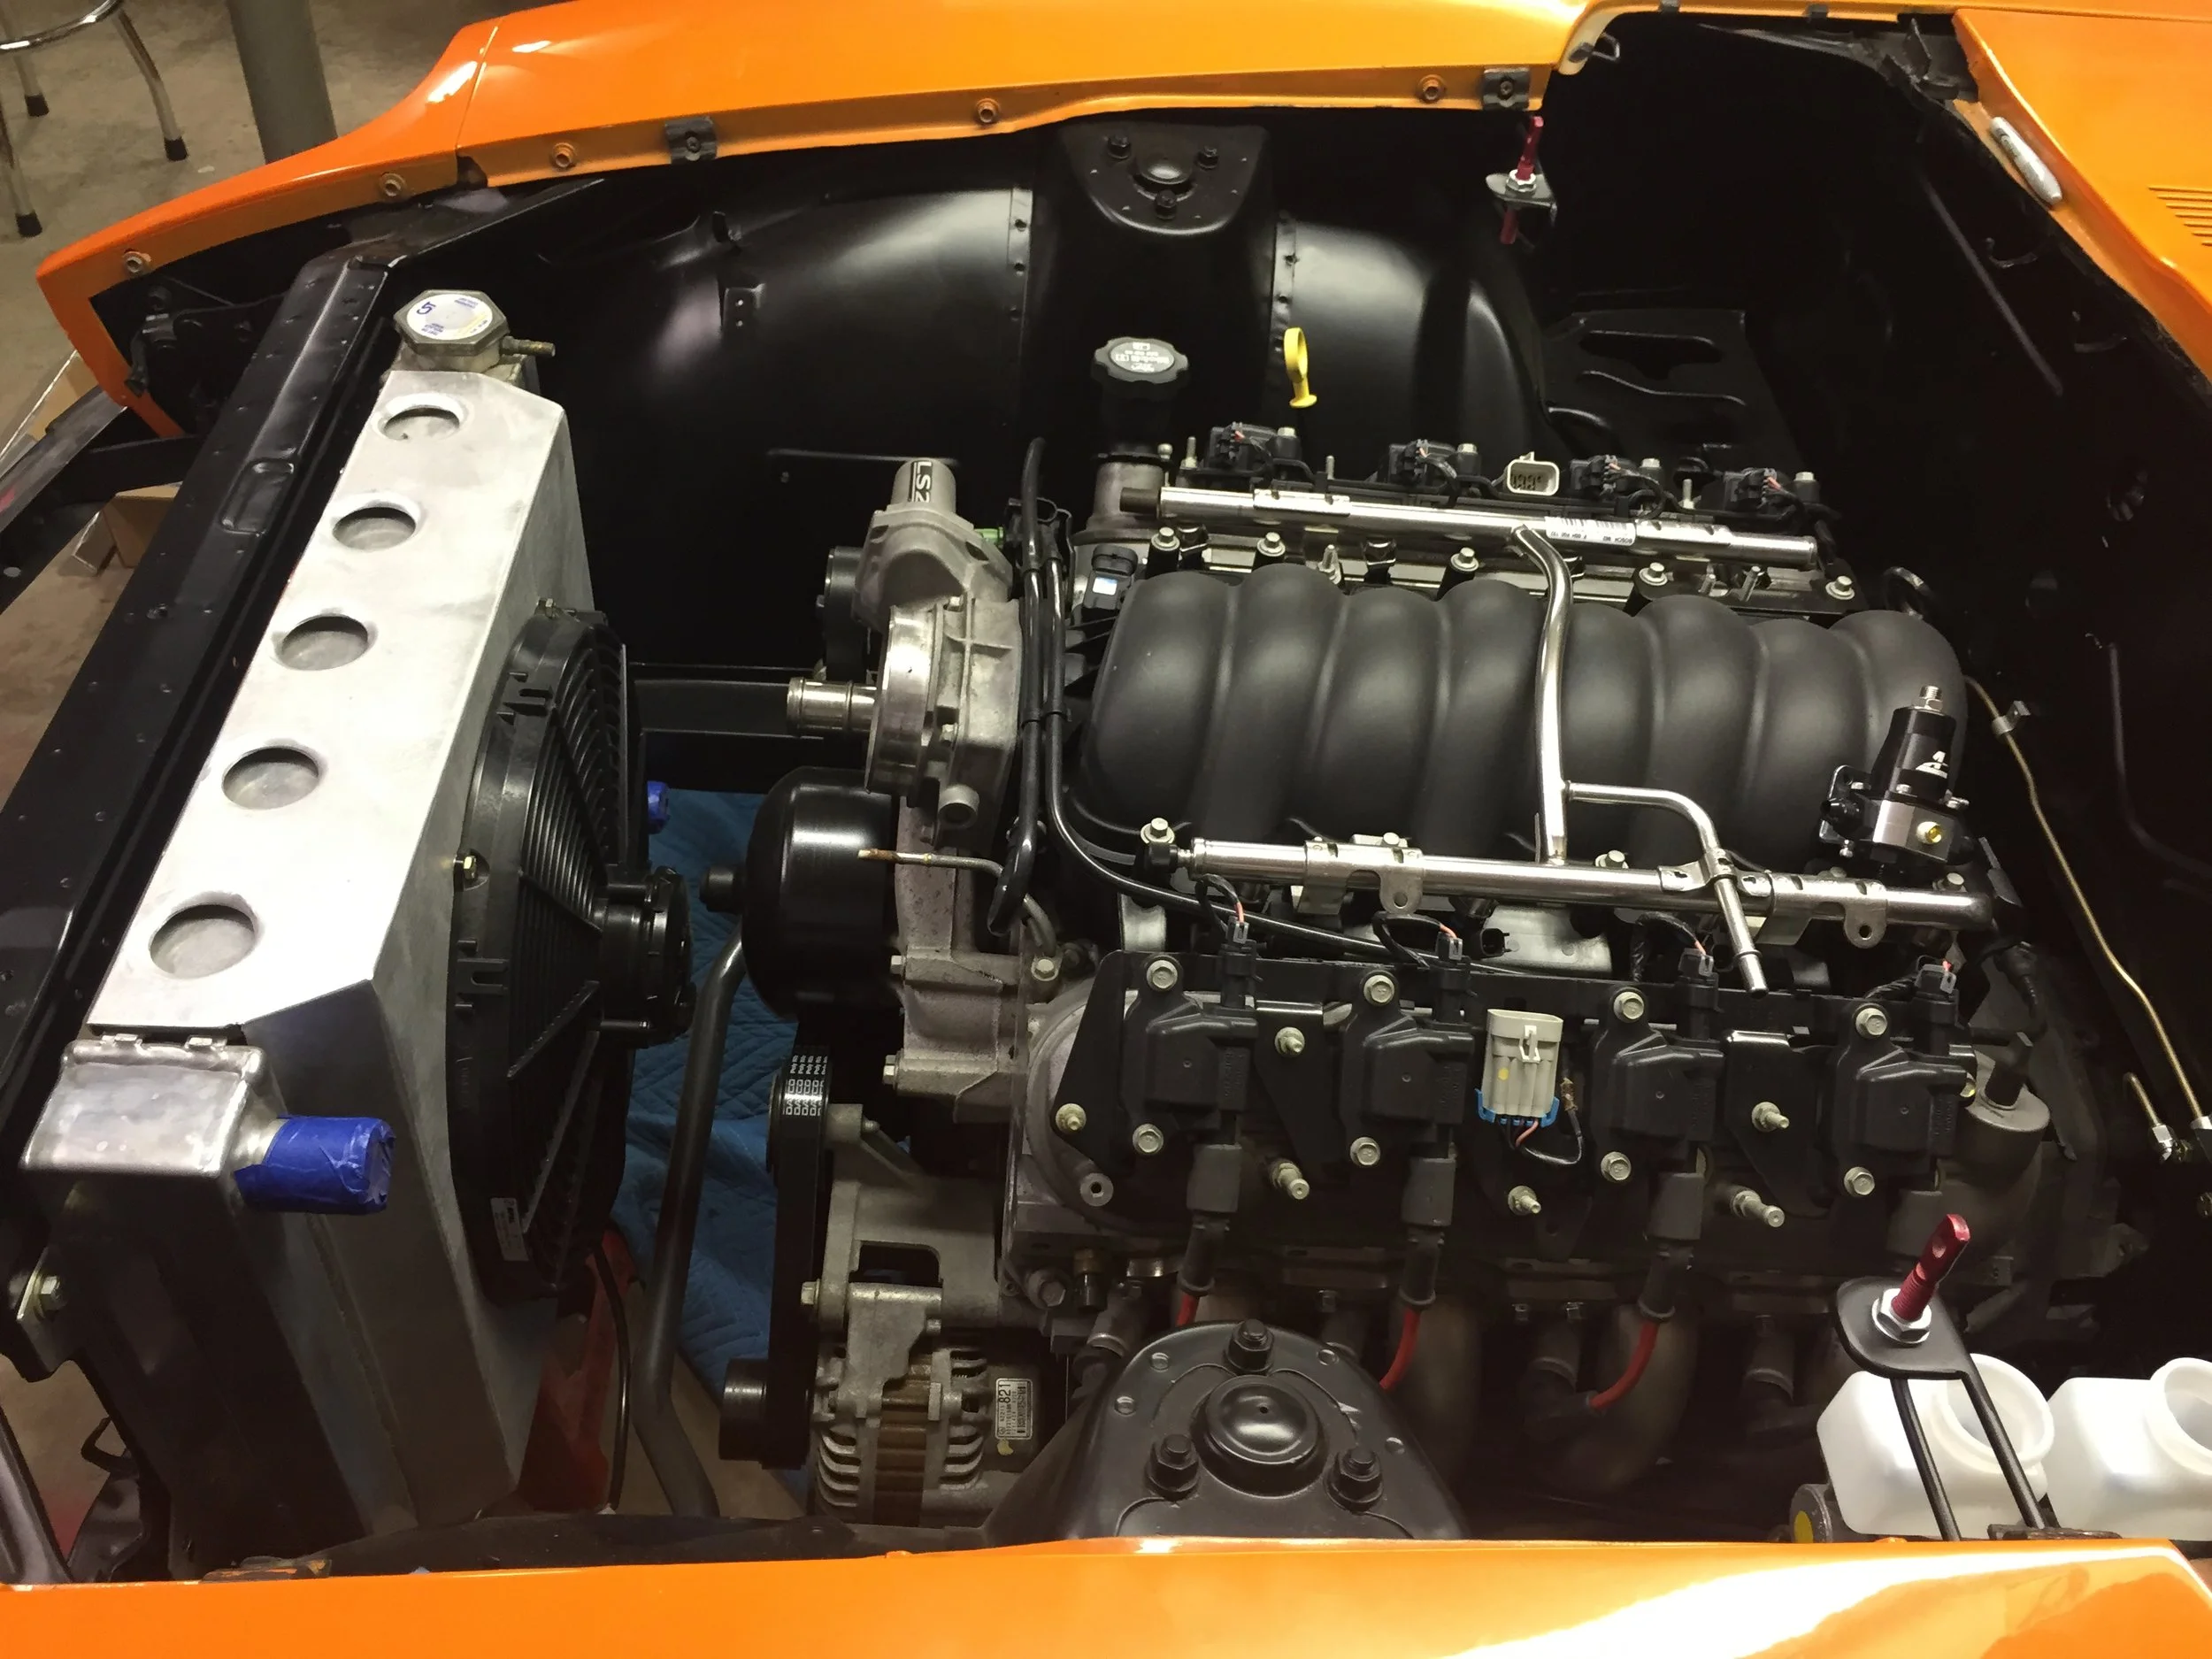
Matt car recieved the first prototype which has a few variations from the production kits. Designing the mounts was a time intensive process, working through several iterations, and many test fits. When it came time to install the engine for good it was beautiful to have it drop in like a glove, installation is just as installing the L28, bolts in like factory...except for those huge long tube headers, you have to hold your toungue just right for that!
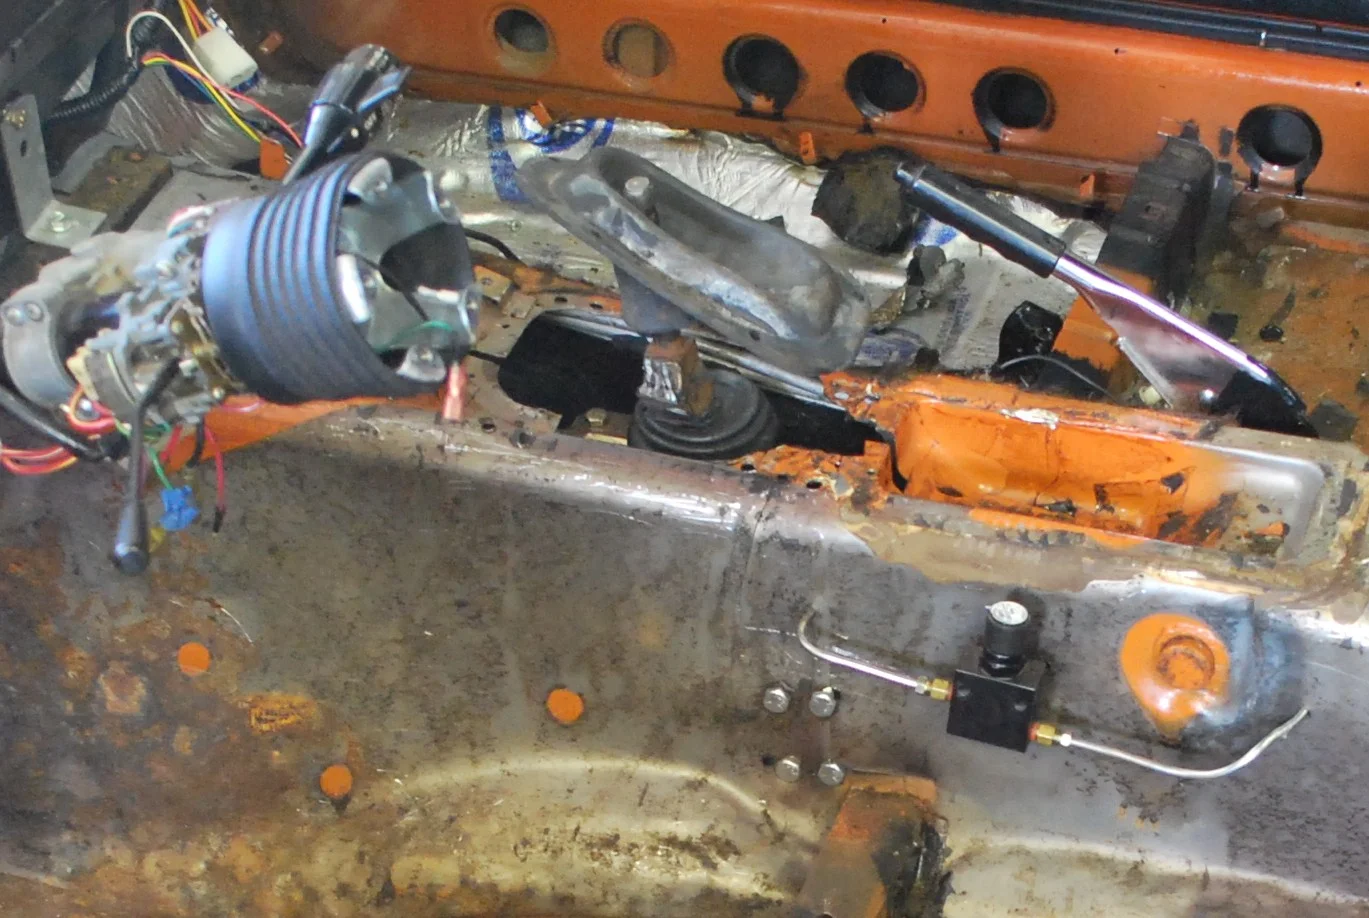
I found the best method was to hold the engine a few inches above the crossmember then install the headers one at a time from the bottom, shifting the engine to the side to get the flange through and in place. After the headers are installing the steering colomn and rack can be slid into place and lossly tightened. Next lower the engine down and tighten the mounts, adjust the stering column for maximum clearance and snug it up...
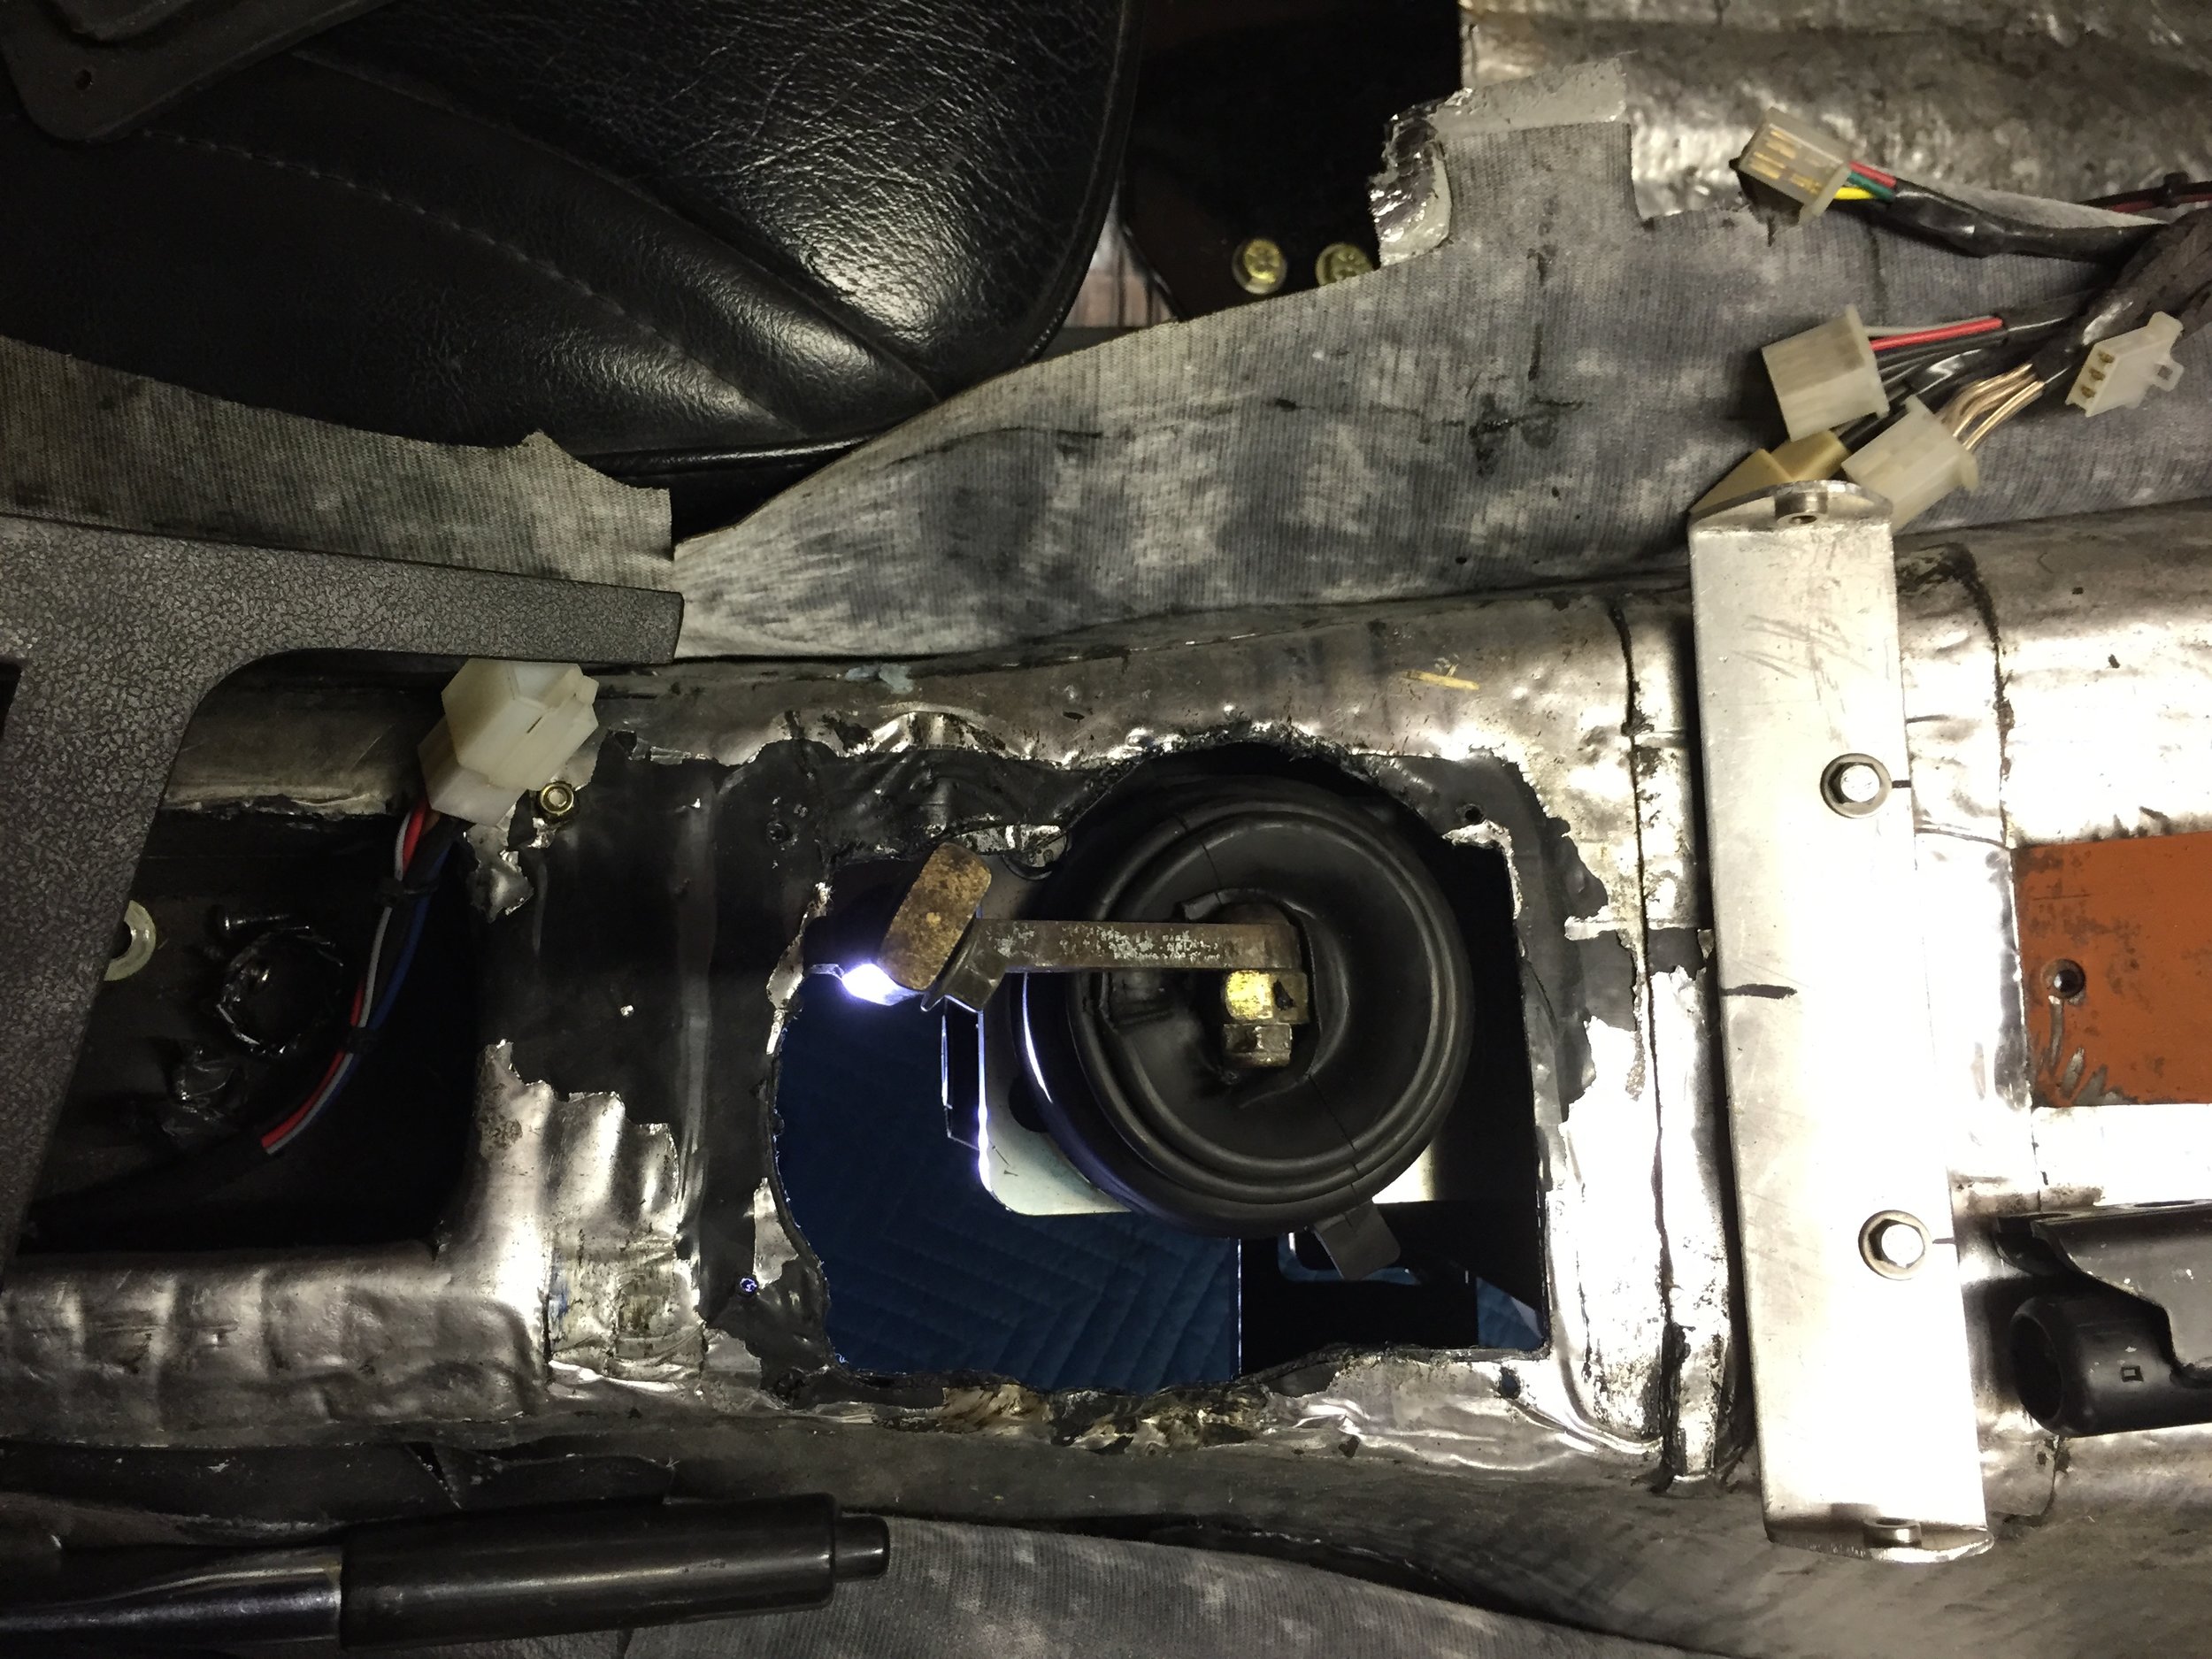
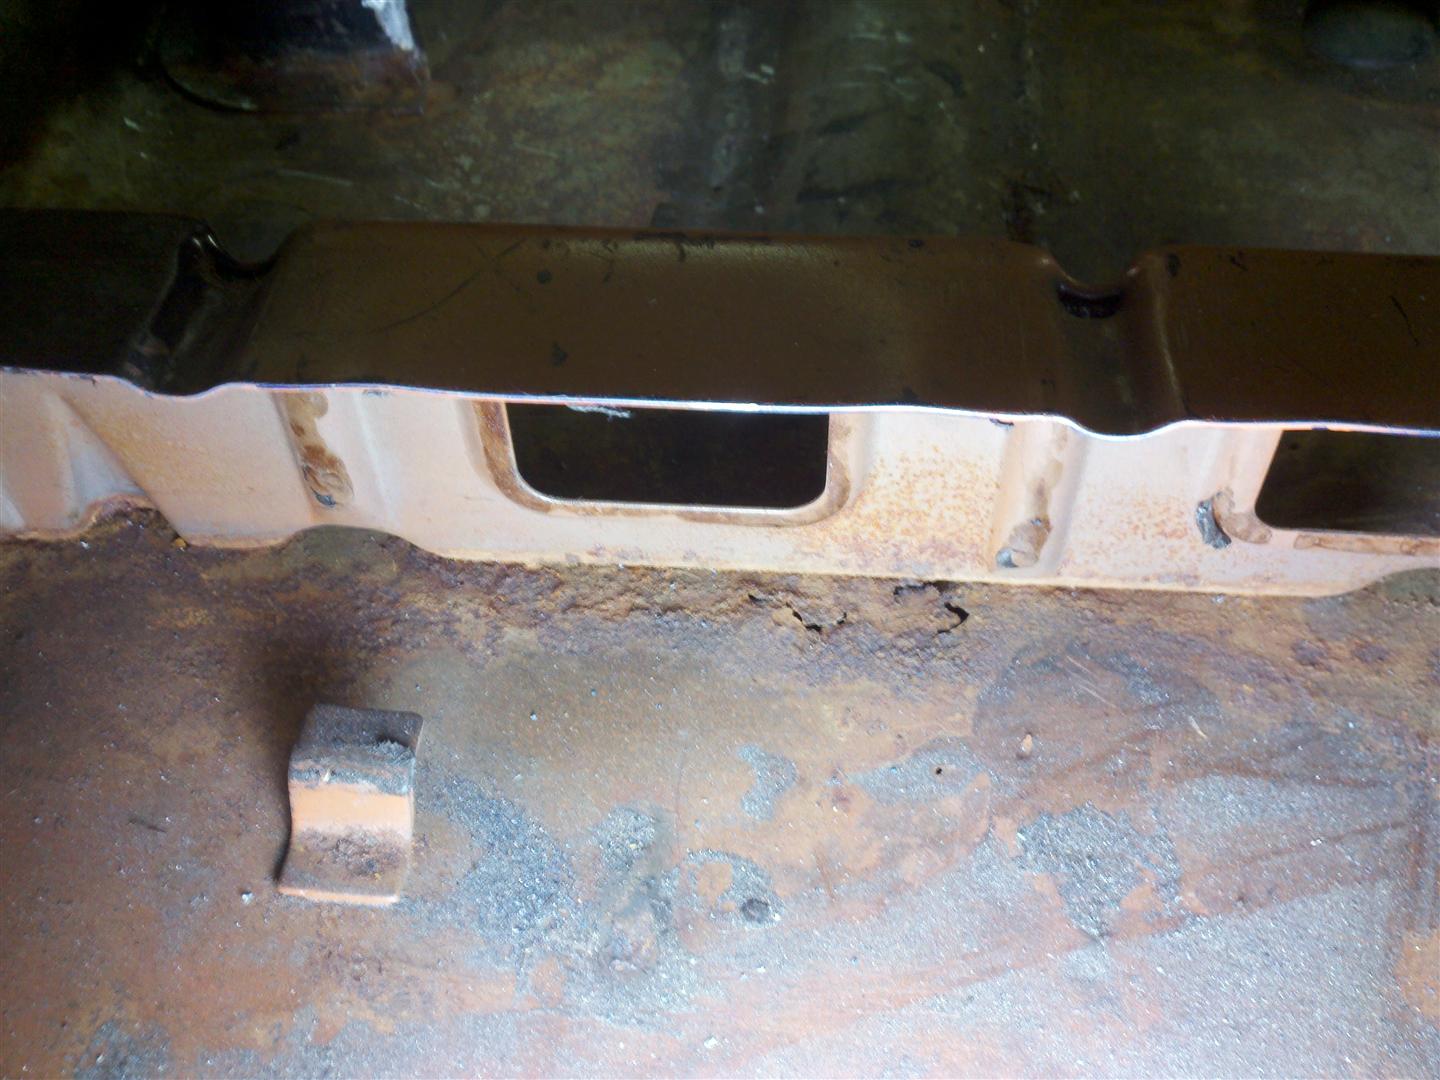
The factory transmission mounts needed to be removed and the new transmission crossmeber bolts directly to the floor. Once in place and held with a floor jack holes can be drilled through the mount. This is then tied into the chassis with a reinforcement plate inside and a backup plate on the outboard side of the rail. Drilling these holes is the only modification required for the installation. The 280z version mounts through the frame ralis instead of the floor board.
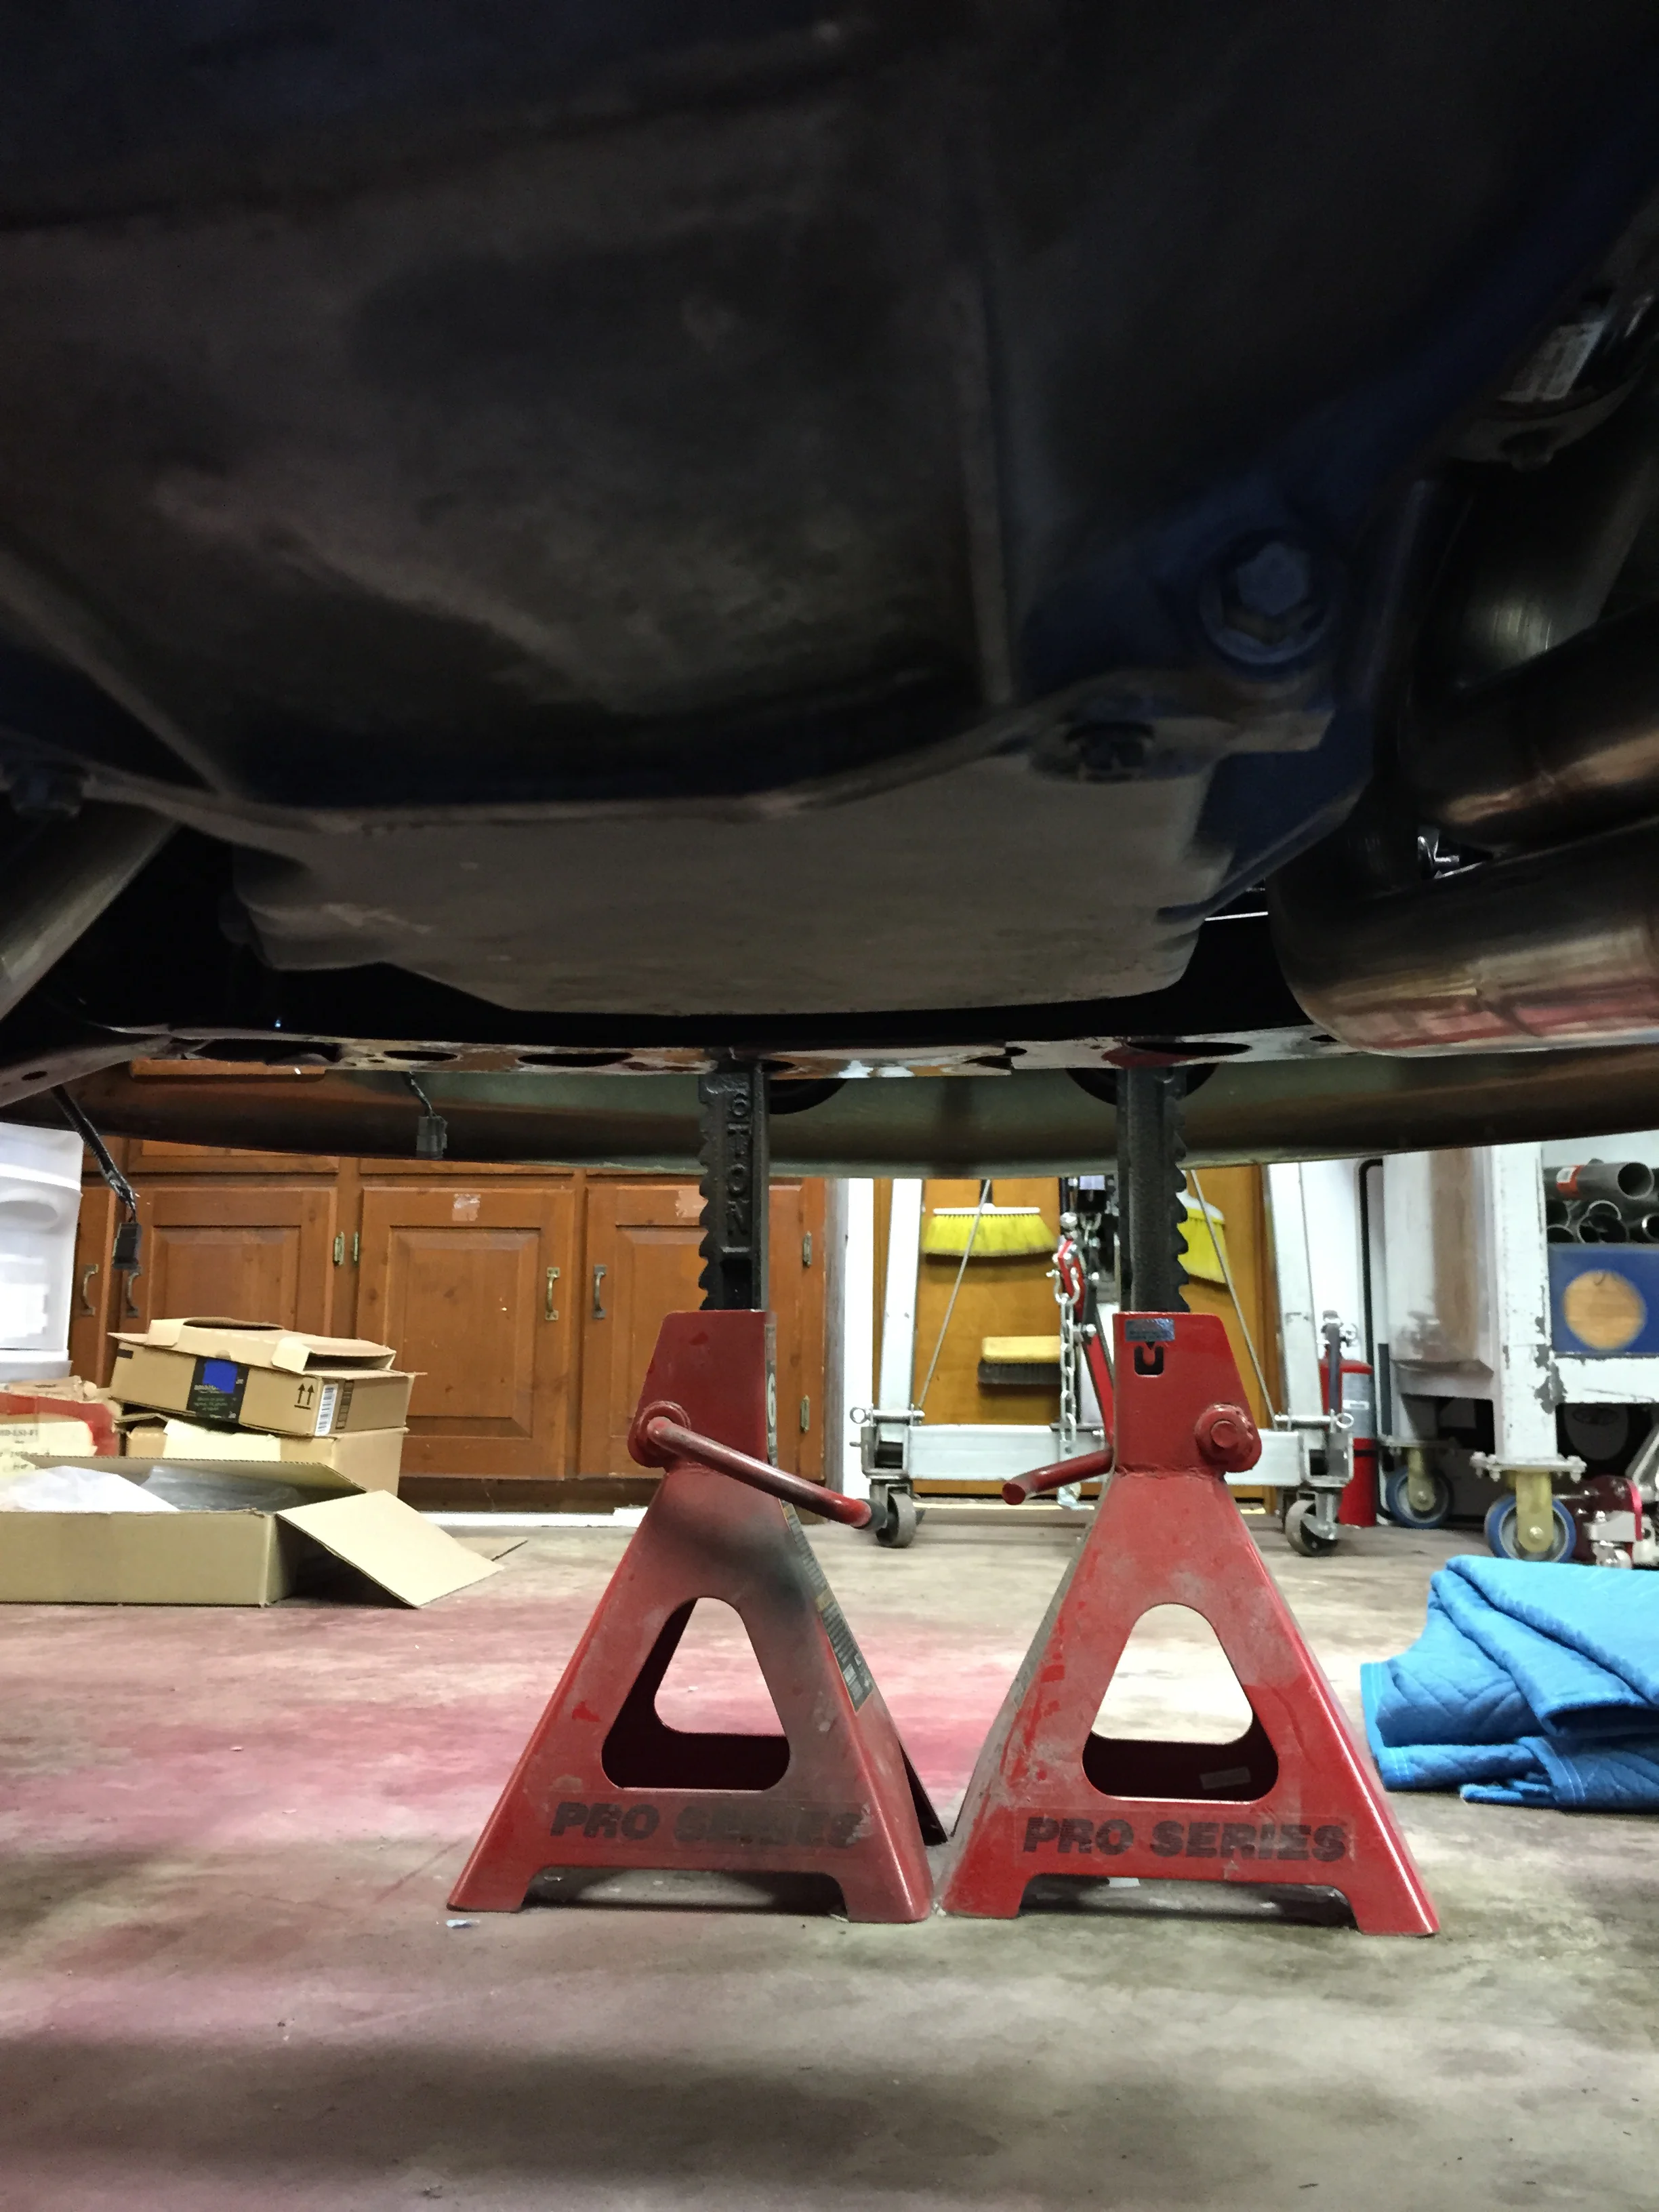
Brake Line Installation
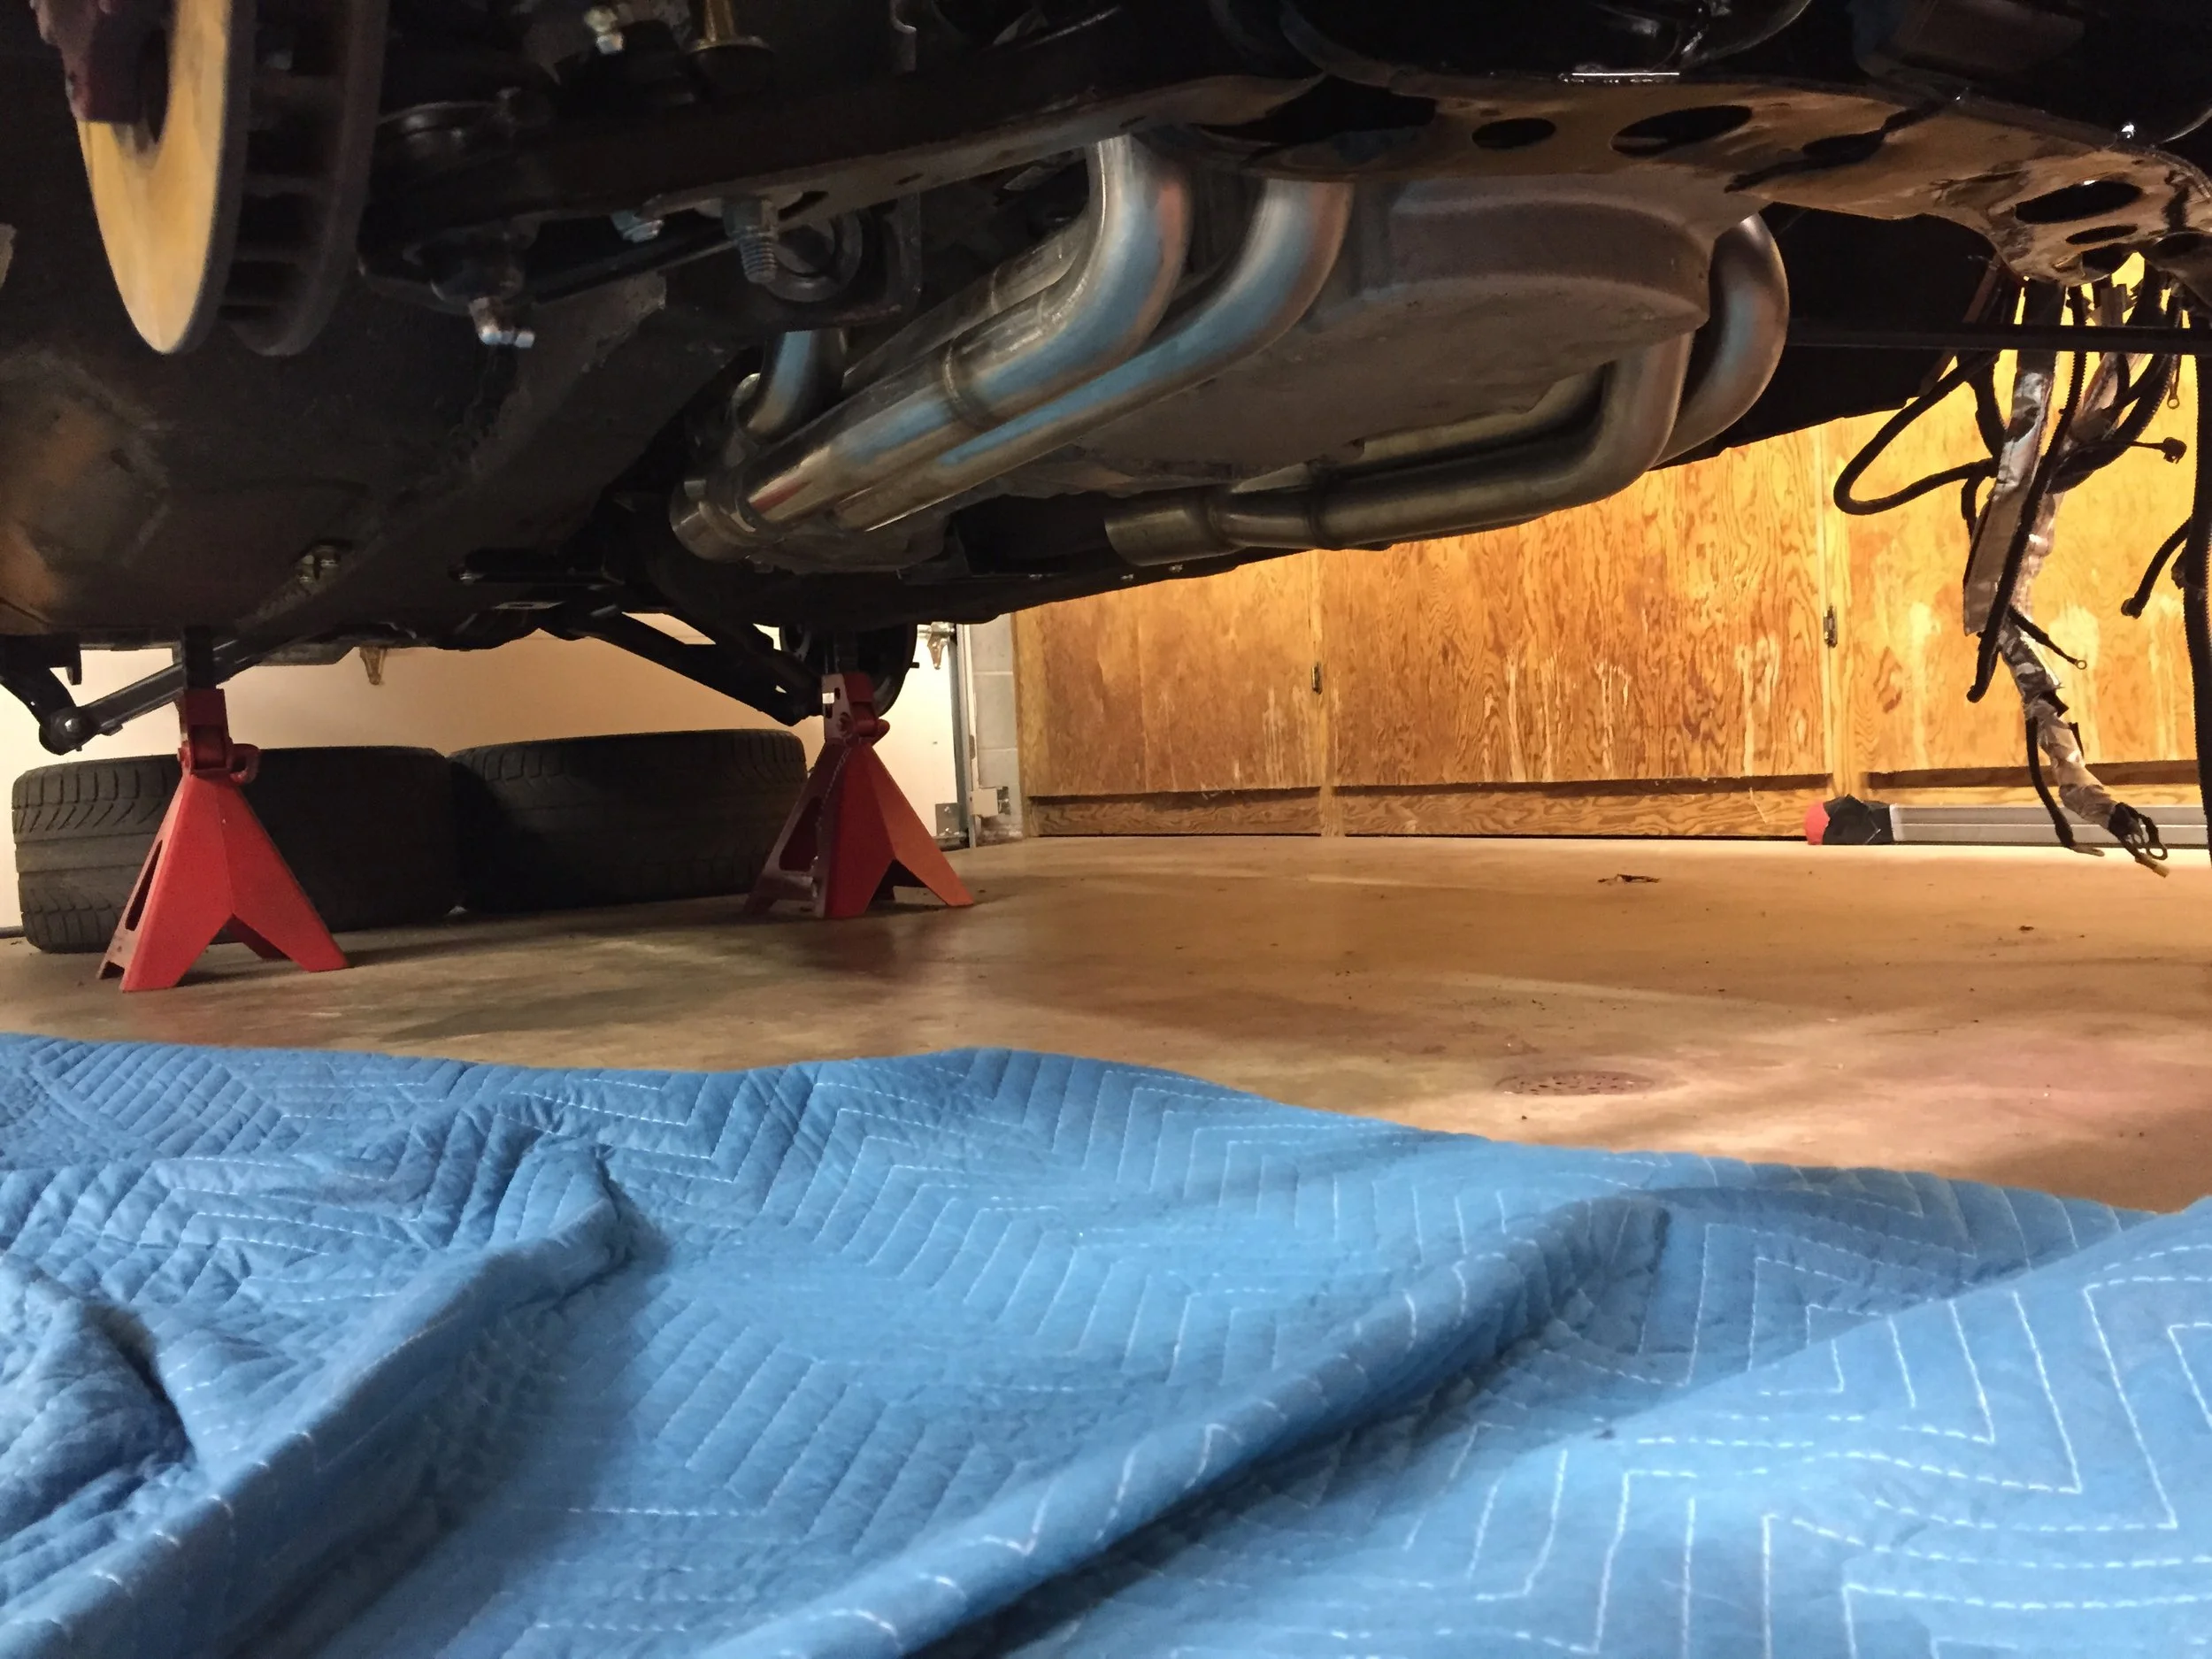
Brakes lines are similar to electrical systems in that many folks do a very poor job of repairs or replacement. Taking your time on the installation and aquiring proper tools really pays off as it is not only important for safety but can produce a really clean result. Matt's car was a great example of this with very poorly installed stainless steel lines which were not routed well and had improper flares which actually damaged mating surfaces on the MC and other parts. SS is much harder to work then standard lines, without the proper tools the job is that much harder.
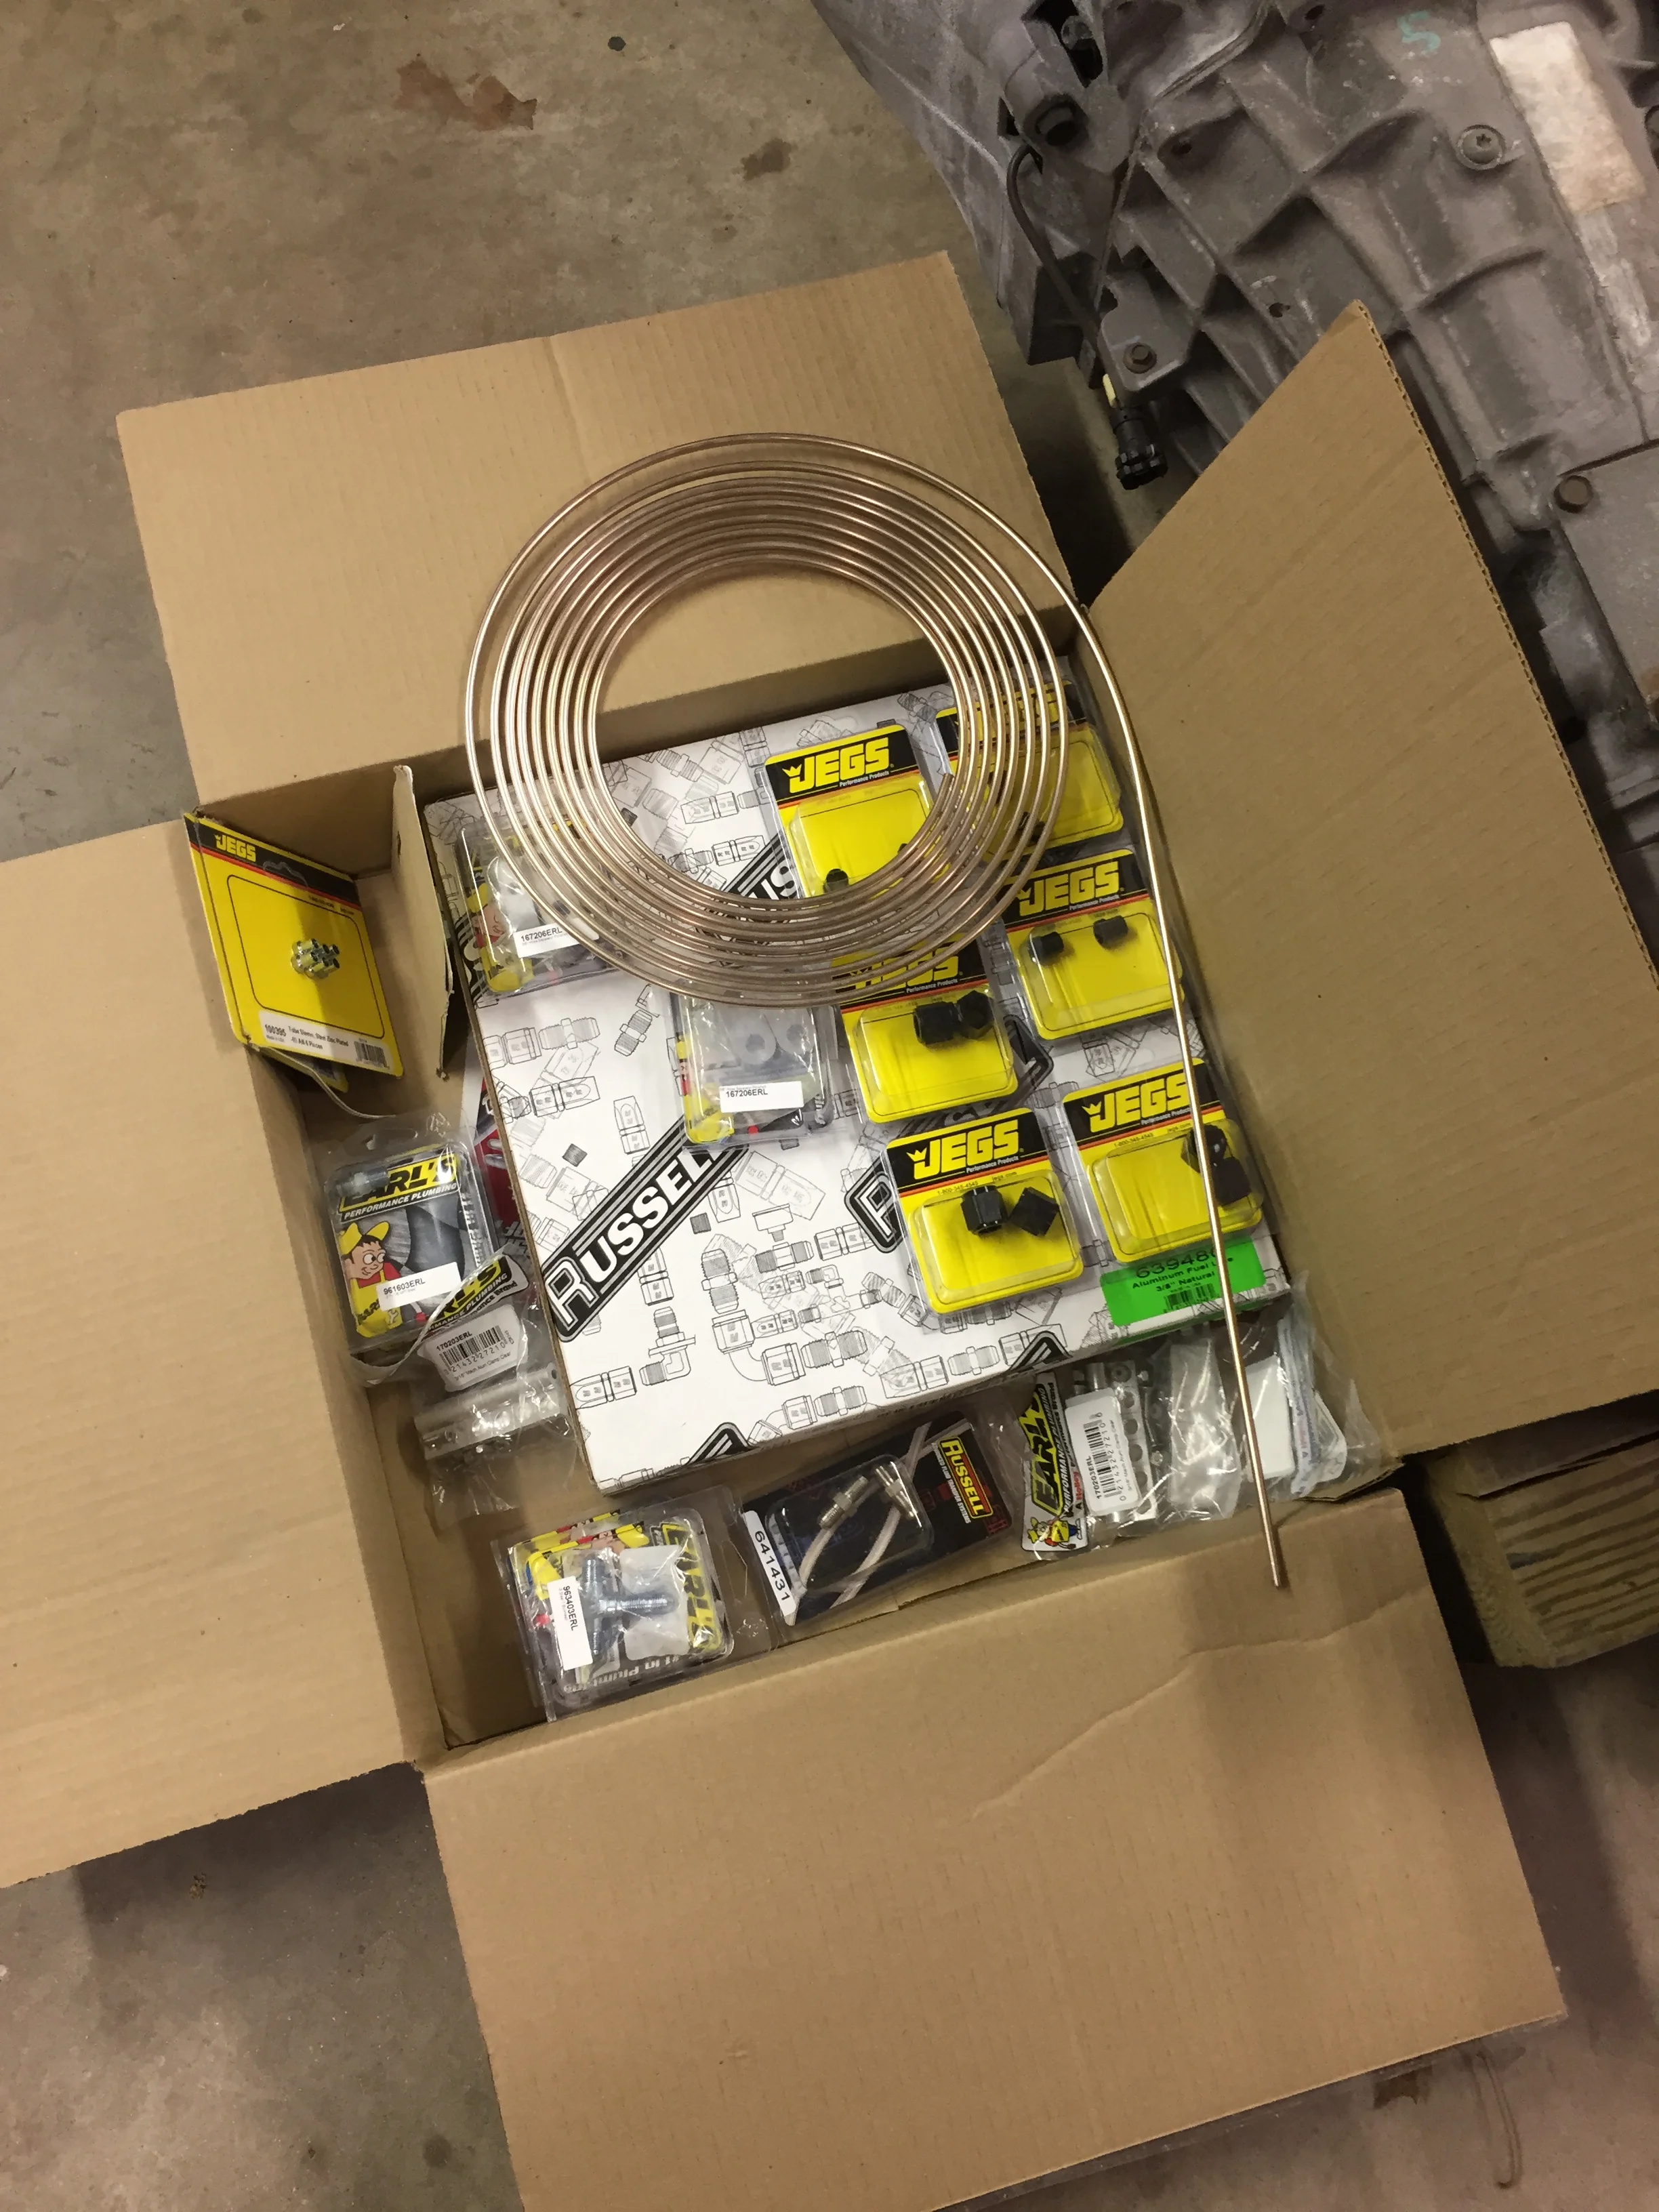
With everything stripped out of the engine bay for cleanup it was a geat time to tackle all new brake lines. NiCopp lines with AN (37Deg) fittings were used throughout the car. Nicopp line will not corrode over time and is very easy to form. AN fittings gave us alot of options for routing, like 90's, bulkheads, and a splitters. The only place OE 45deg fittings were installed was the master cylinder.
A couple hundred dollars spent on brakes tools is a good investment for any avid hobbist. I highely reccomend the vise mounted flare tools offered by Eastwoord. The base kit along with a set of AN dies allows you to tackle most plumbing jobs up through -6AN. A cheap tubing cutter, tube bender, and tube pliers rounds out everything you will need to get the job done.
I started maing templates for each section using aluminum welding wire and then replicated them with NiCopp. This method works well and with Nicop it is easy to make adjustments by hand as you go. The install was finished up with braided stainless lines to the calipers.
Sorry for the light pictures, I need to document the rear lines and claiper connections next time the car is in the shop!


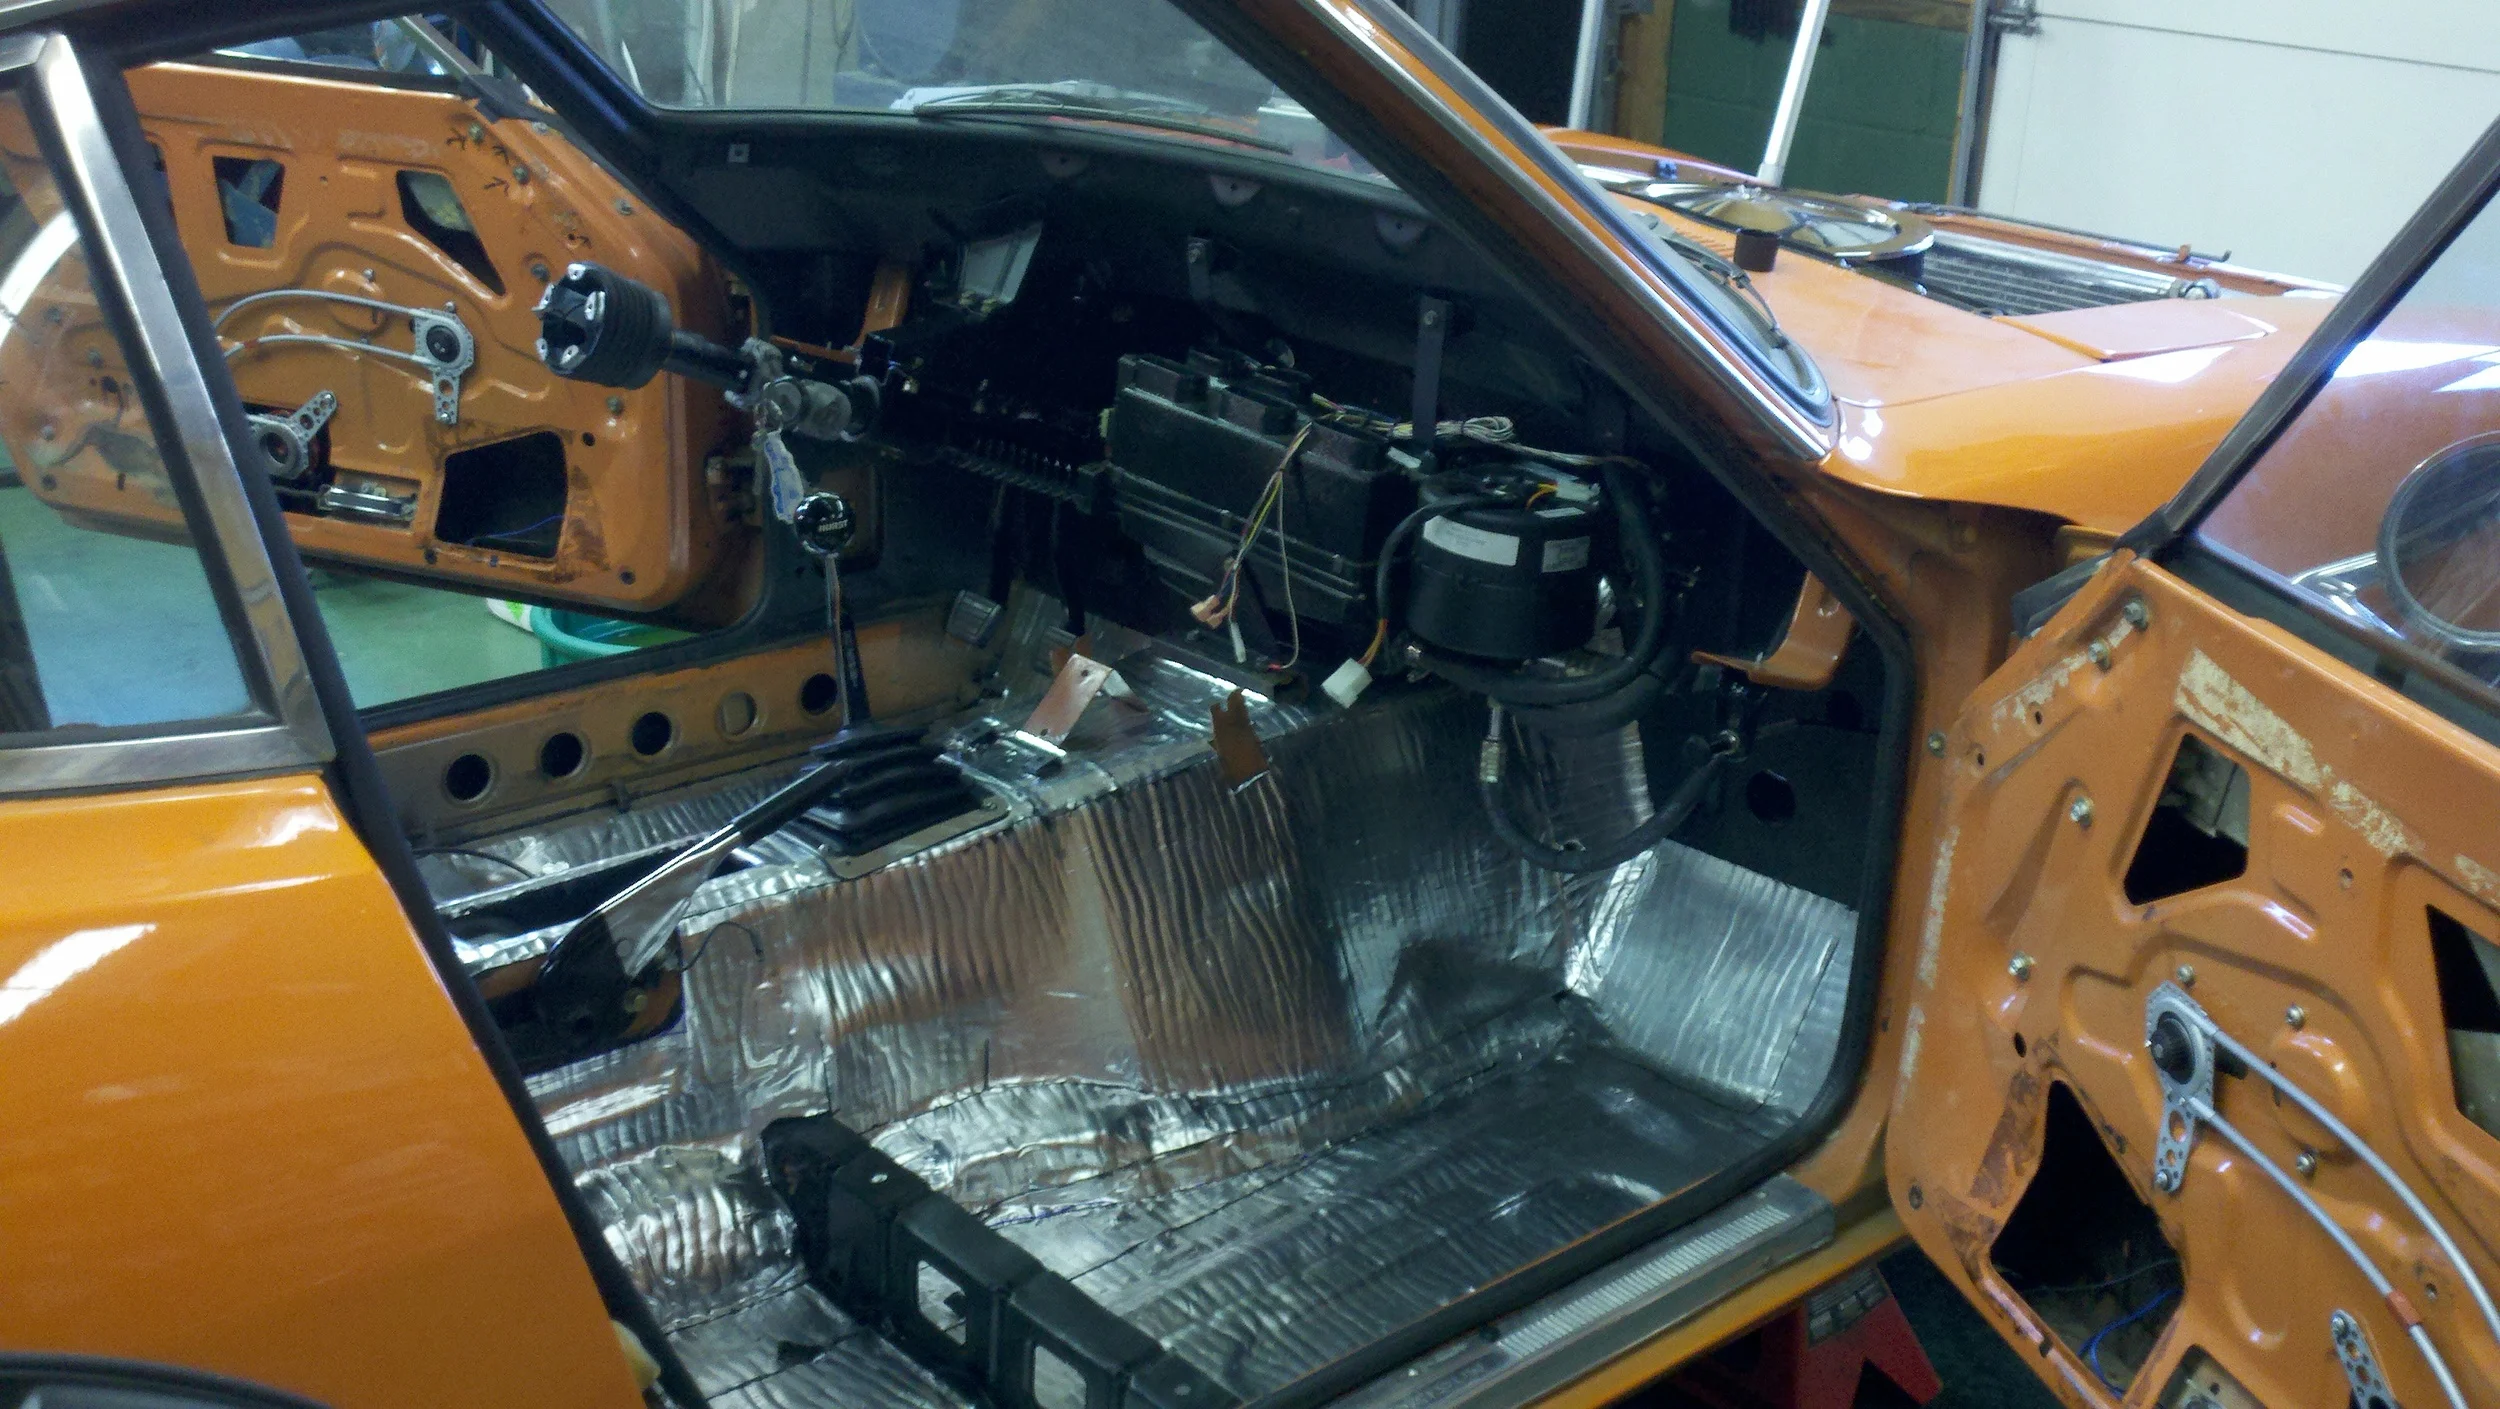
LS2 Install - Engine Bay Cleanup
After a project Hiatus I was excited to get back to work on Matt's car, and I'm sure he was excited too! A year is too long for a beautiful Z like this to sit without making progress, all settled into Asheville I started making sparks and turning wrenches again.
With a beautiful V8 going in the engine bay we wanted the engine bay to look just as good. The car was given a bath to knock the dust off and it was put up on stands to analyze the work needed. Over the years and through different rounds of modifications the Z's engine bay had been through a lot. There were many holes drilled in the fender wells, frame rails, and firewall. One hole was found under a plate on the firewall that cut into the cowl area and the cabin allowing water to leak into the cabin! Some rust was also found in the strut tower panels which was sure to brea kthrough soon and ruin fresh paint. All these spots needed to be fixed and the engine bay given a fresh coat of paint, for now it will be Satin black until the engine install is complete and tested out. The brake lines needed to be remade as they were not installed very well by the previous owner so these were removed as well at this time.
Below are a few pictures of the original condition:


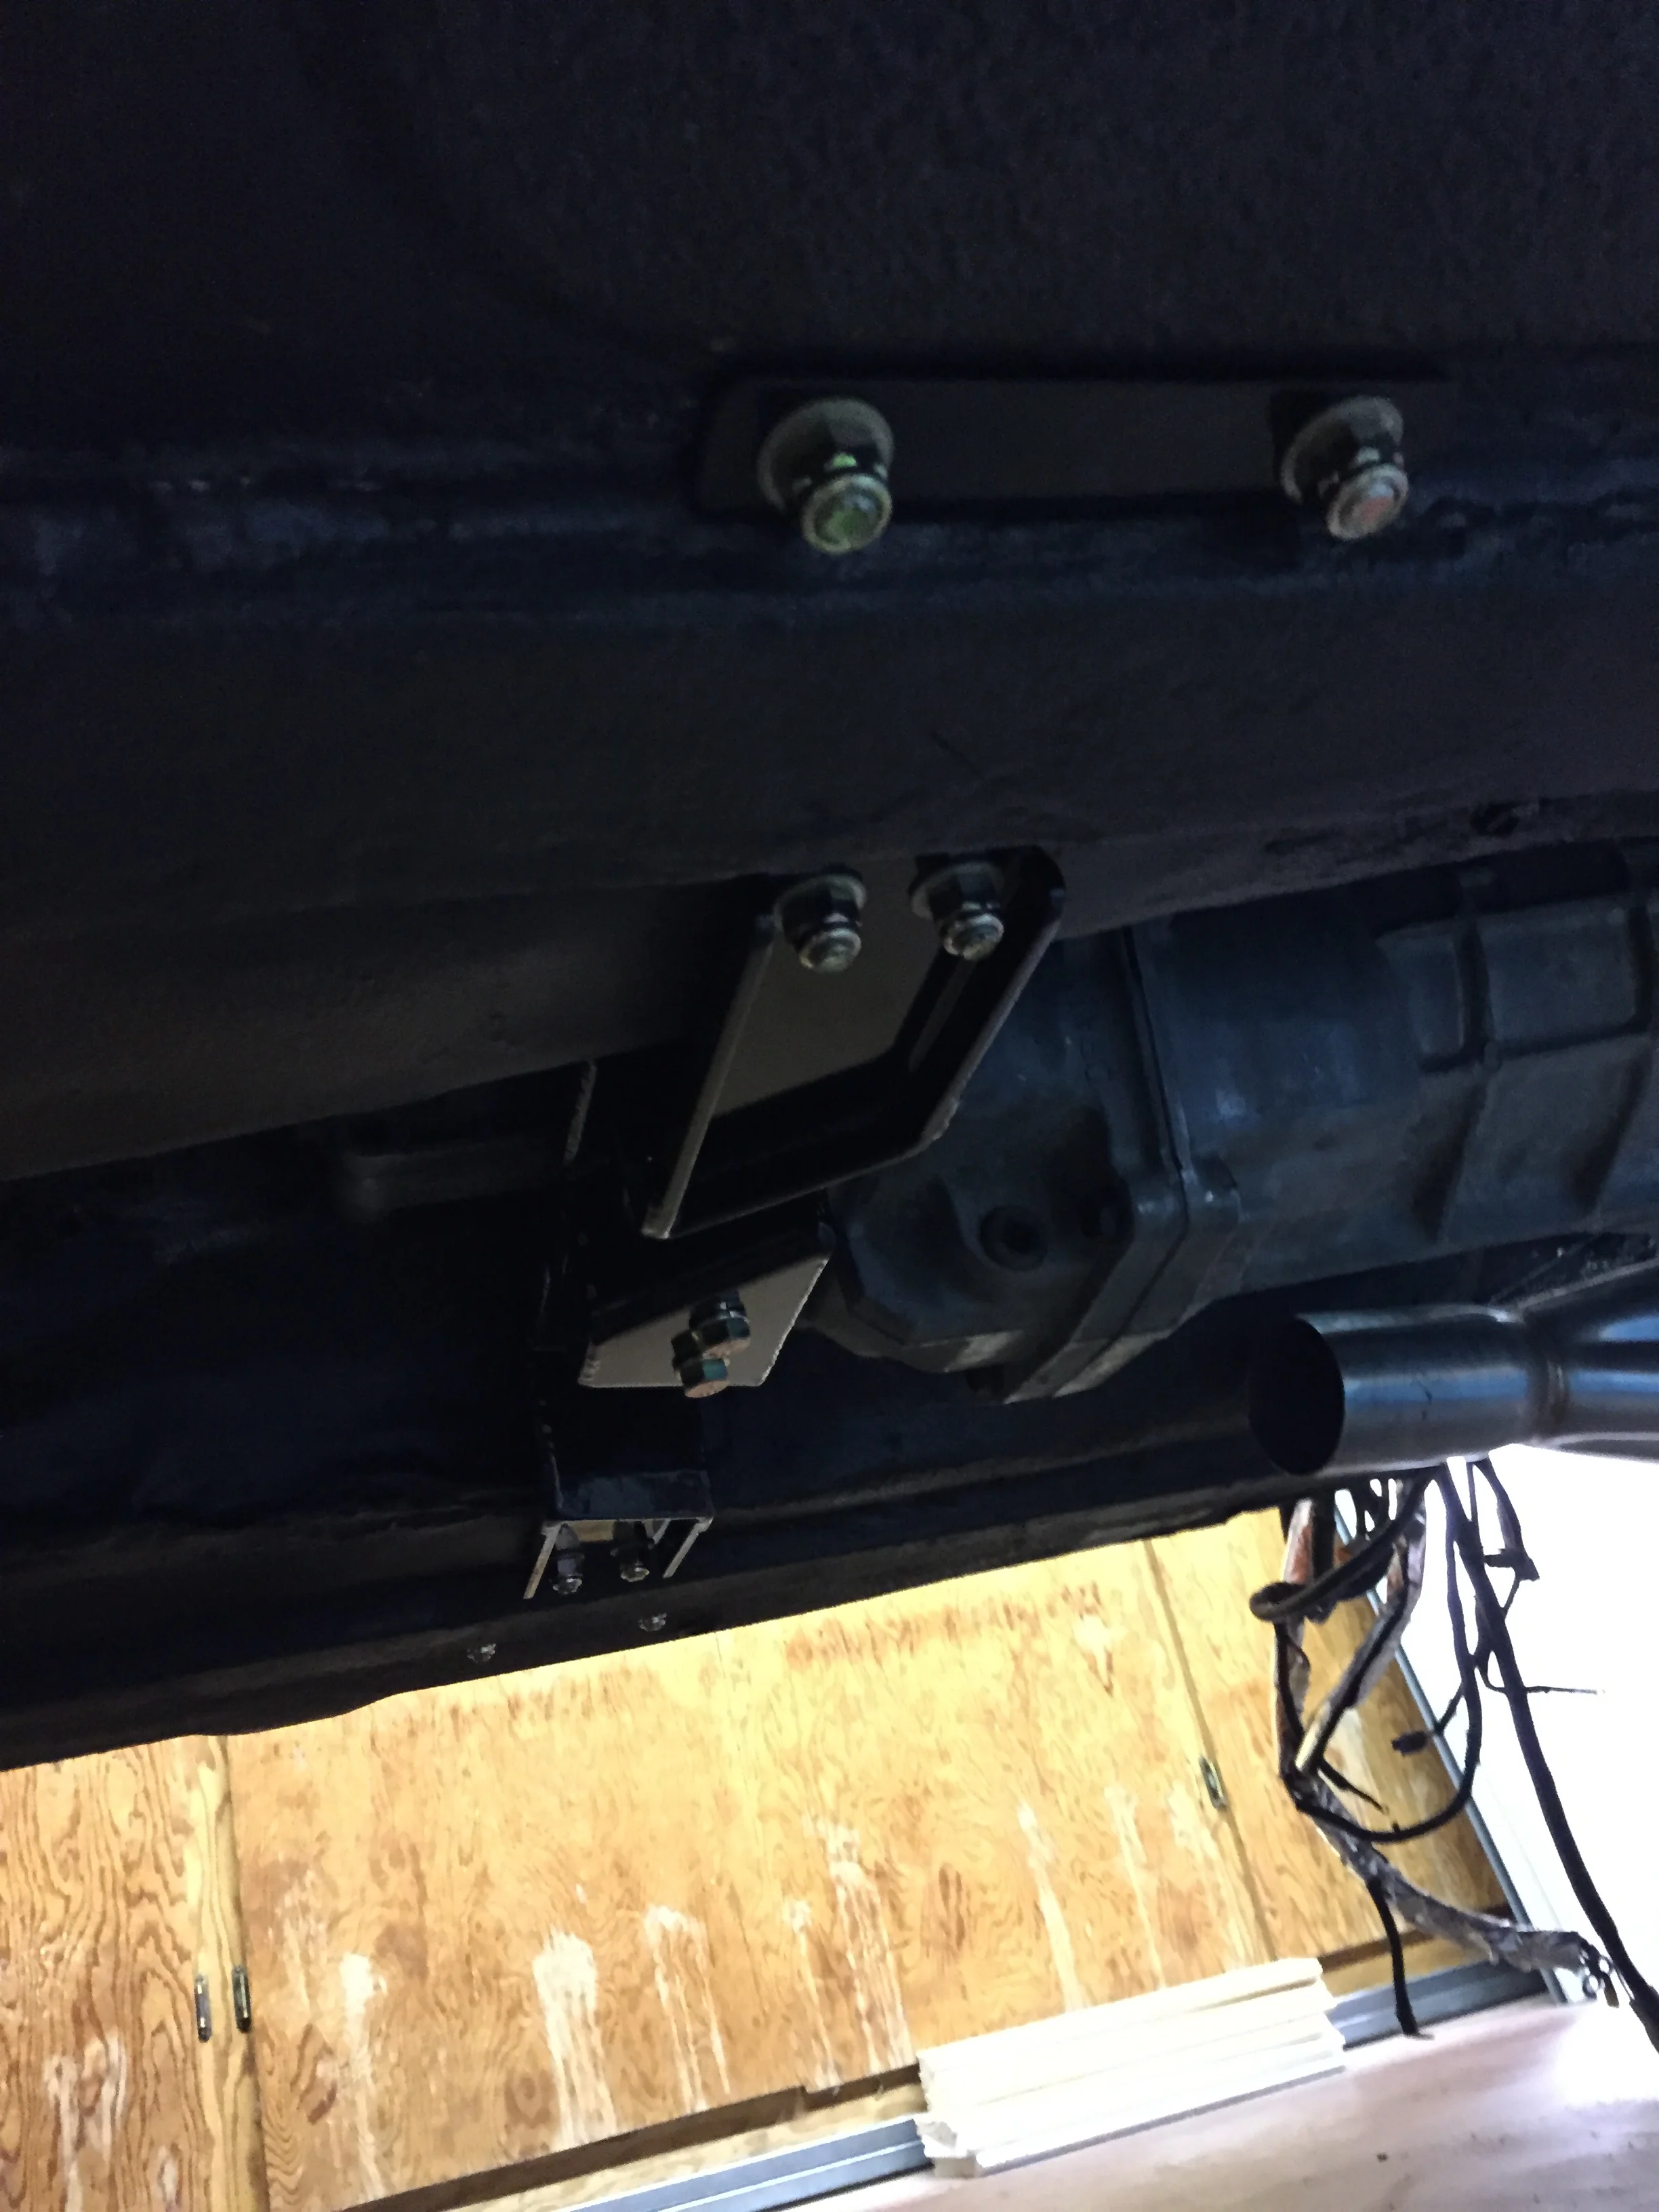
With everything identified work was started, patches were made for large holes and smaller ones were filled using the MIG welder and a copper spoon. The work was a little tedious and messy but the result came out nice. With a little filler and paint the engine bay will look like new! We will give it a coat of stain black paint once the engine mounts are built and the engine test fit. The L series engine mounts were removed from the cross member as well.
You'll notice the frame rail reinforcements, these were initially installed for the Hawk's engine mount setup. I initially wanted to design my own mounts for this project but crunched with time we decided to give the Hawk's mounts a try. We ran into several fitment issues and were dissapointed with the overall quality. Given that I had already taken the them time and expense to scan the engine it was just the push I needed to go to the drawing board. While designing mounts adds time to the project I felt it would be worth it, and soemthing that could be offered to the Z community. Since the new design locates the engine on the suspension crossmember the rails had to be patched back like new!
For more details on the engine mount design please check out the product development page. We will pick back up here with engine test fit after the brake and fuel lines are installed.


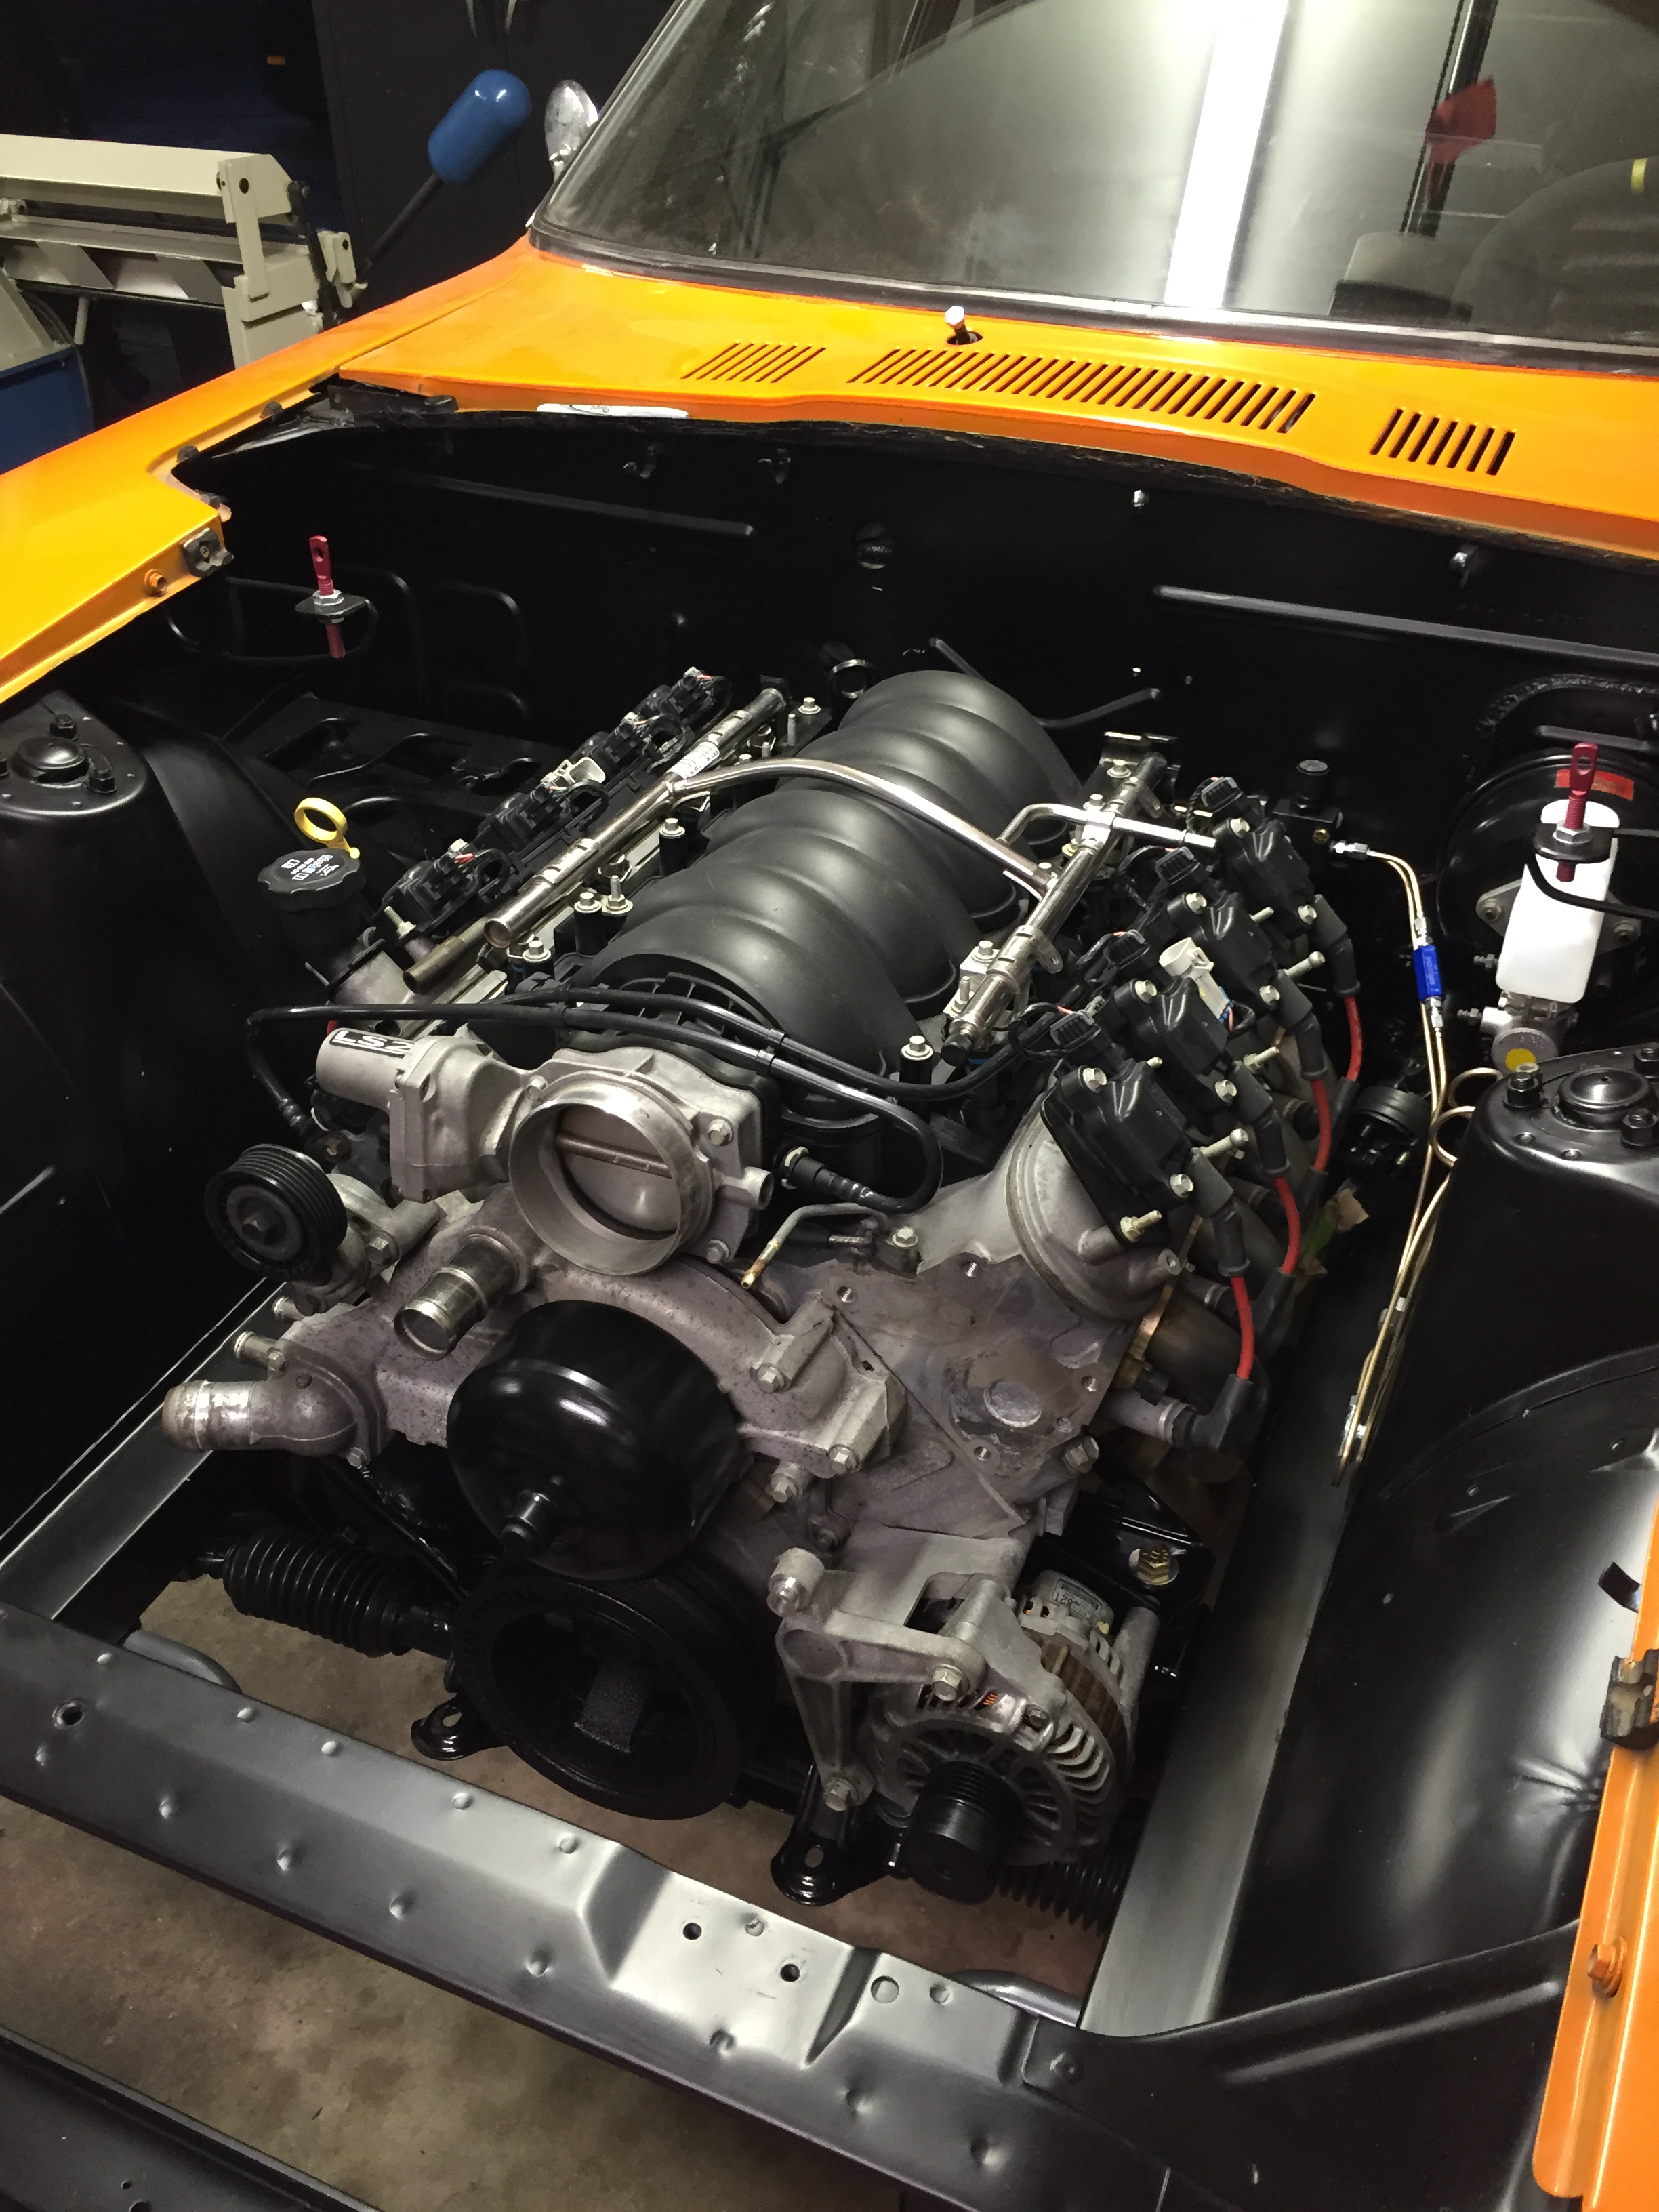
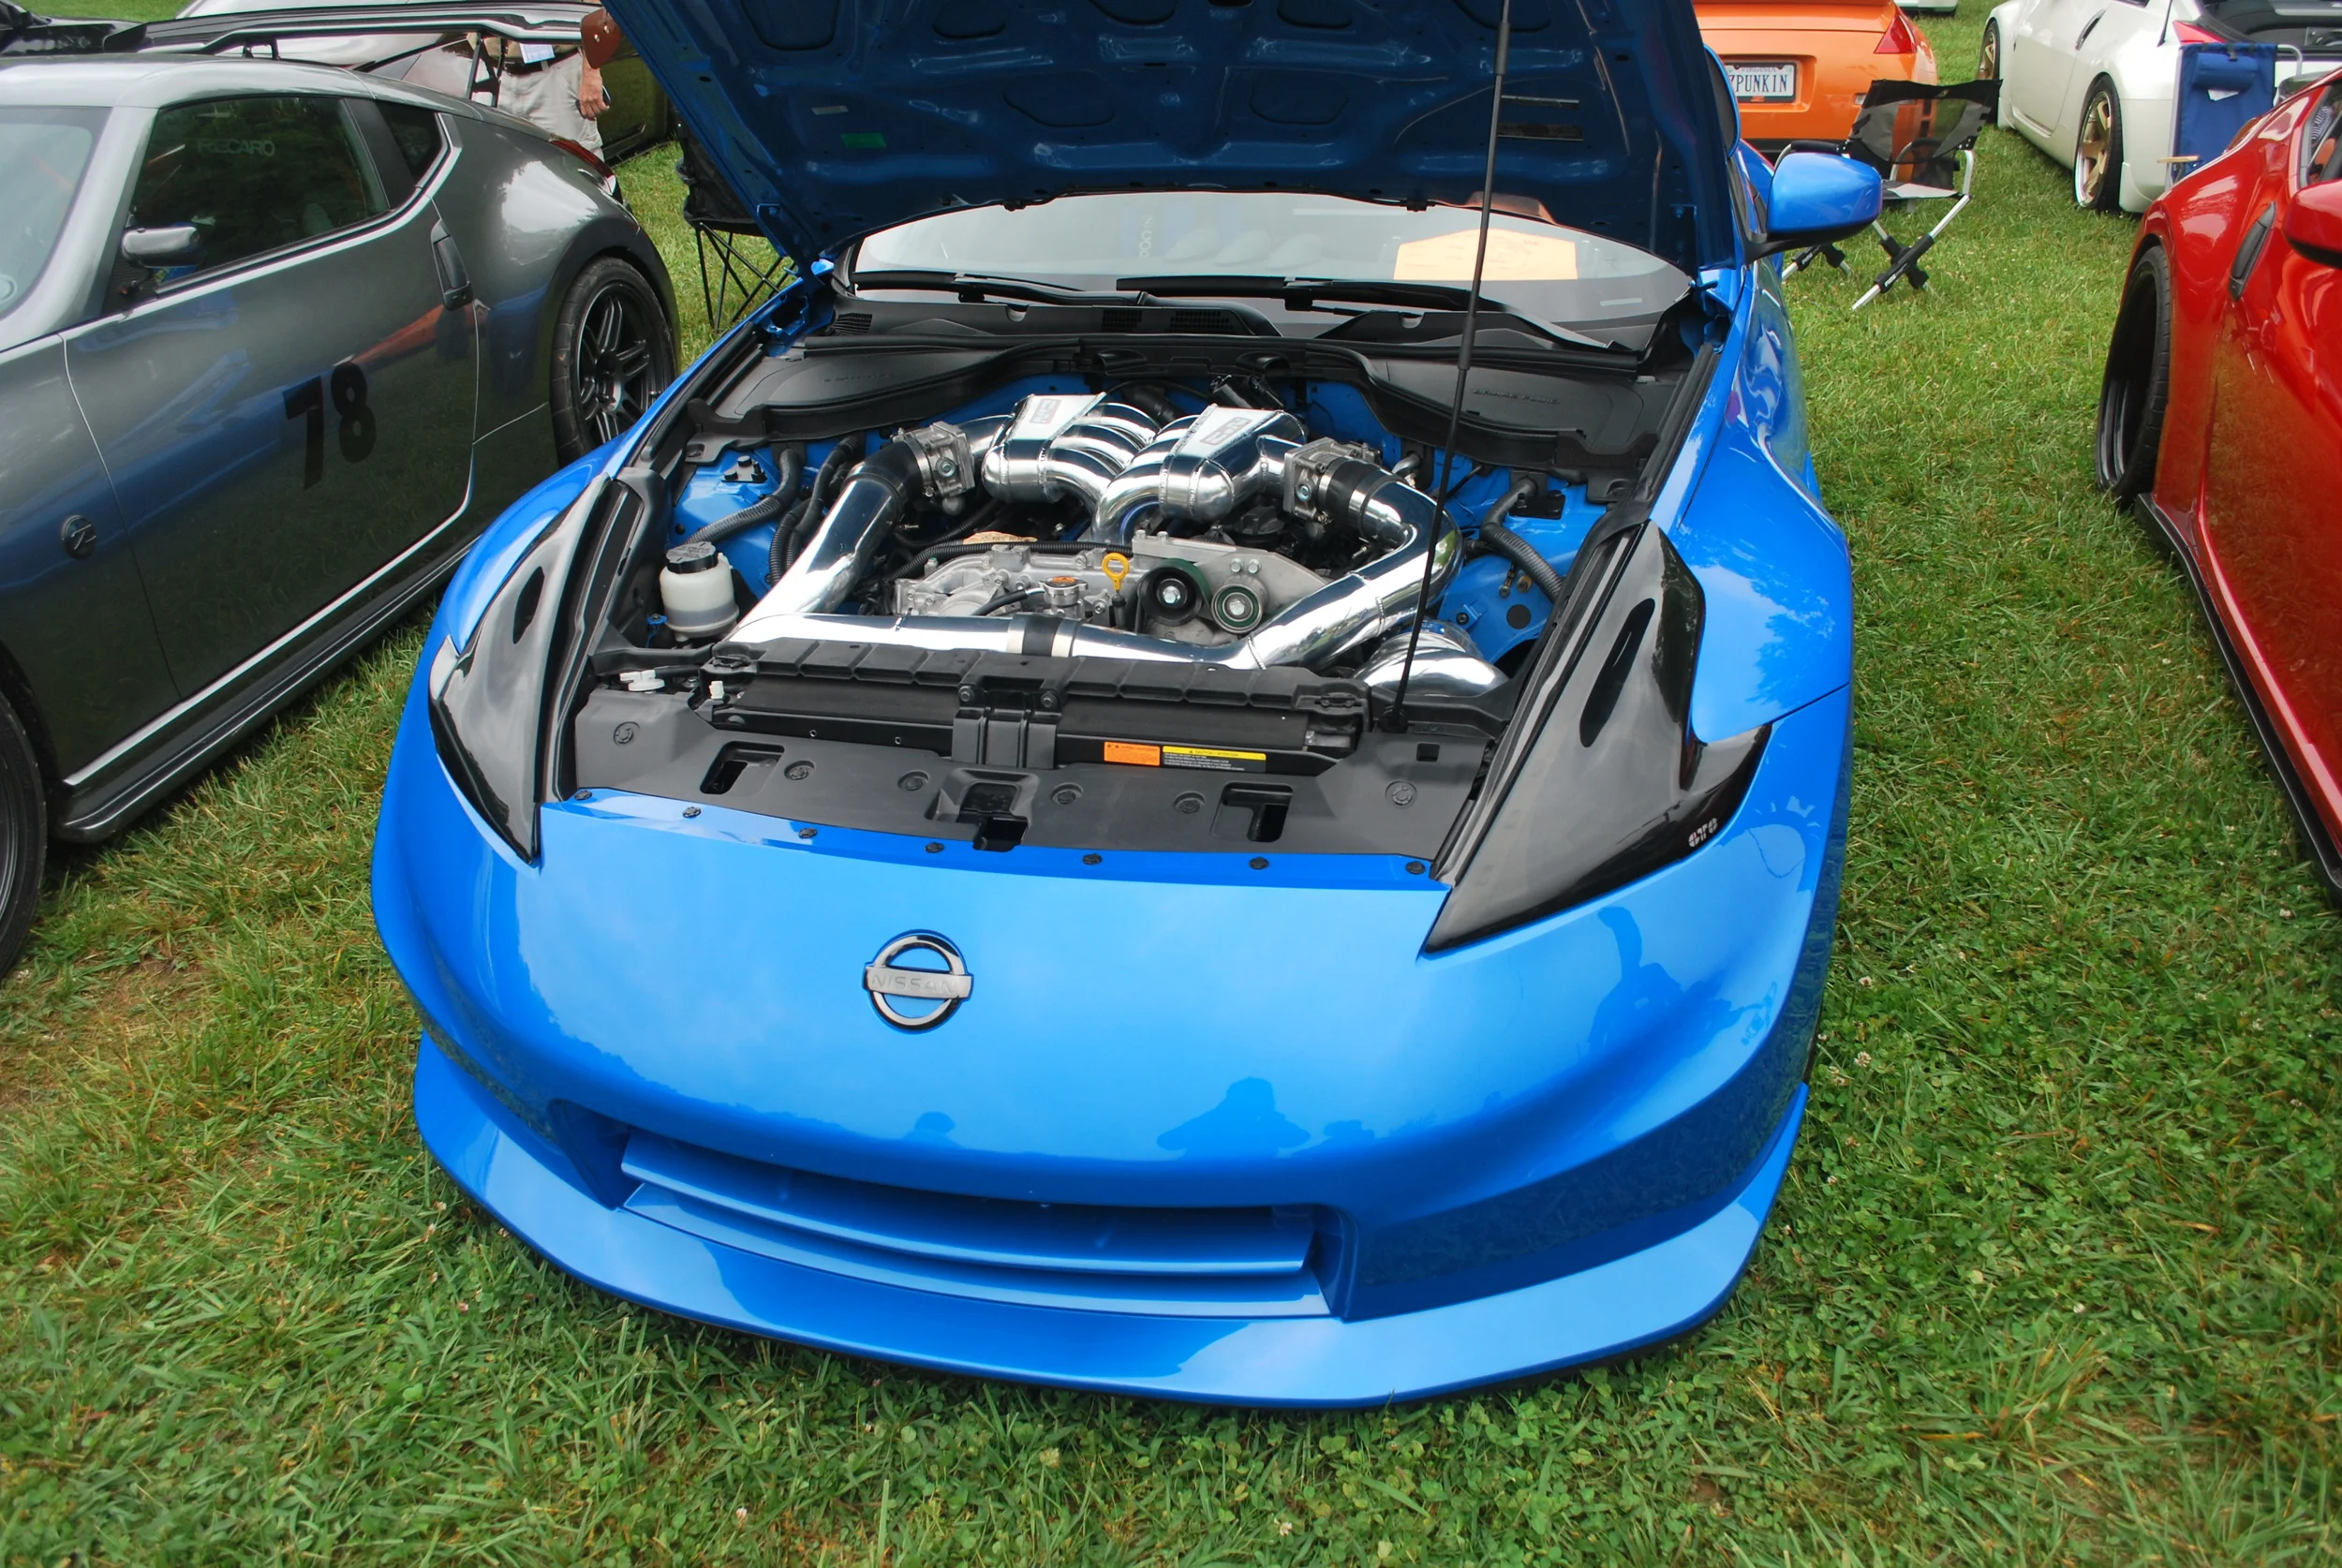
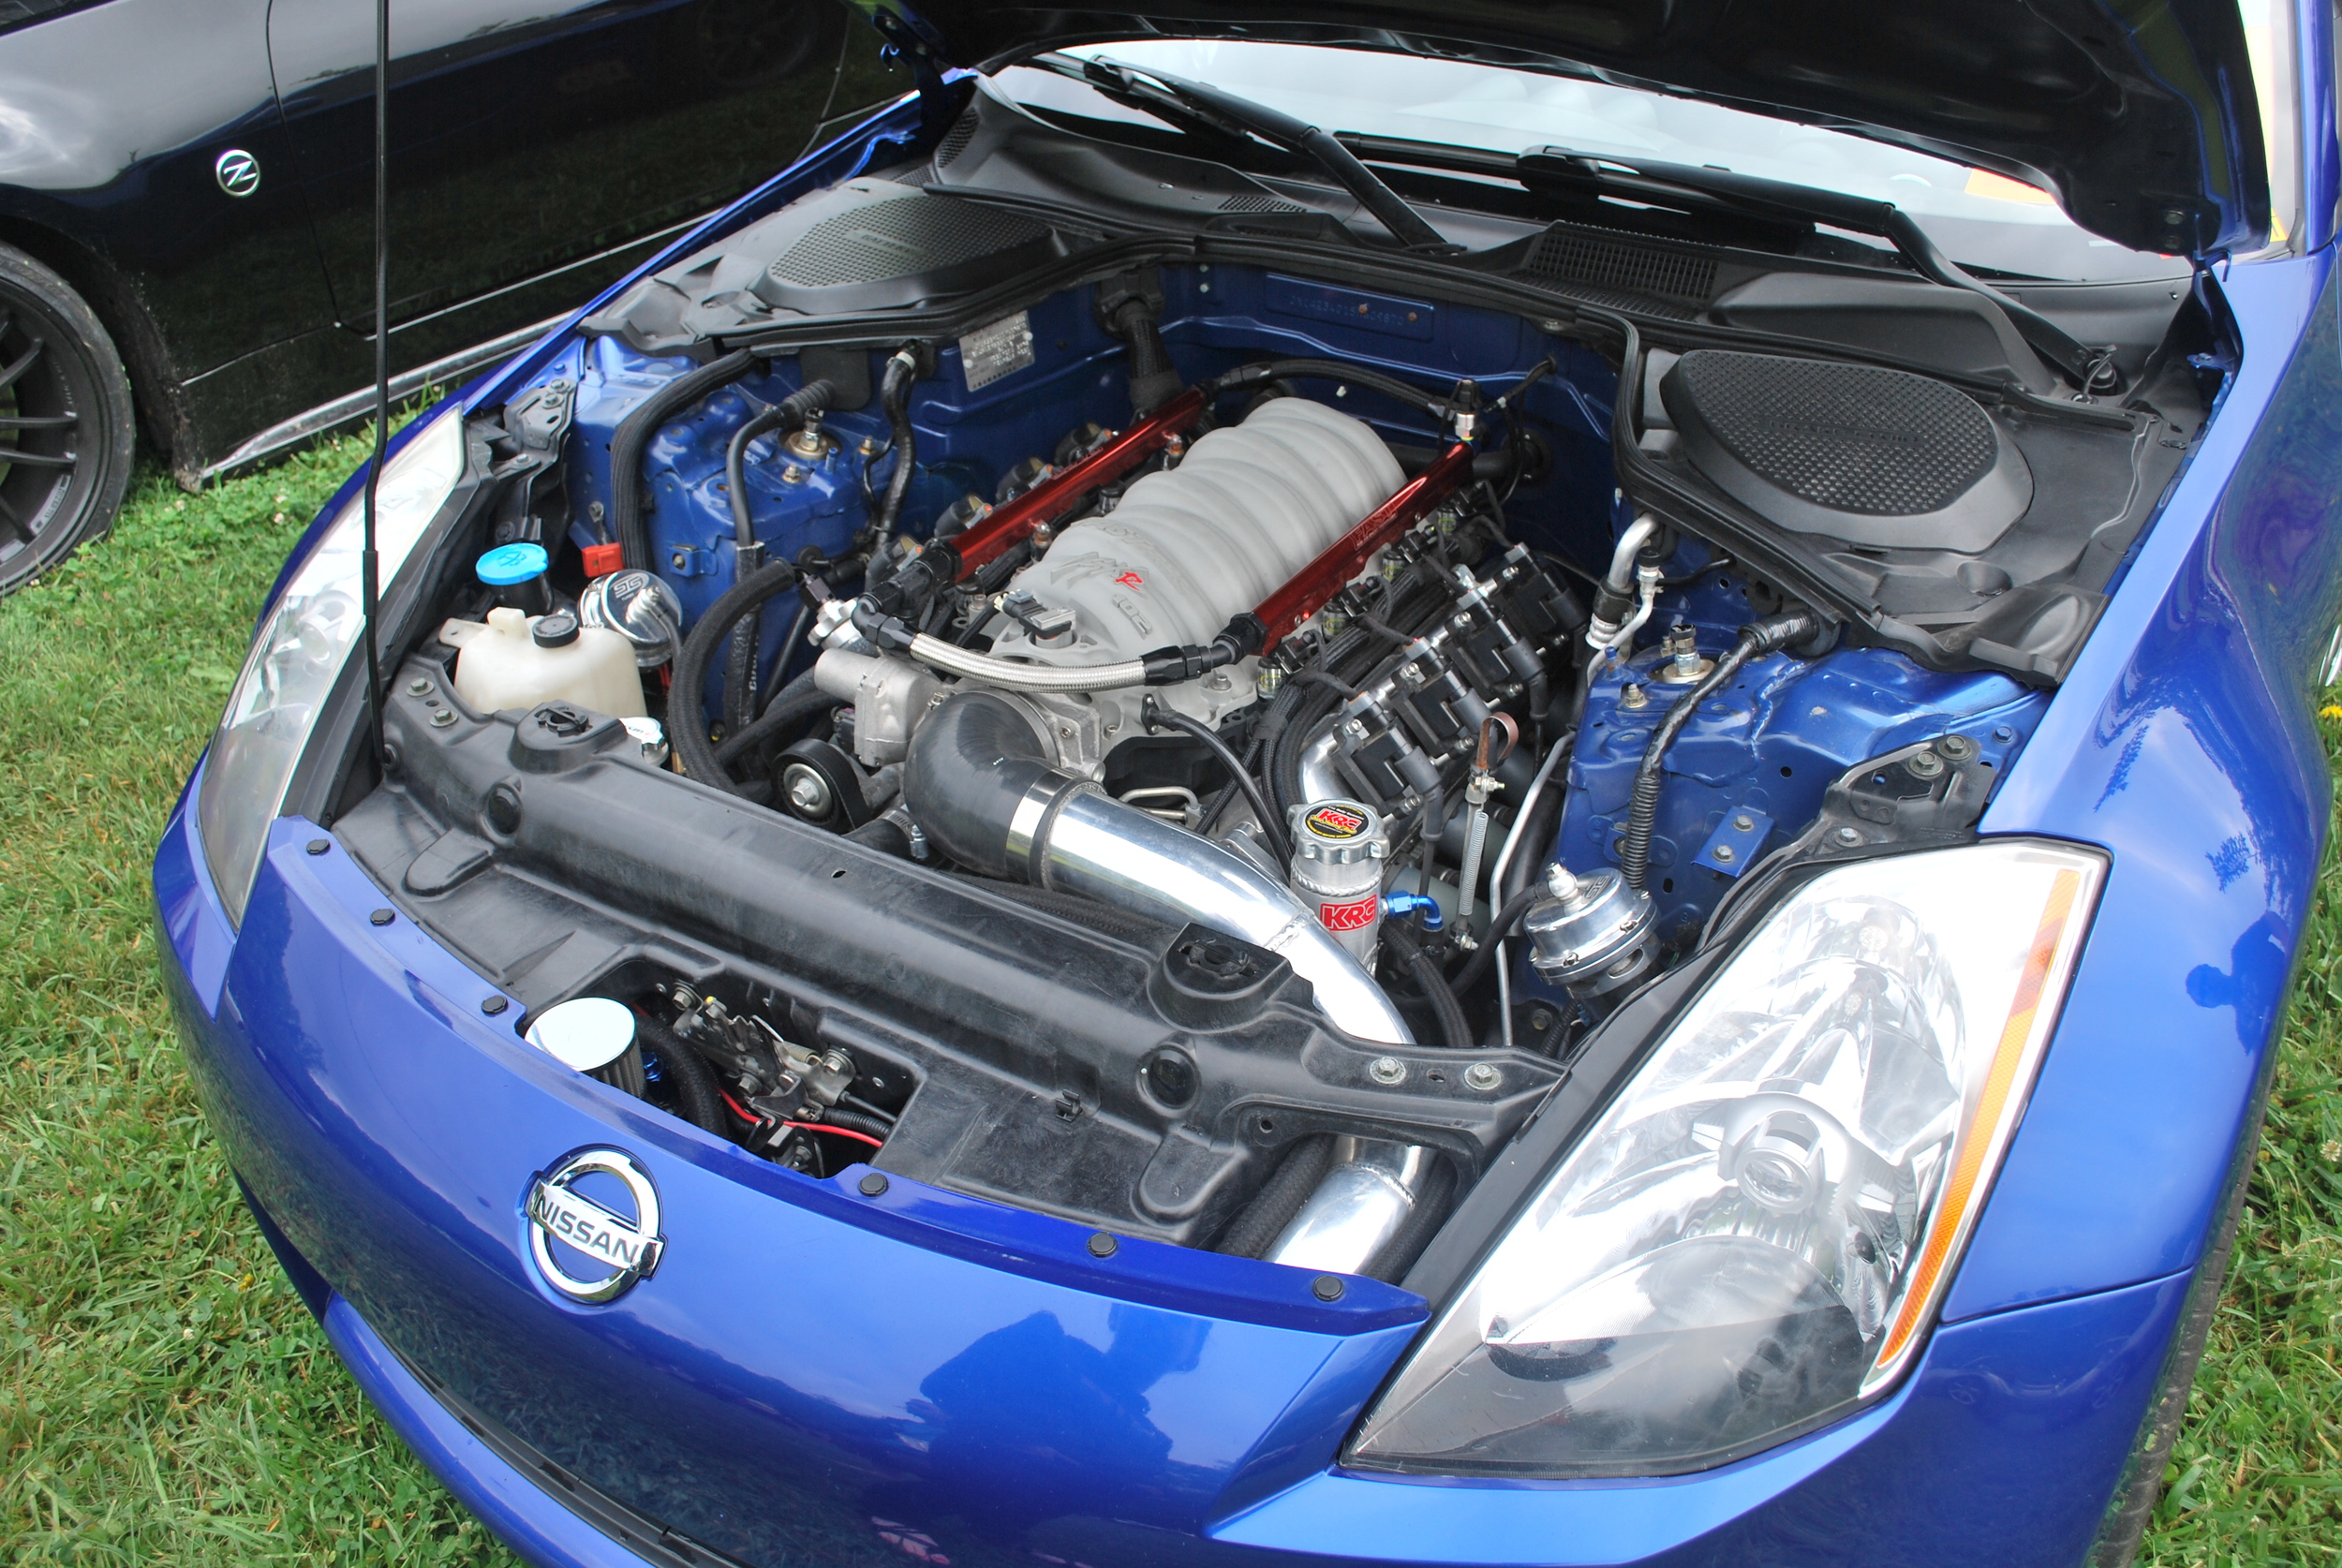
And here is the 'finished' engine bay at least for now. I am really happy with the way it turned out. Fixing all the holes gives us a solid and clean slate for any other changes we want to make and gives a nice home to match the new LS2. The engine bay is likely to get painted along with the body later but for now the satin black allows for easy touch up or changes as we go (welded in brackets, camber plates, etc). Next up is custom brake lines and fuel lines!

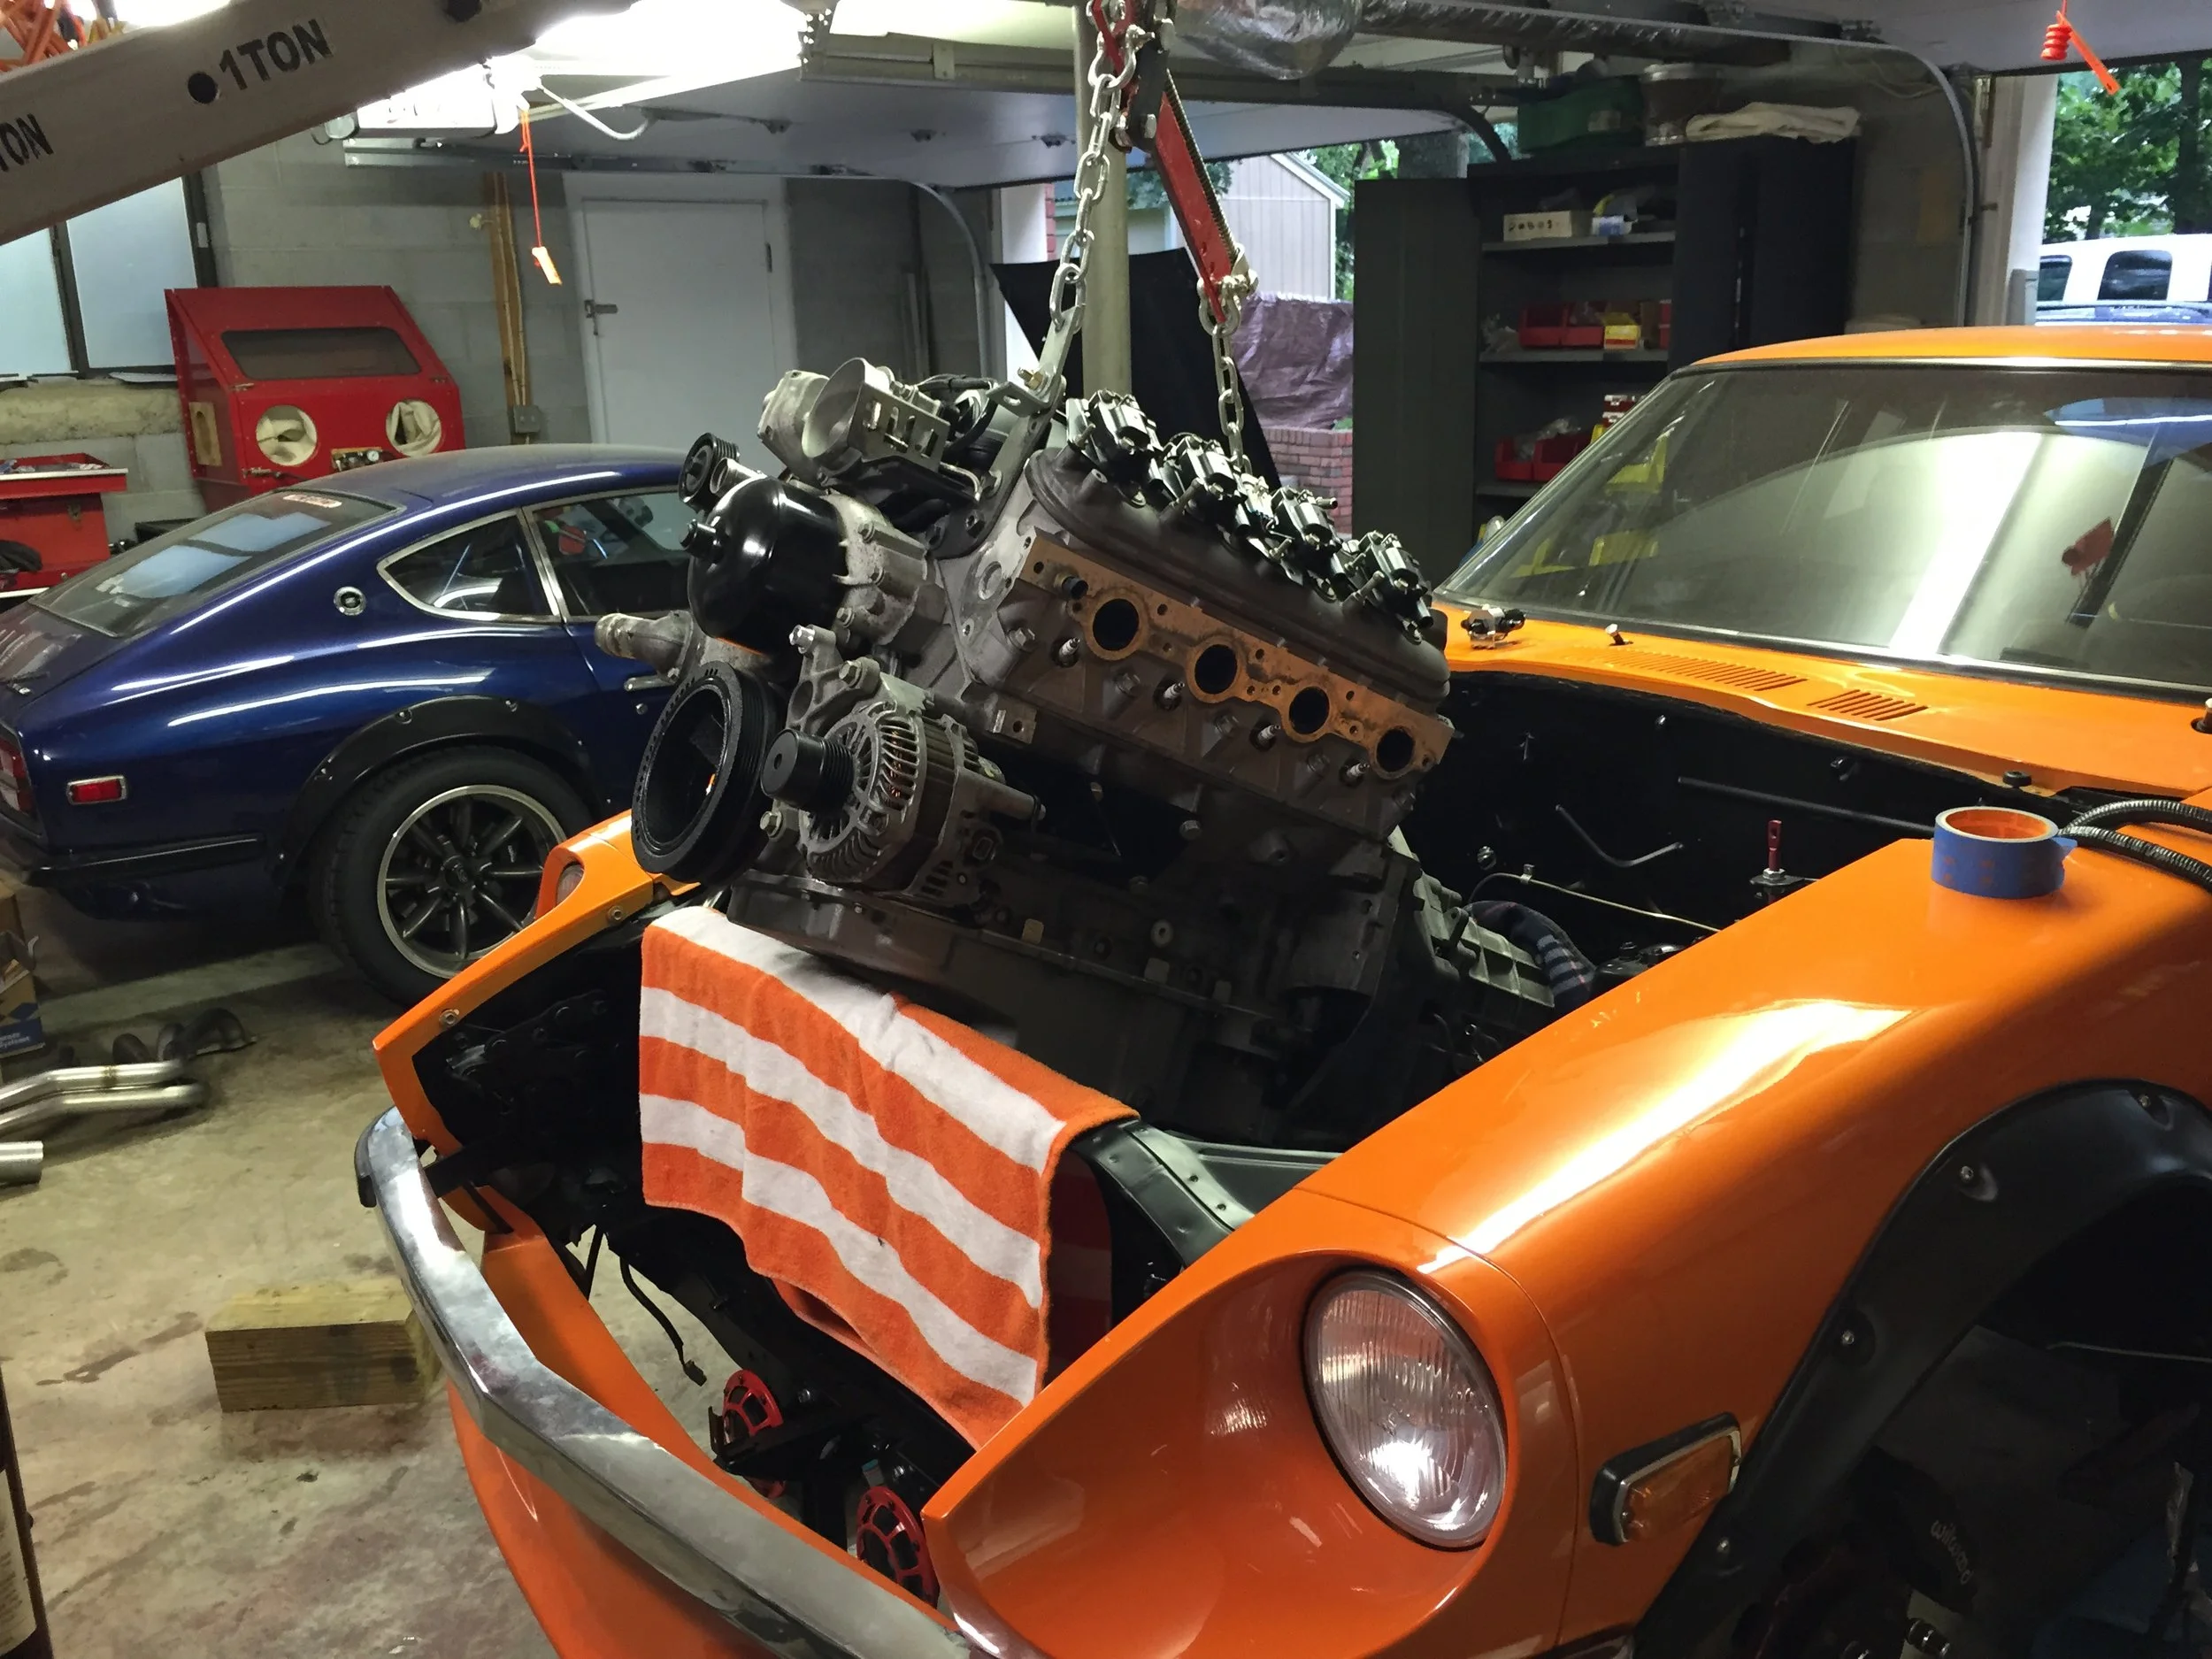
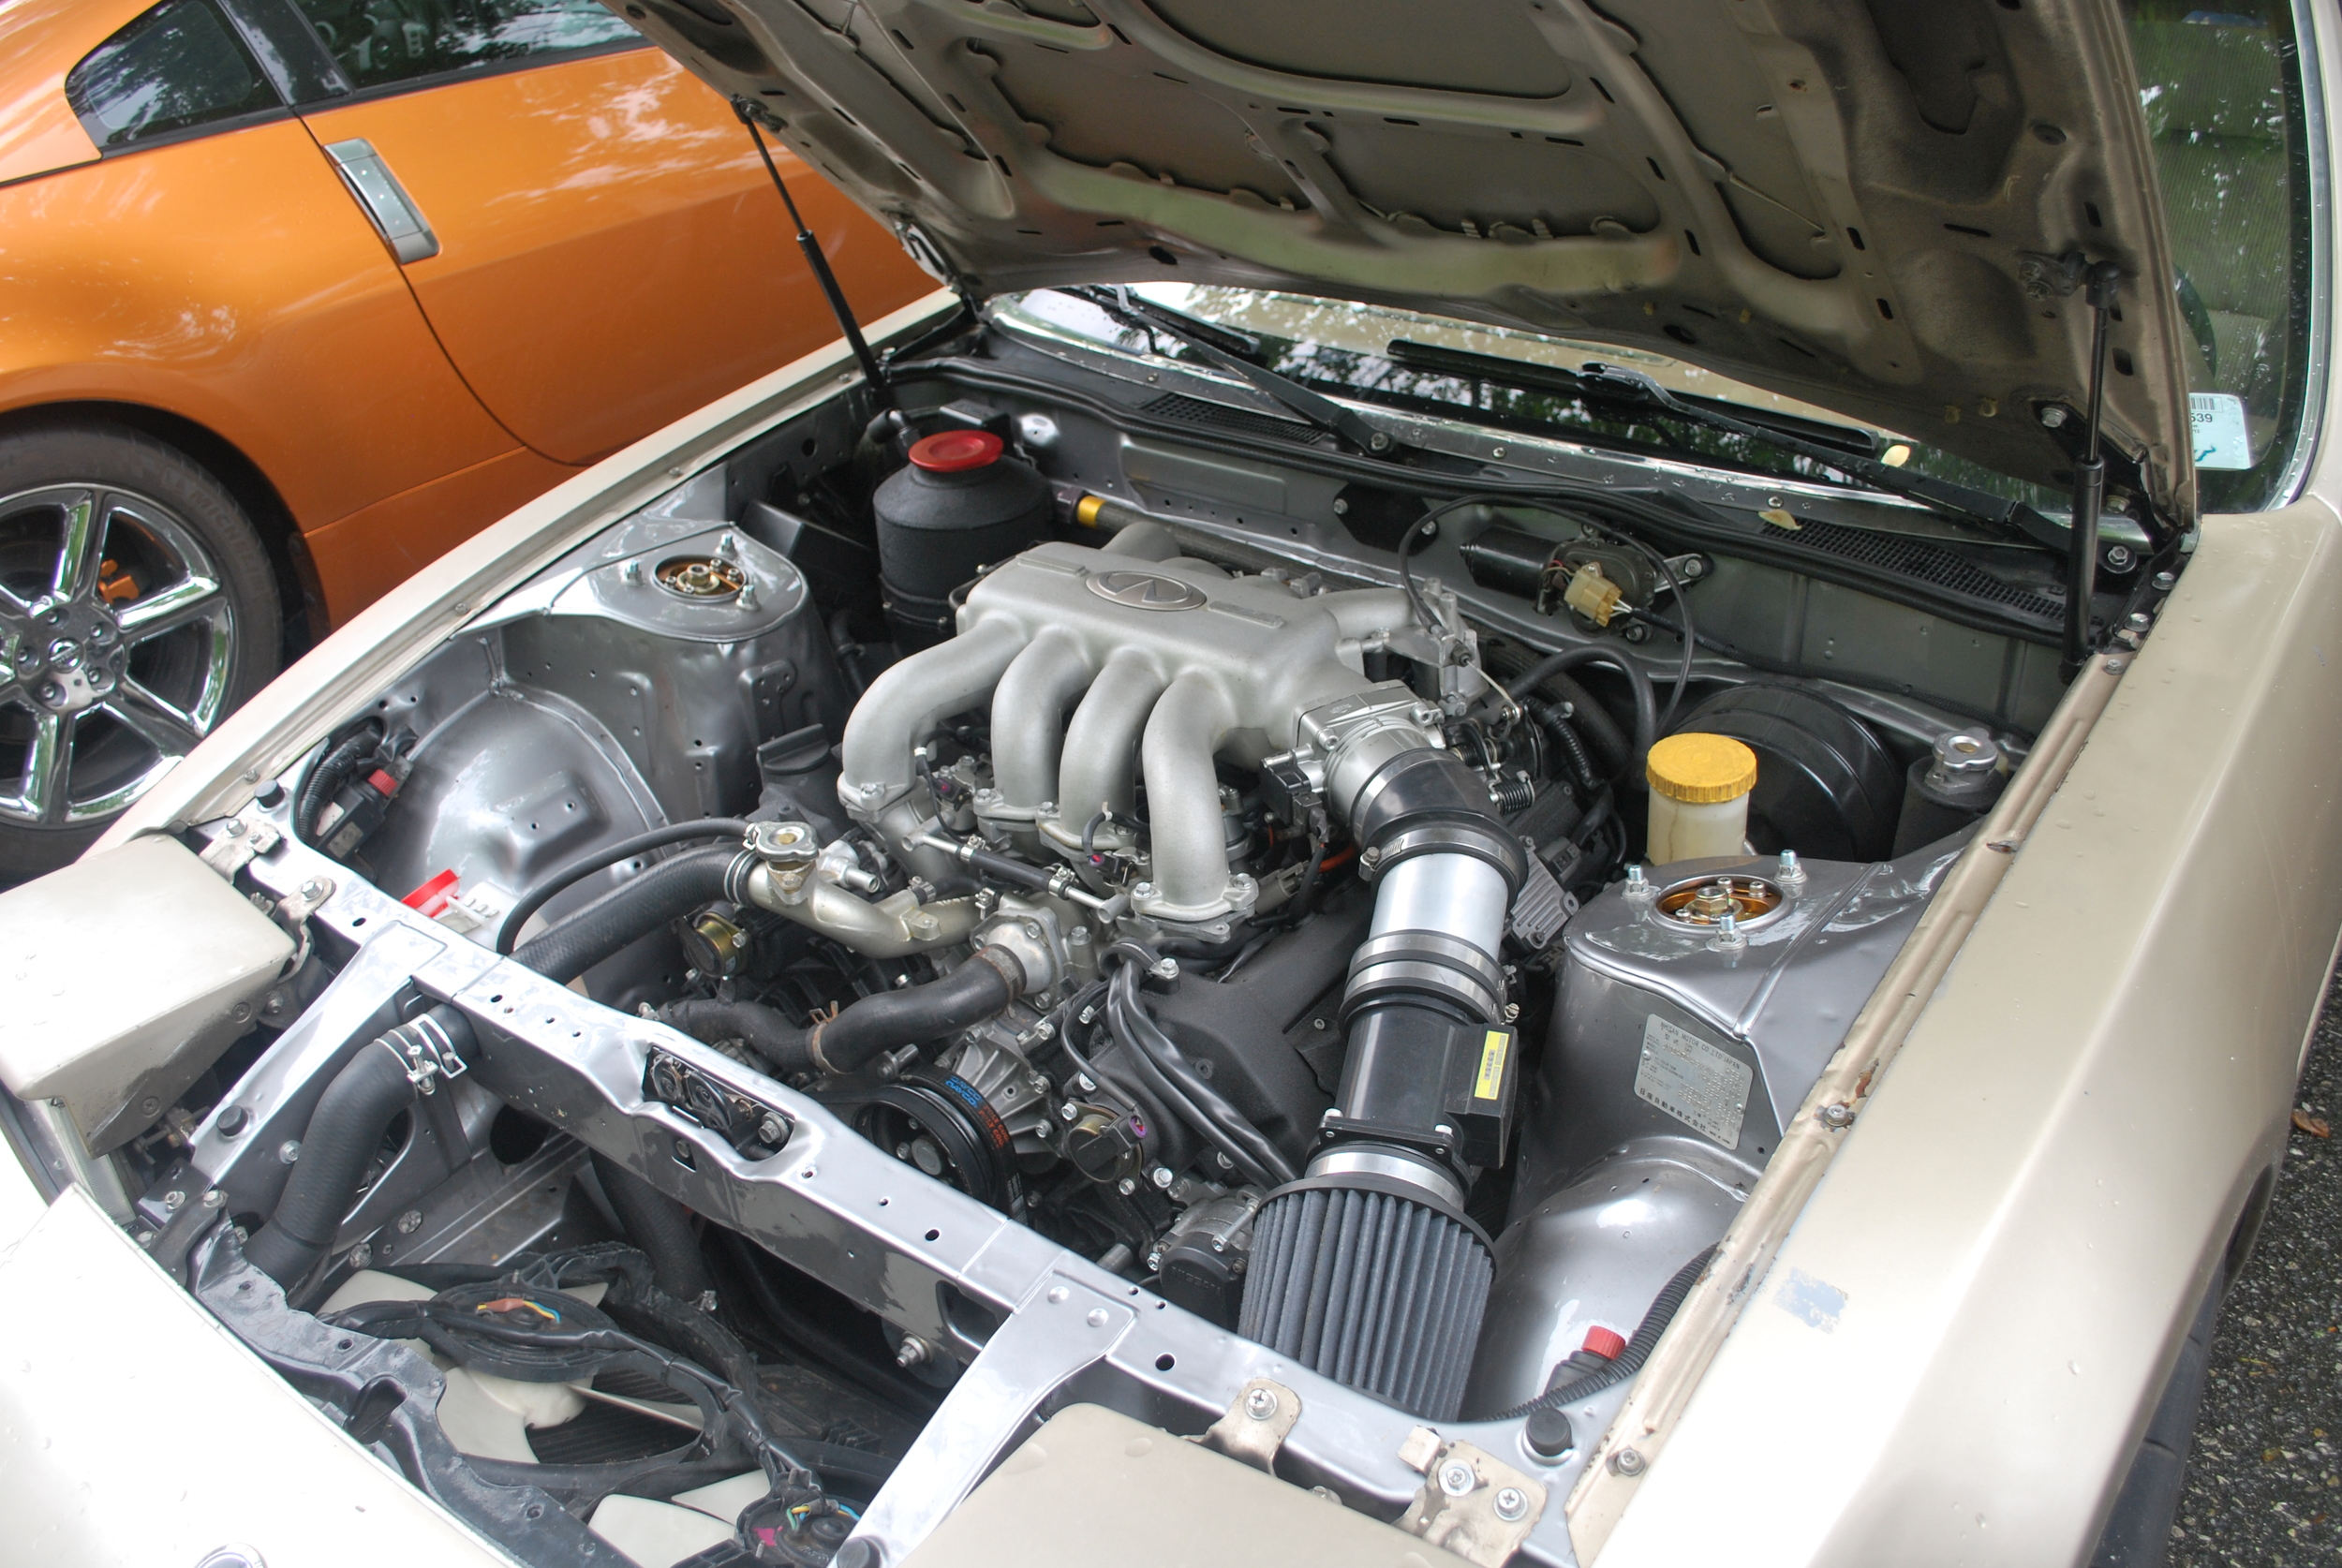
LS2 Install - The Engine
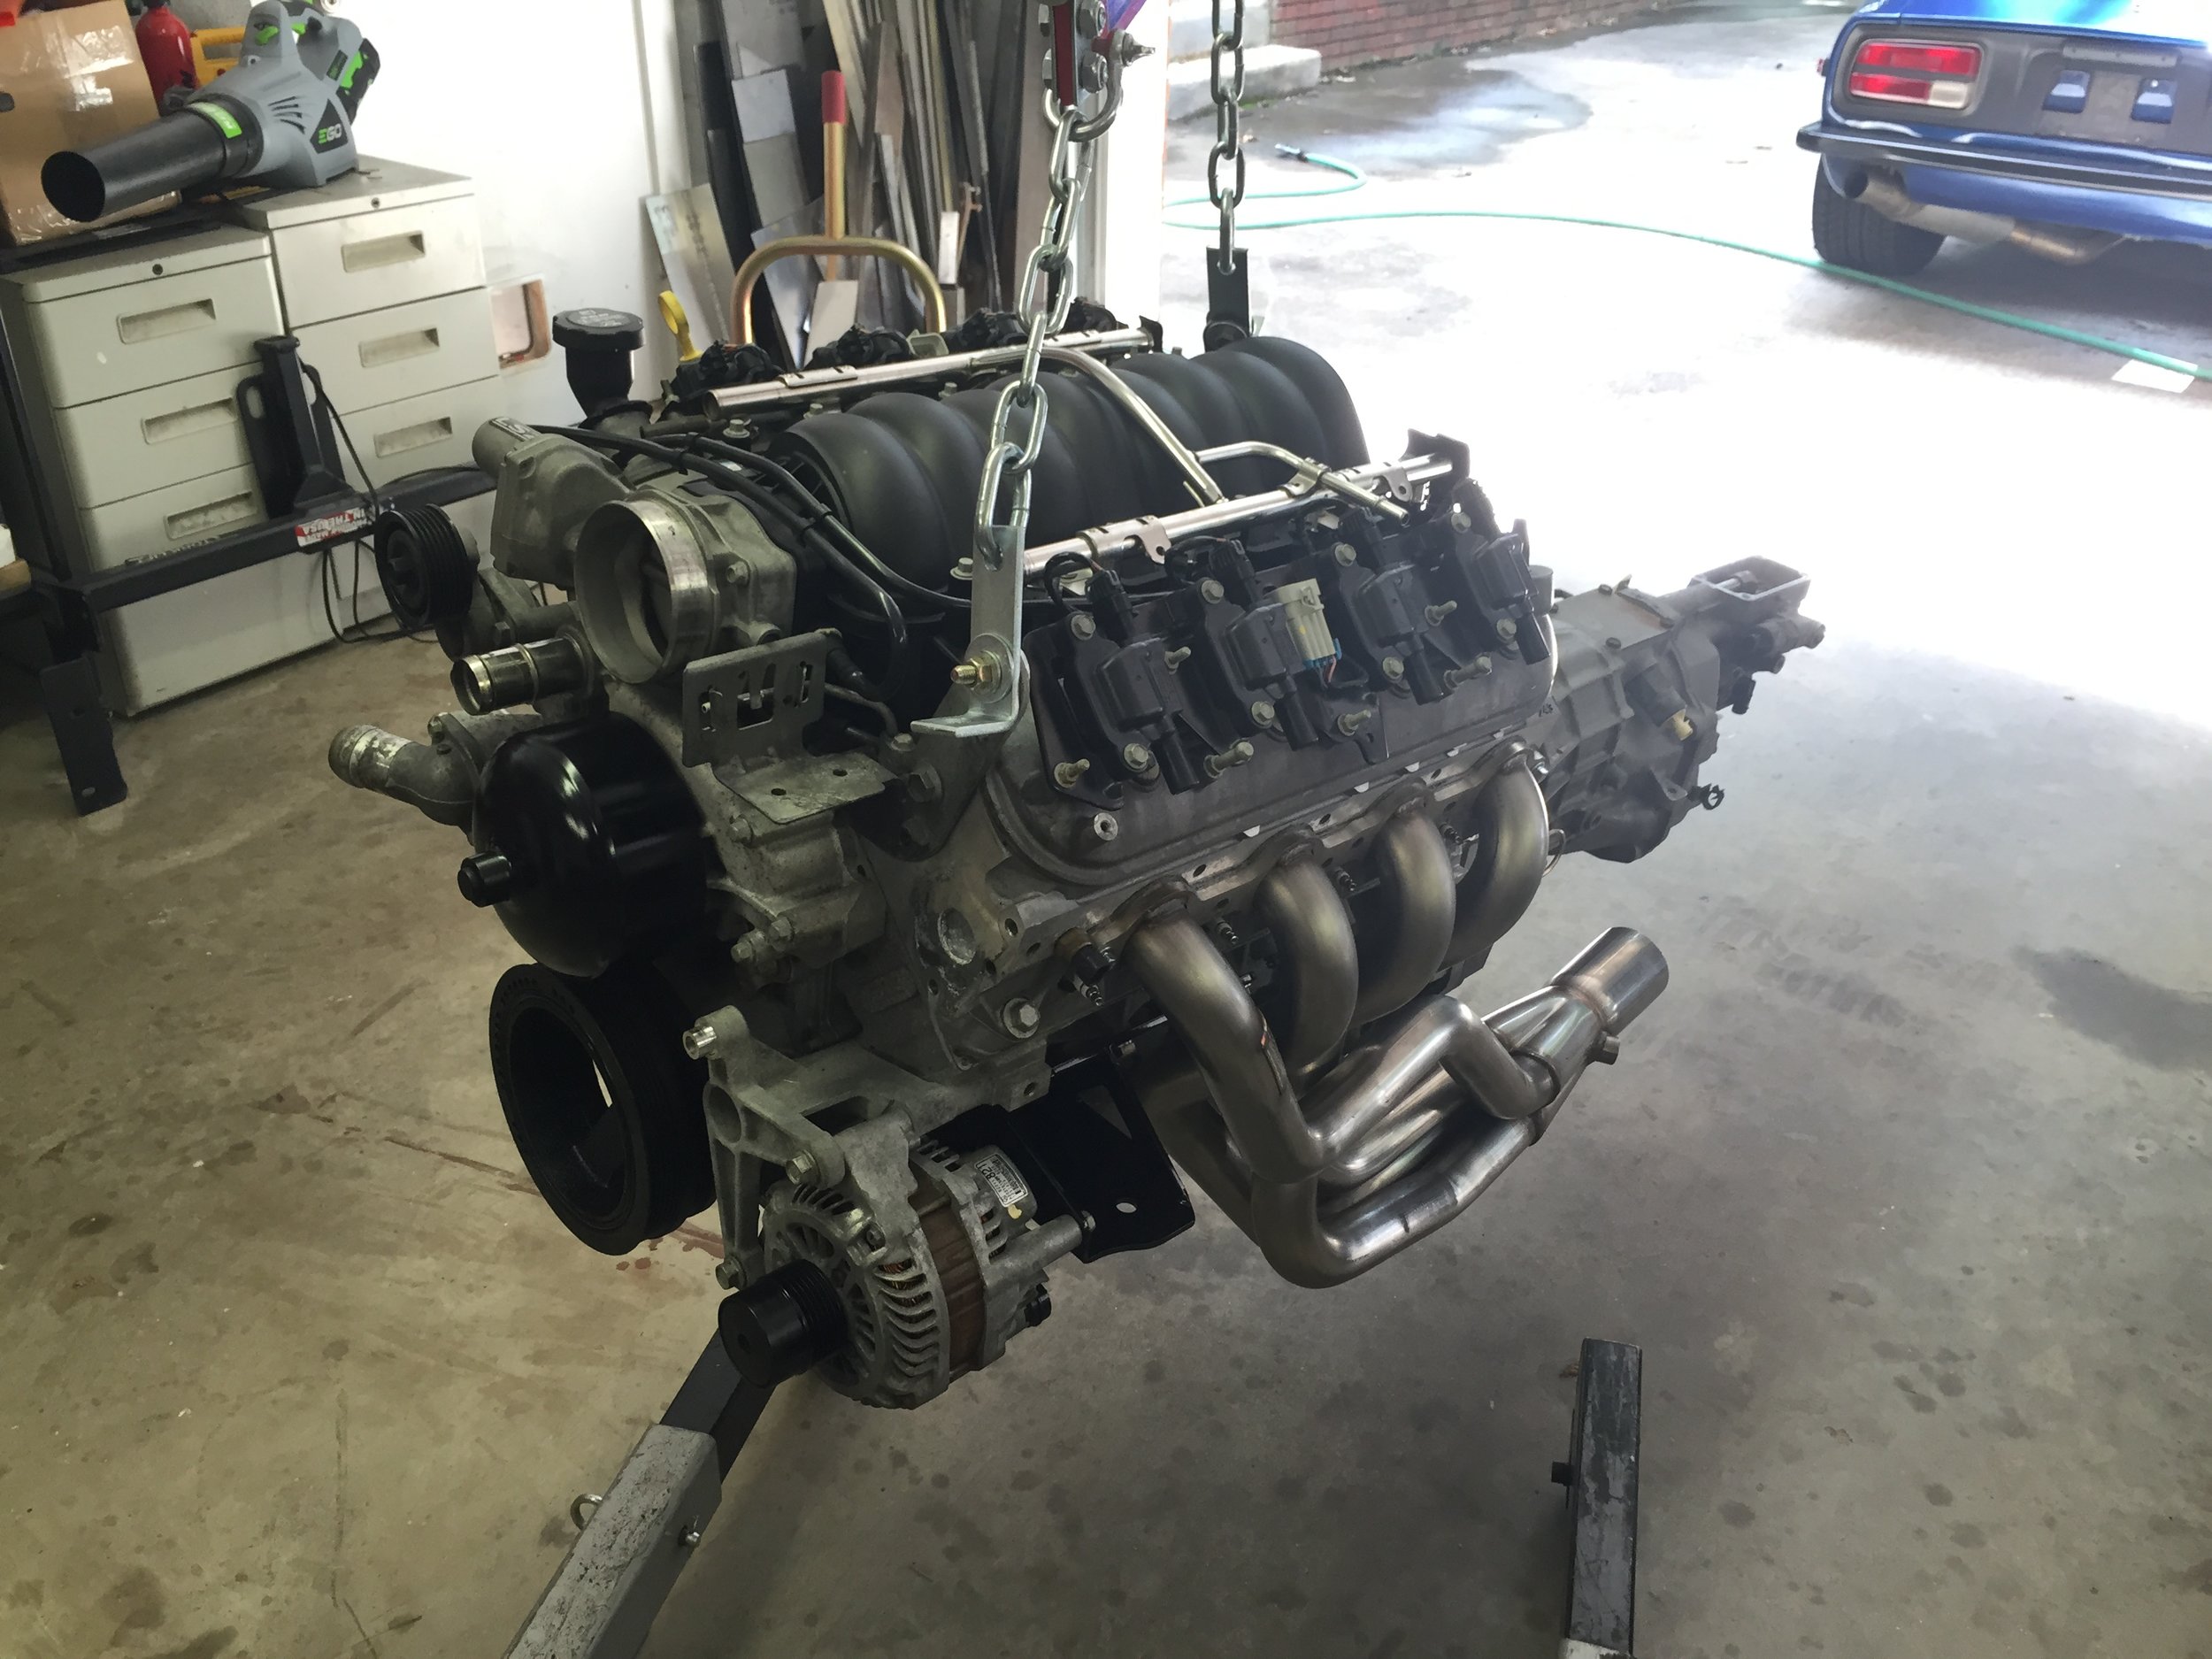
After ZDAYZ in may of 2013 Matt surprised me with a call saying that he had purchased a LS2 drop out from a 2005 GTO complete with the manual transmission, and wiring harness. This is the 6.0L 400hp version of the LS. It was sure to be a monster.
We pulled his old engine out and crated it up for shipment to its new owner in Norway! The GTO engine arrived shortly after and was in excellent shape. Unfortunately with other things going on it would be almost a year before any serious work could be completed on the car and it sat in the shop quietly waiting for a transformation. During this time I relocated to Asheville and re setup my workshop.
Here are a few pictures of the engine


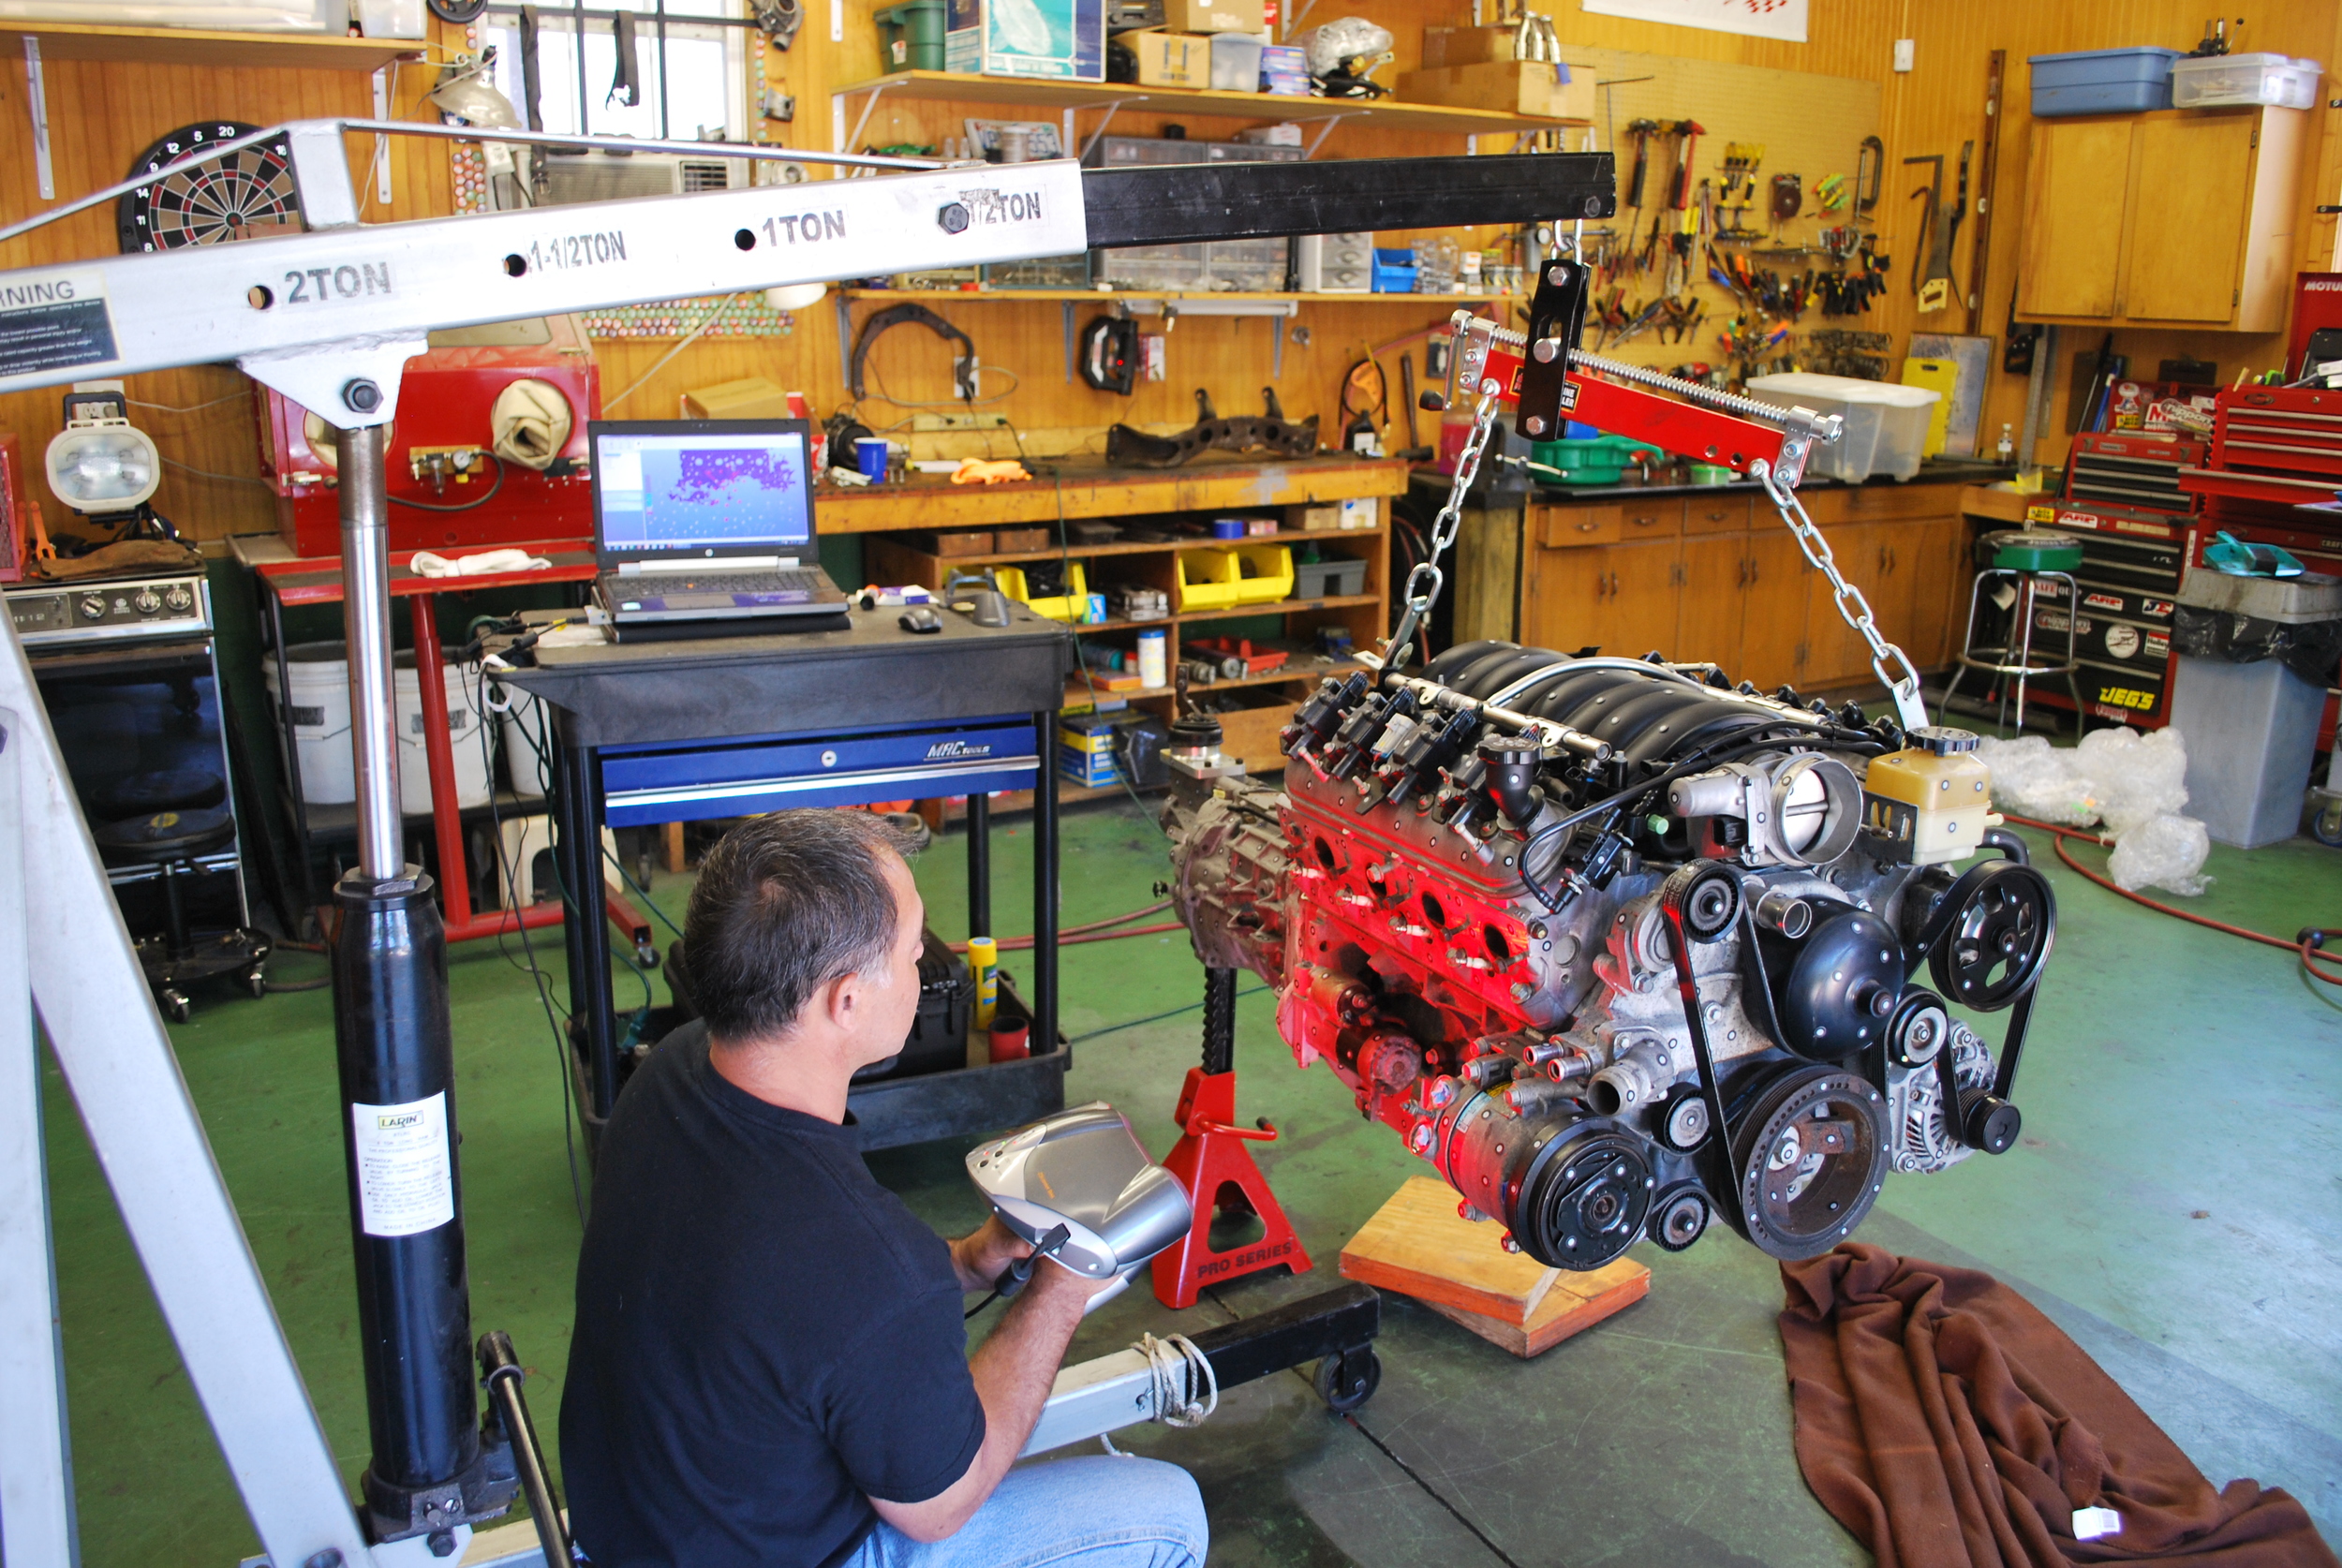
Knowing that I wanted to design and fabricate the mounts if time allowed I started by having the engine assembly and Datsun engine crossmember Laser scanned. This would allow me to position the engine in my CAD software and explore different designs. Dittberner Engineering out of Denver, NC was used for the scanning work. They used a Z corp scanner which captures surfaces with amazing accuracy. We focused on the engine and transmission mounts as well as the exhaust flange patterns, the rest of the engine was scanned for packaging purposes at a lower resolution.


![Capture2[1].JPG](https://images.squarespace-cdn.com/content/v1/53054f3be4b06b3a5cccd136/1417296071002-40LJYK3Z1HI9L7371HQN/Capture2%5B1%5D.JPG)


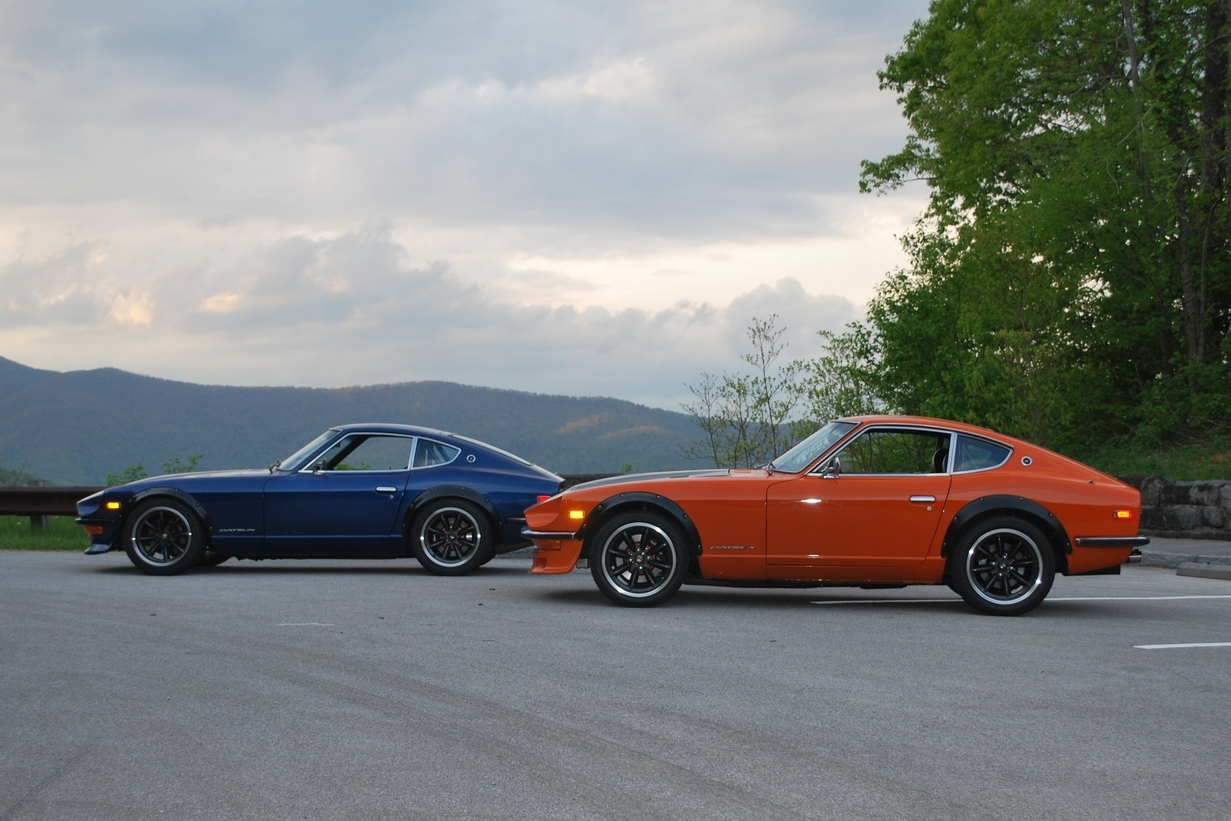
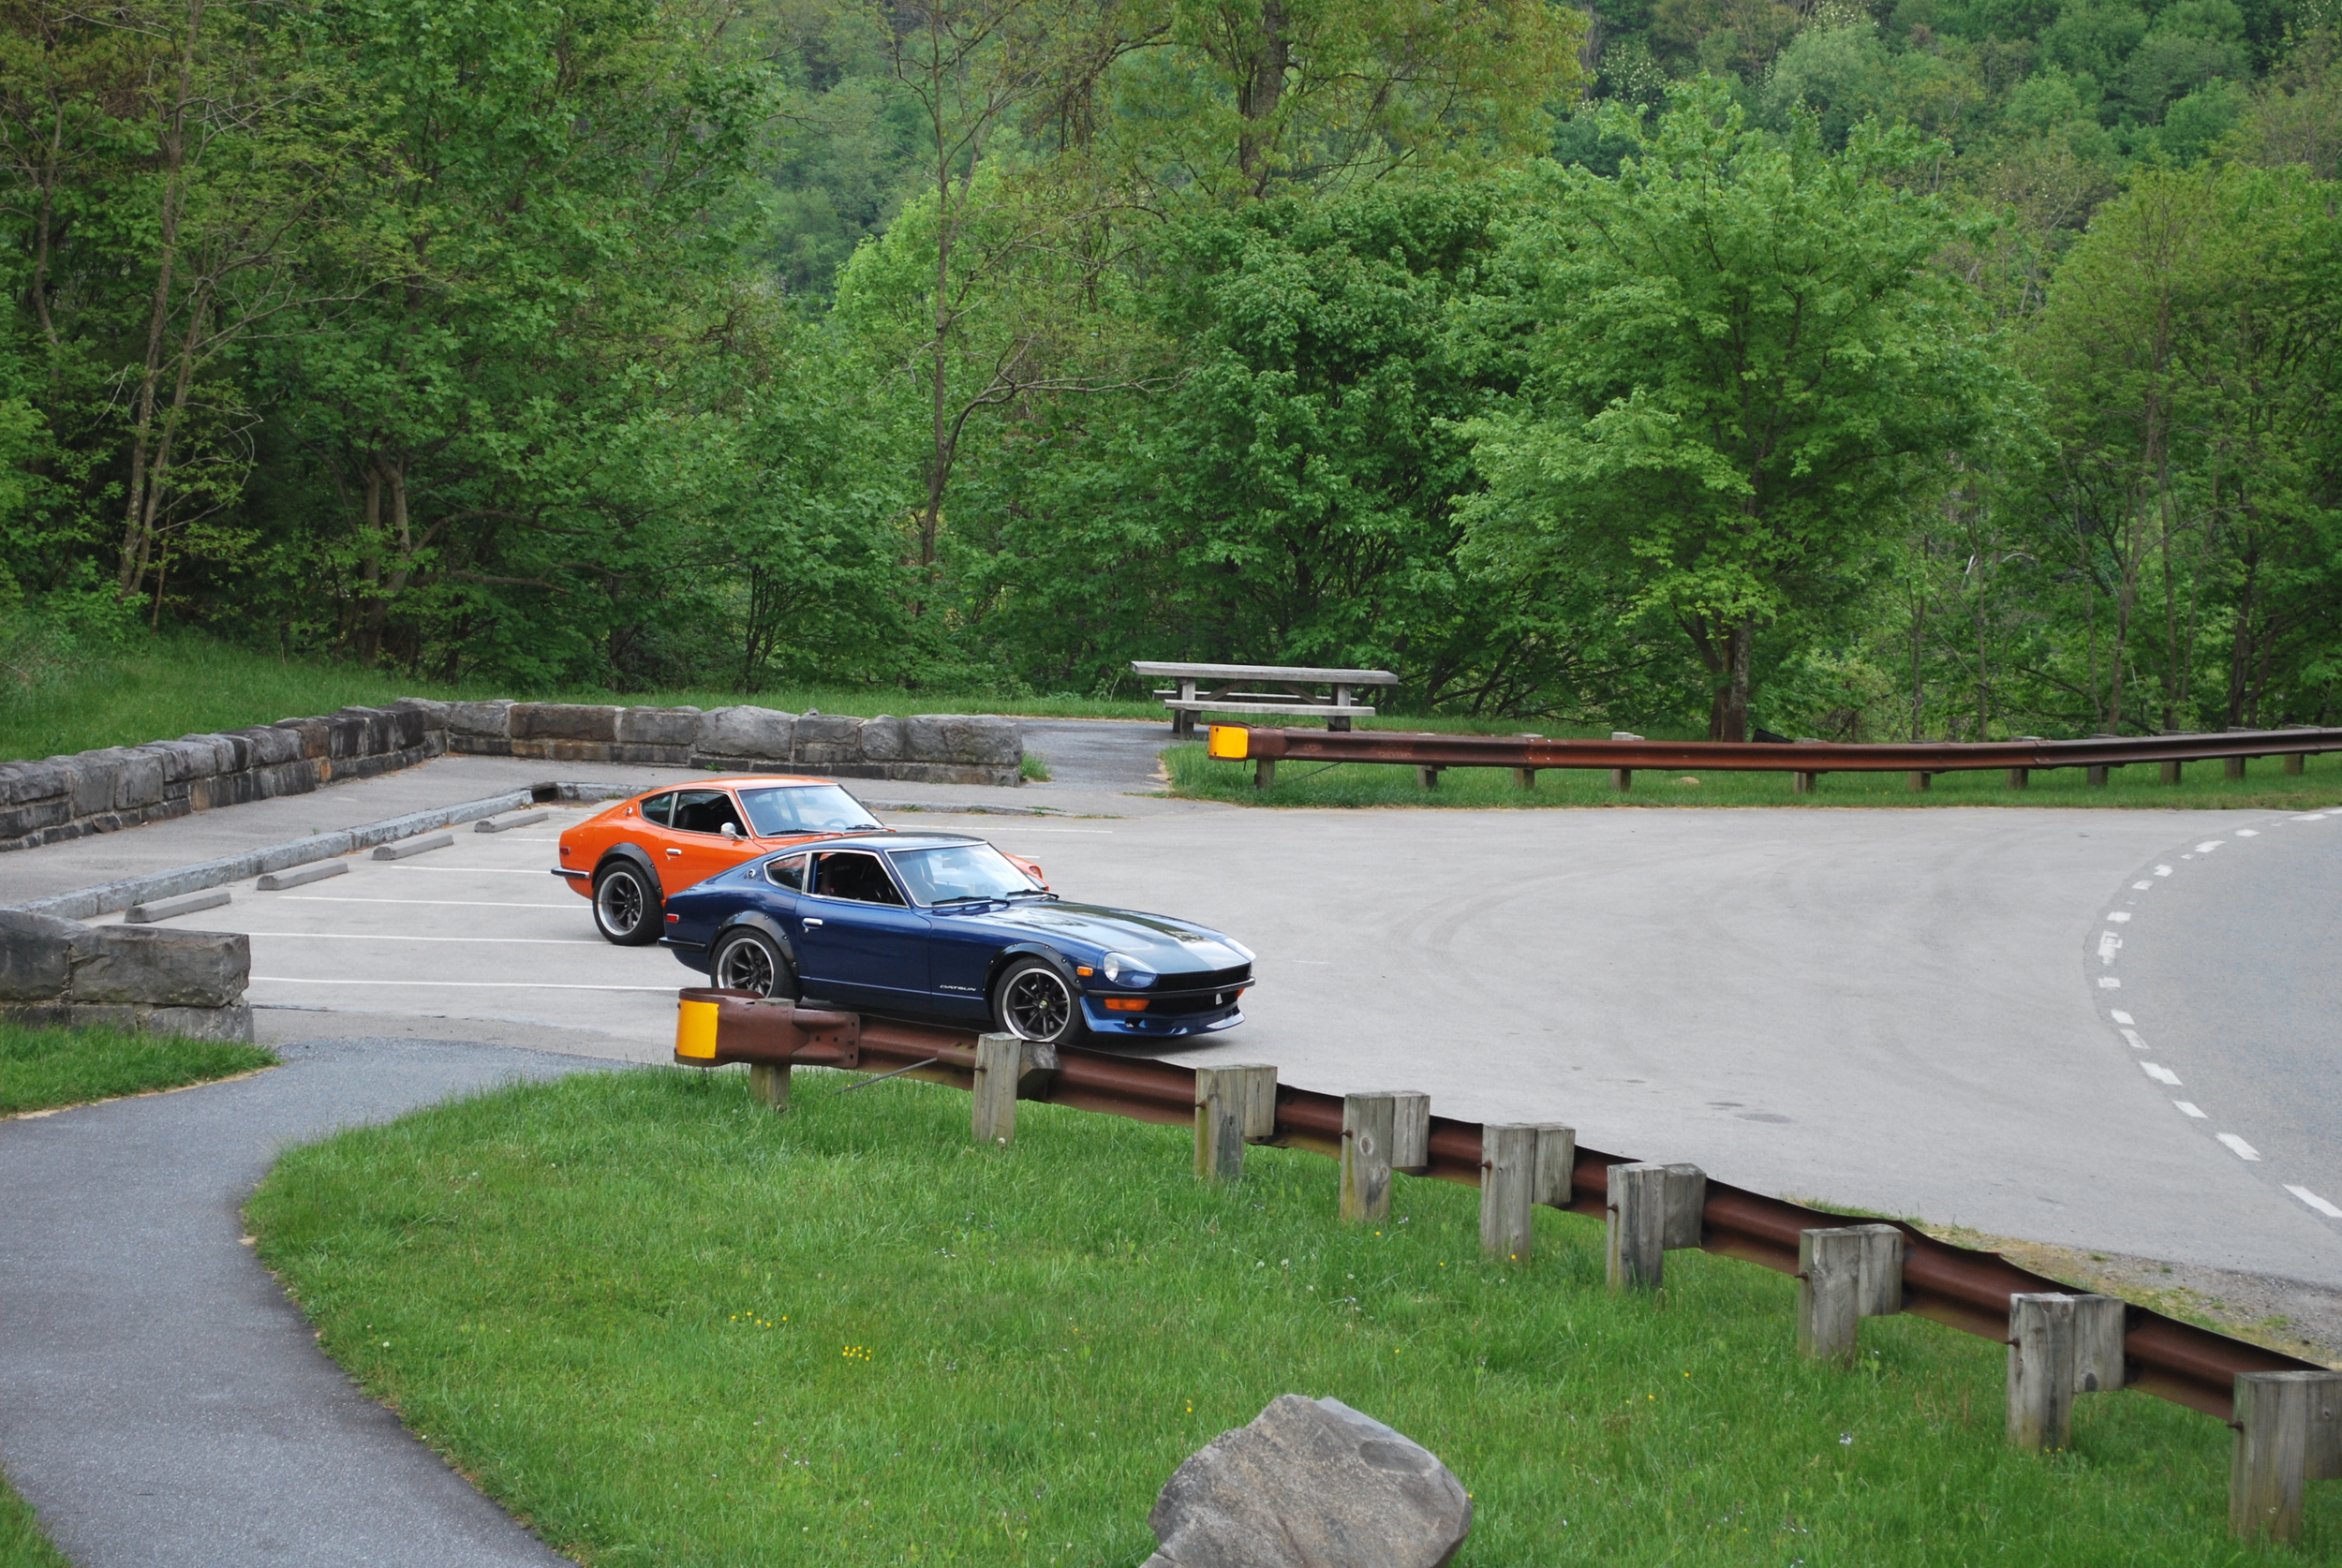
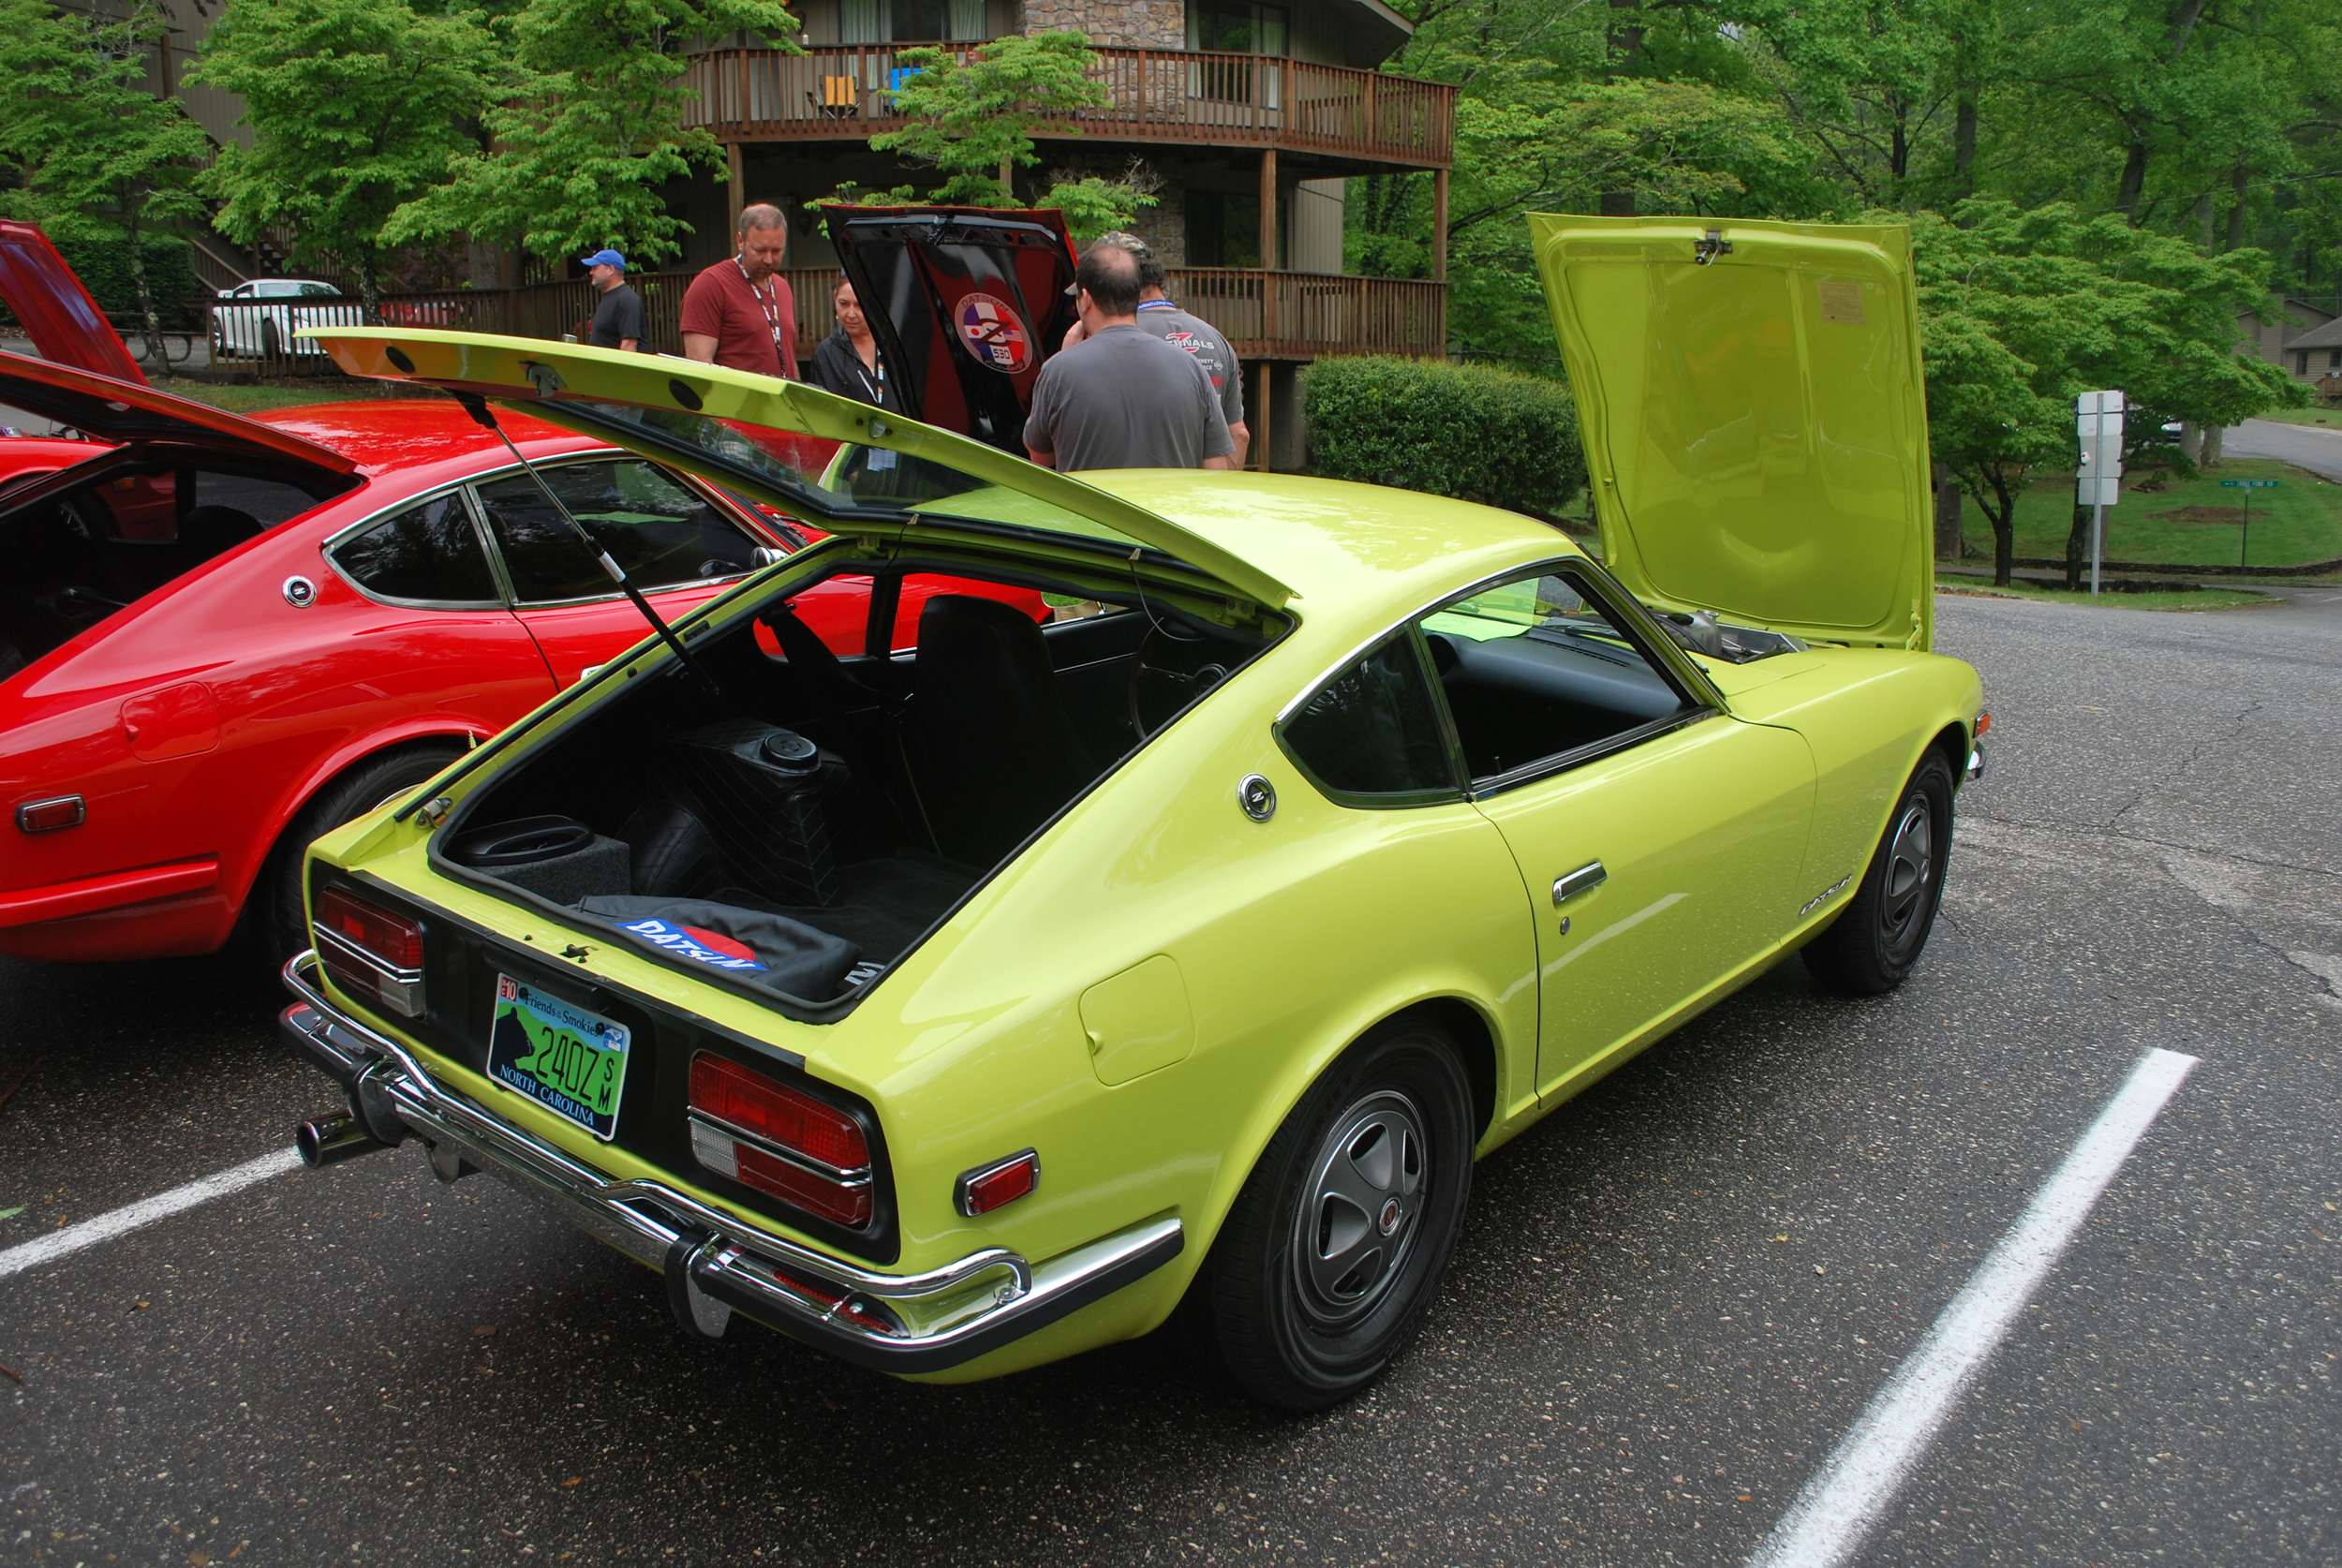
ZDayz 2013
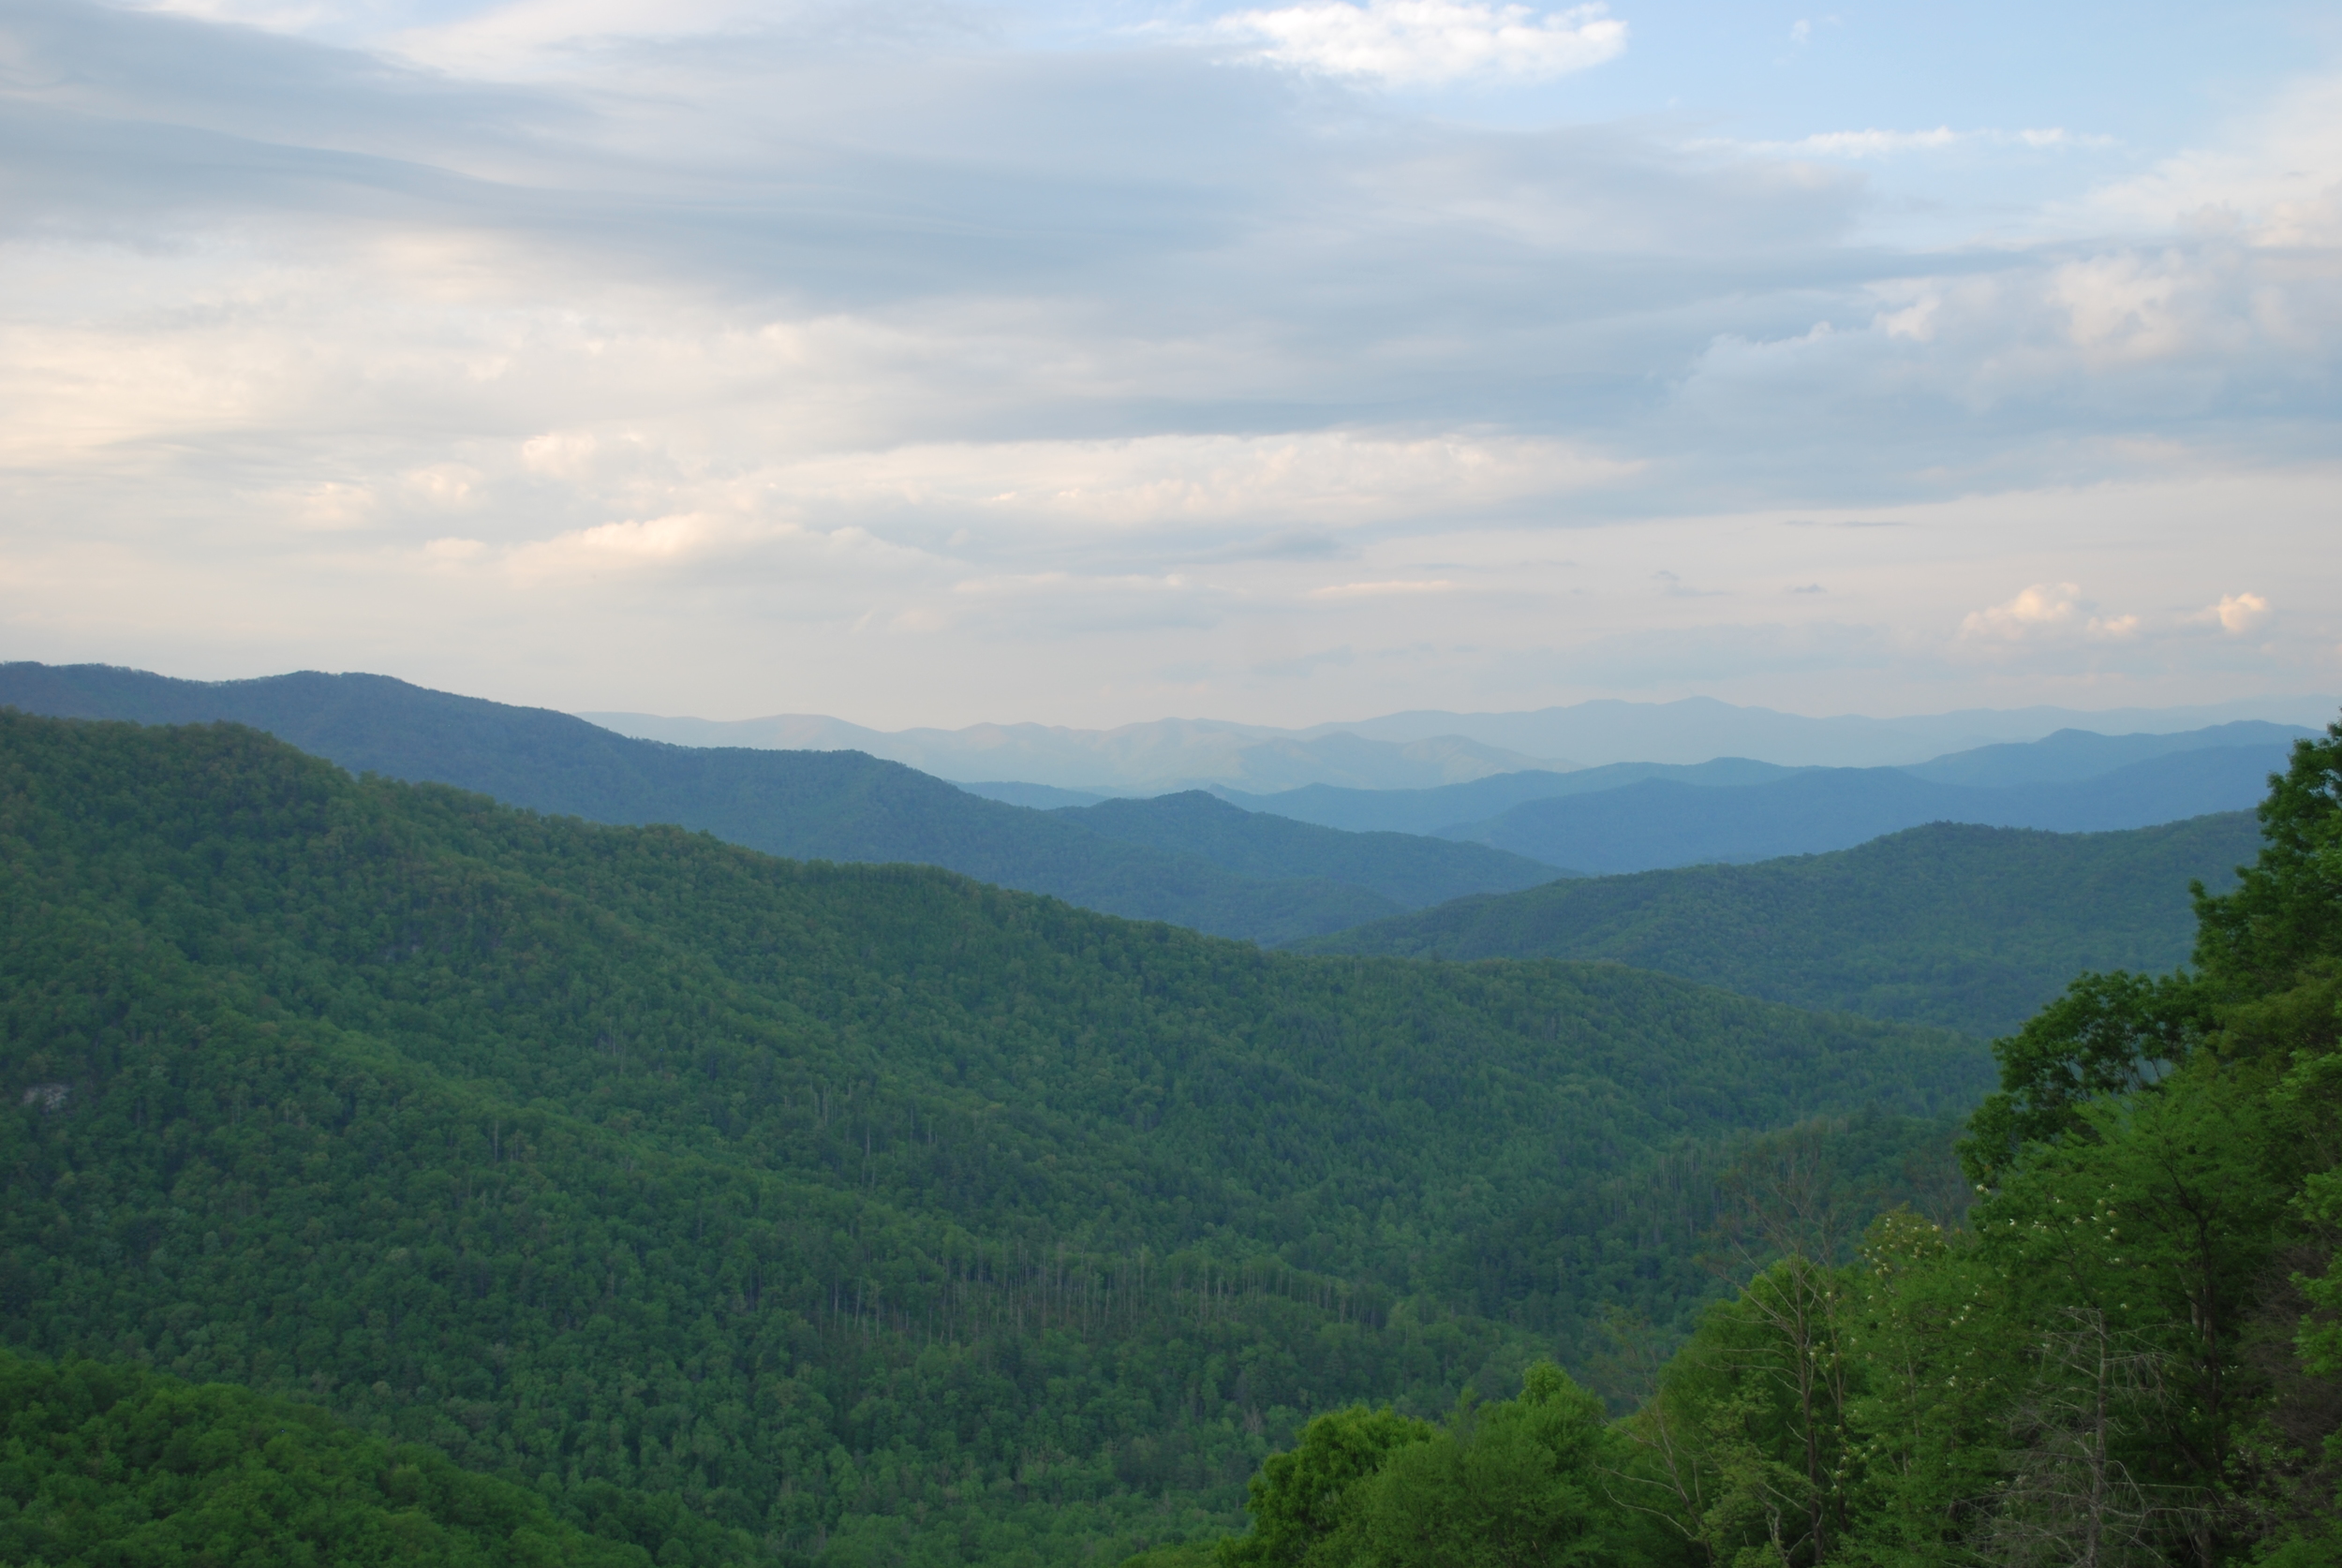
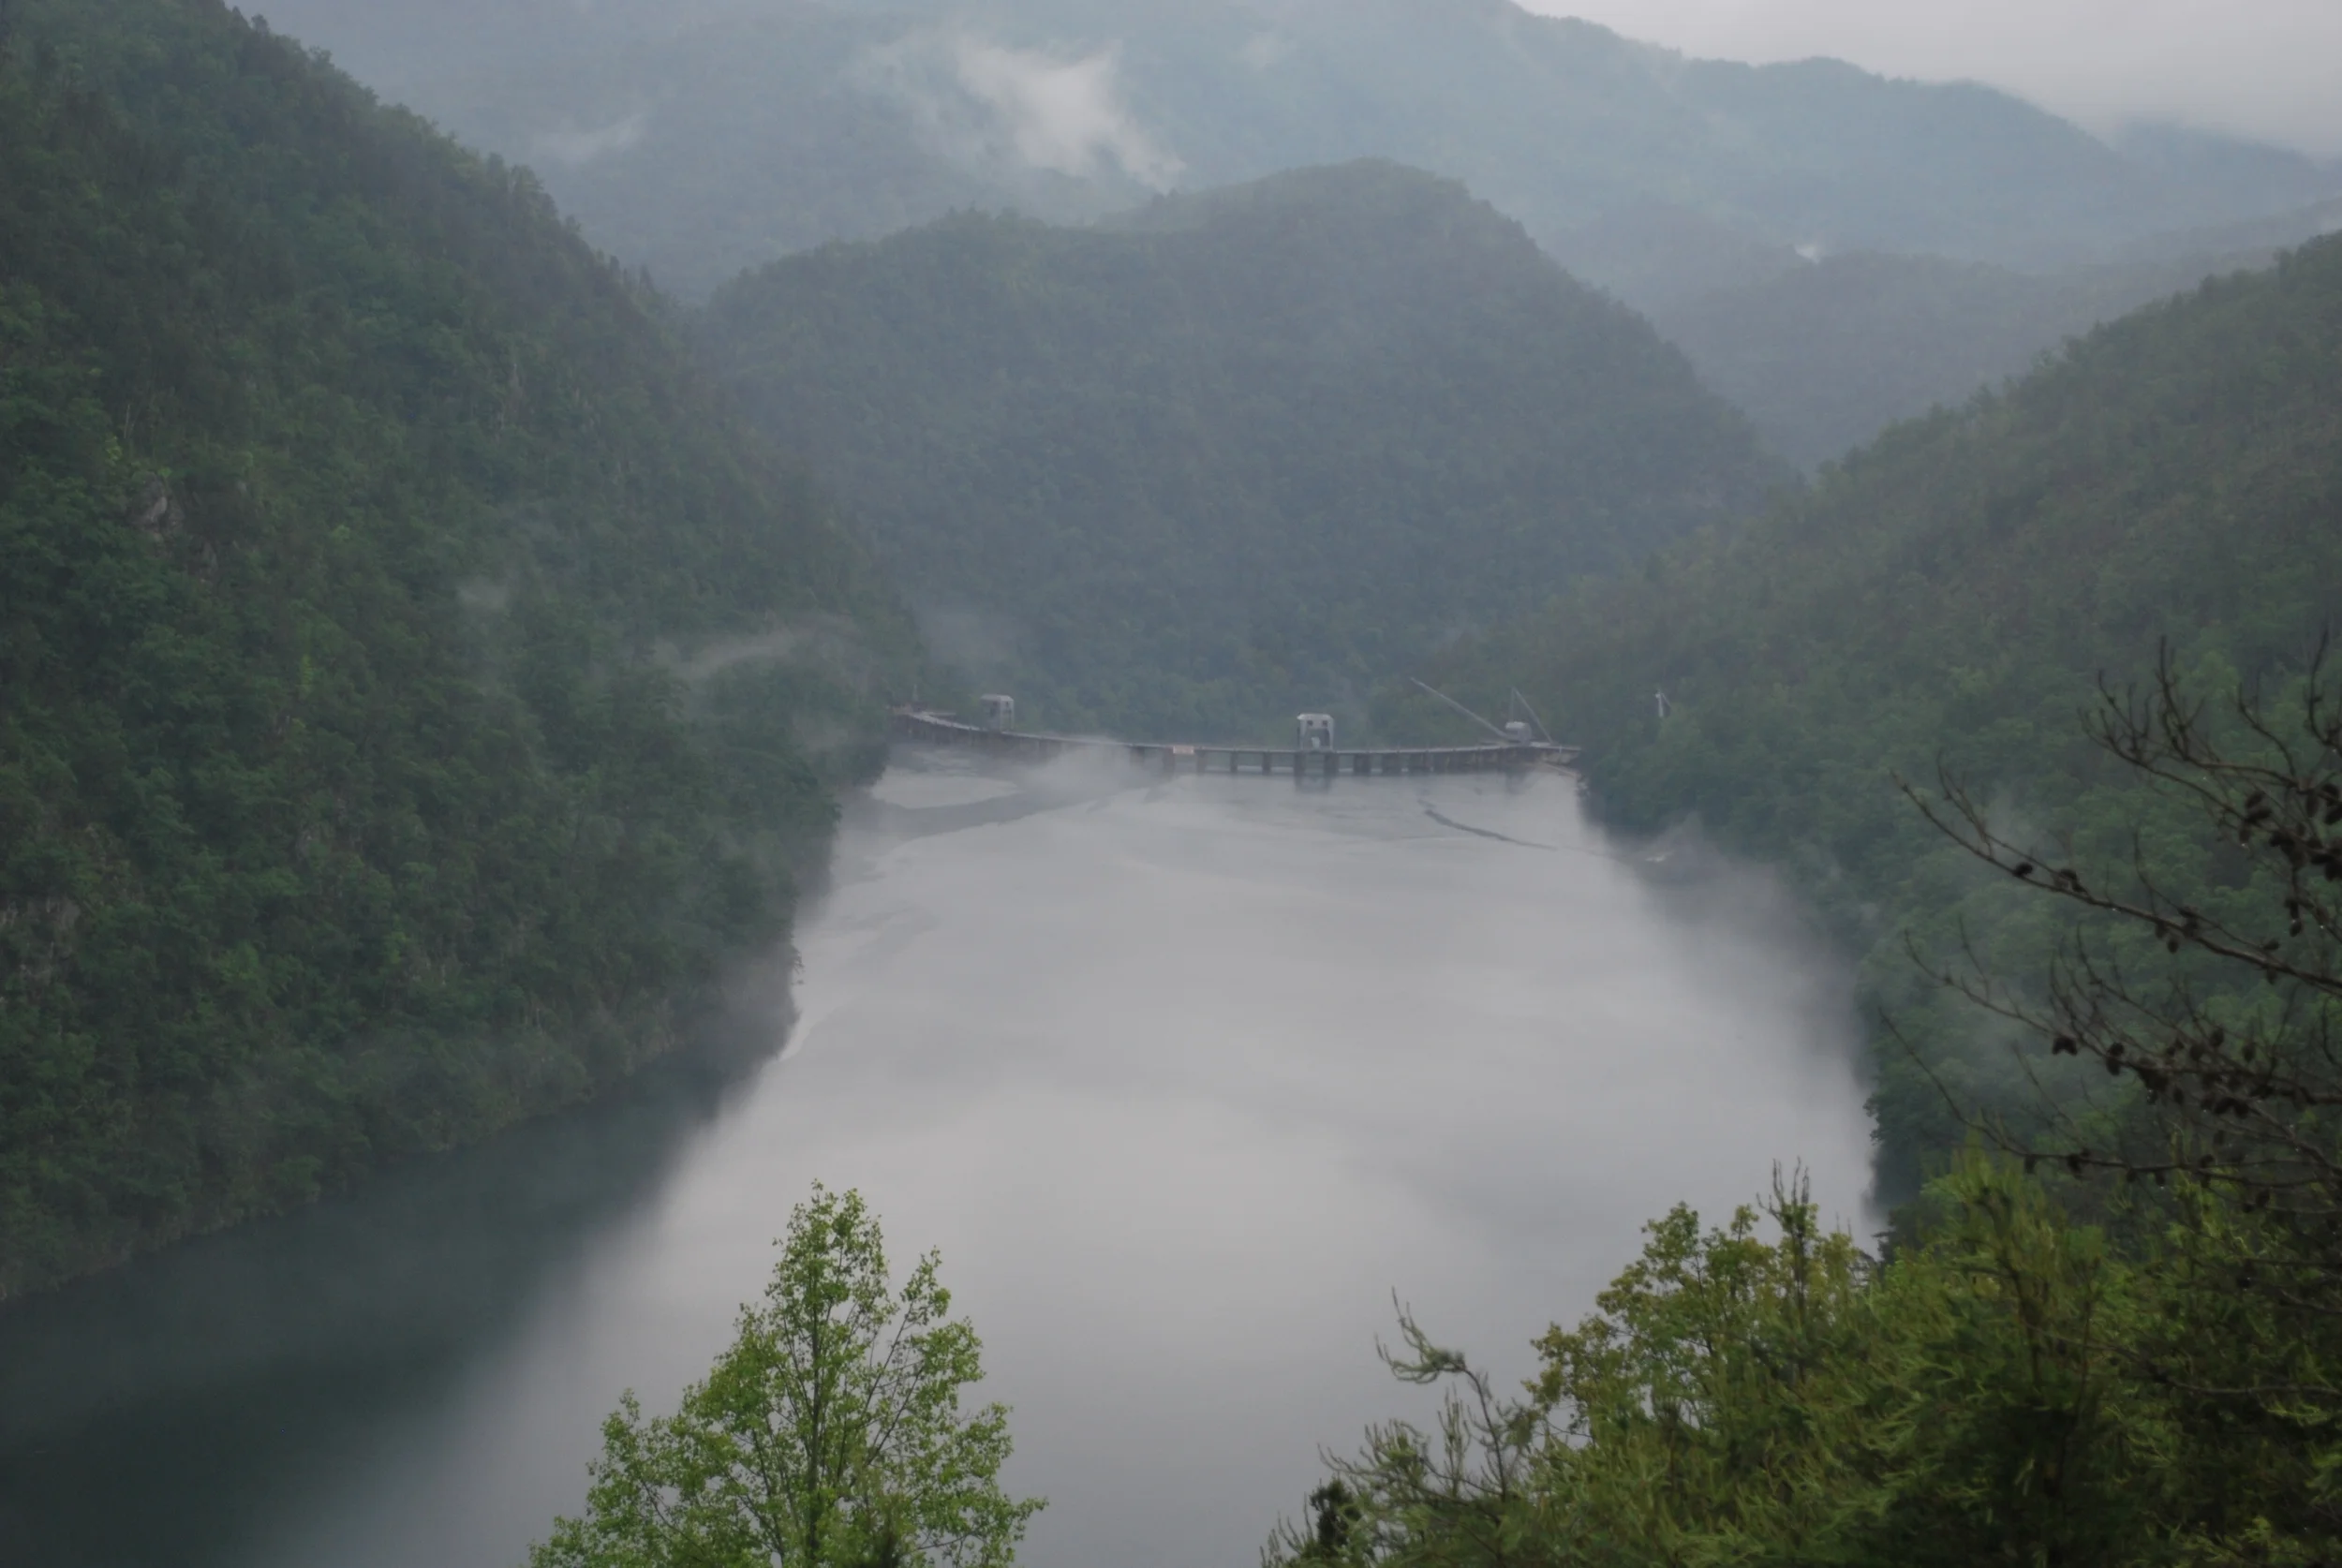
ZDayz is an AWESOME Z event based at Fontana Village on the border of NC and Tennesee. HWY 129, also known as the 'Tail of the Dragon' is just a few miles away, along with hundreds of amazing driving roads in the mountains. Matt and I took our cars up for a weekend of driving. It is always a great time and there are hundreds of awesome Z's and enthusiasts.
Prior to the event I went through the suspension to make sure everything was in top shape. The car got a new aluminum driveshaft, axle boots, poly bushings, and new balljoints and tie rods.
Here are a few pictures from the event:


I made the mistake of giving Matt a ride down the Dragon in my VQ240z and letting him drive it. After living with the cold natured and somewhat raw carbureted V8 Matt was bit with the modern bug. I got a call a few days after the event saying that he had bought a LS2 drop out from a GTO and wondered how fast I could pull out the old engine to sell it!
Electrical and Interior Restoration - Part 2
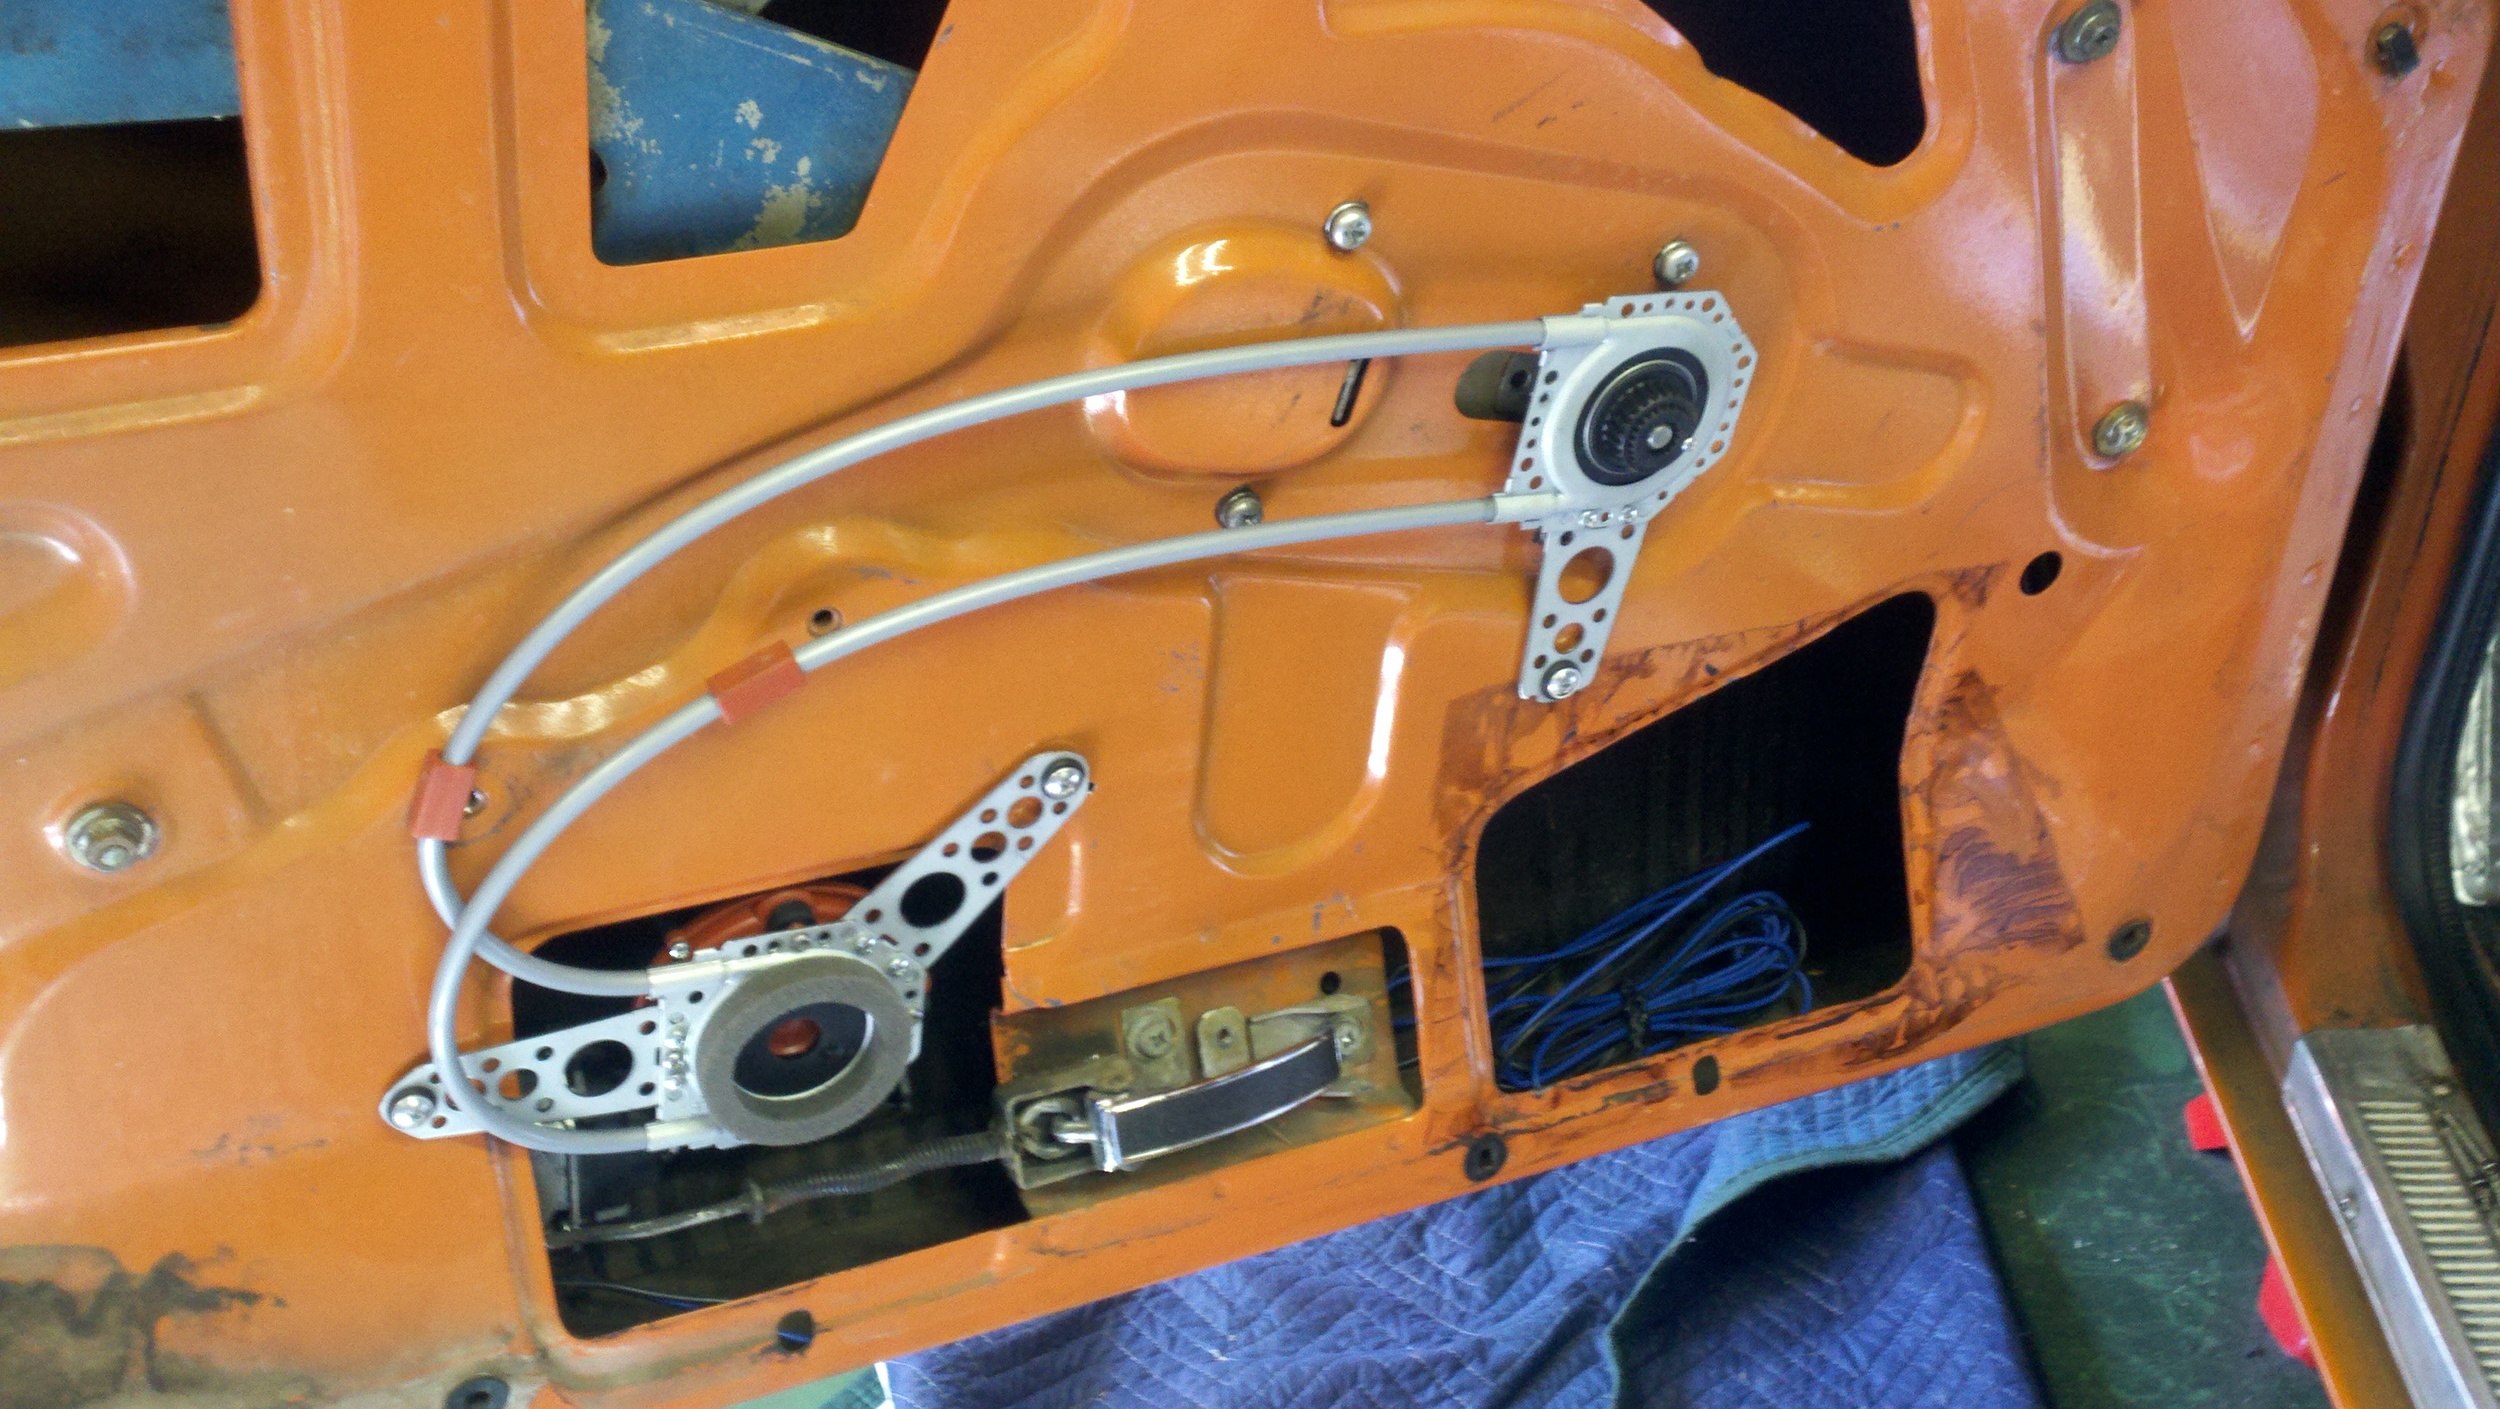
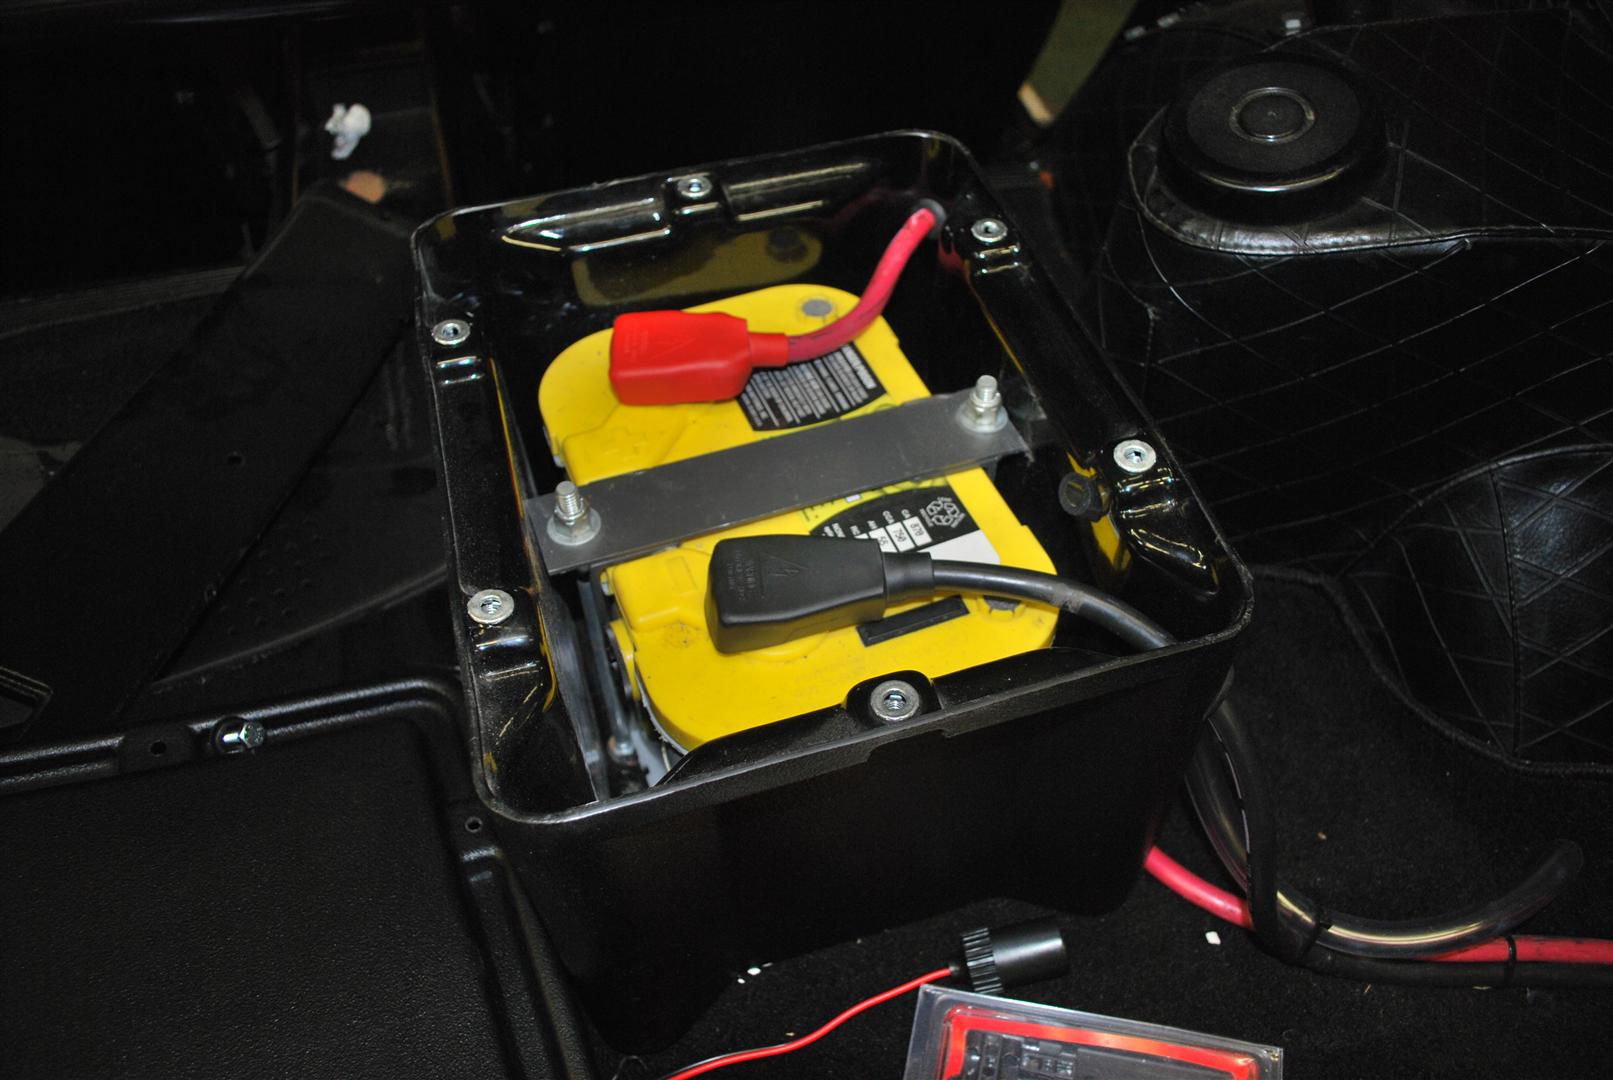
With the floors fixed and ready to go attention was turned back to the wiring. We decided to go with an American Autowire 13 Circuit kit. I have used several different wiring harnesses in the past as the base for a rewire. For the money the American Autowire kit is OK, but it doesn't compare to a Painless kit in terms of part and wire quality. Both take a lot of work to install well!
I wanted this installation to be very easy to service so a good bit of thought went into the wire routing. New vintage style locking connectors were used in the interior, and Deutsch DTM series were used in the engine bay and underneath the car.
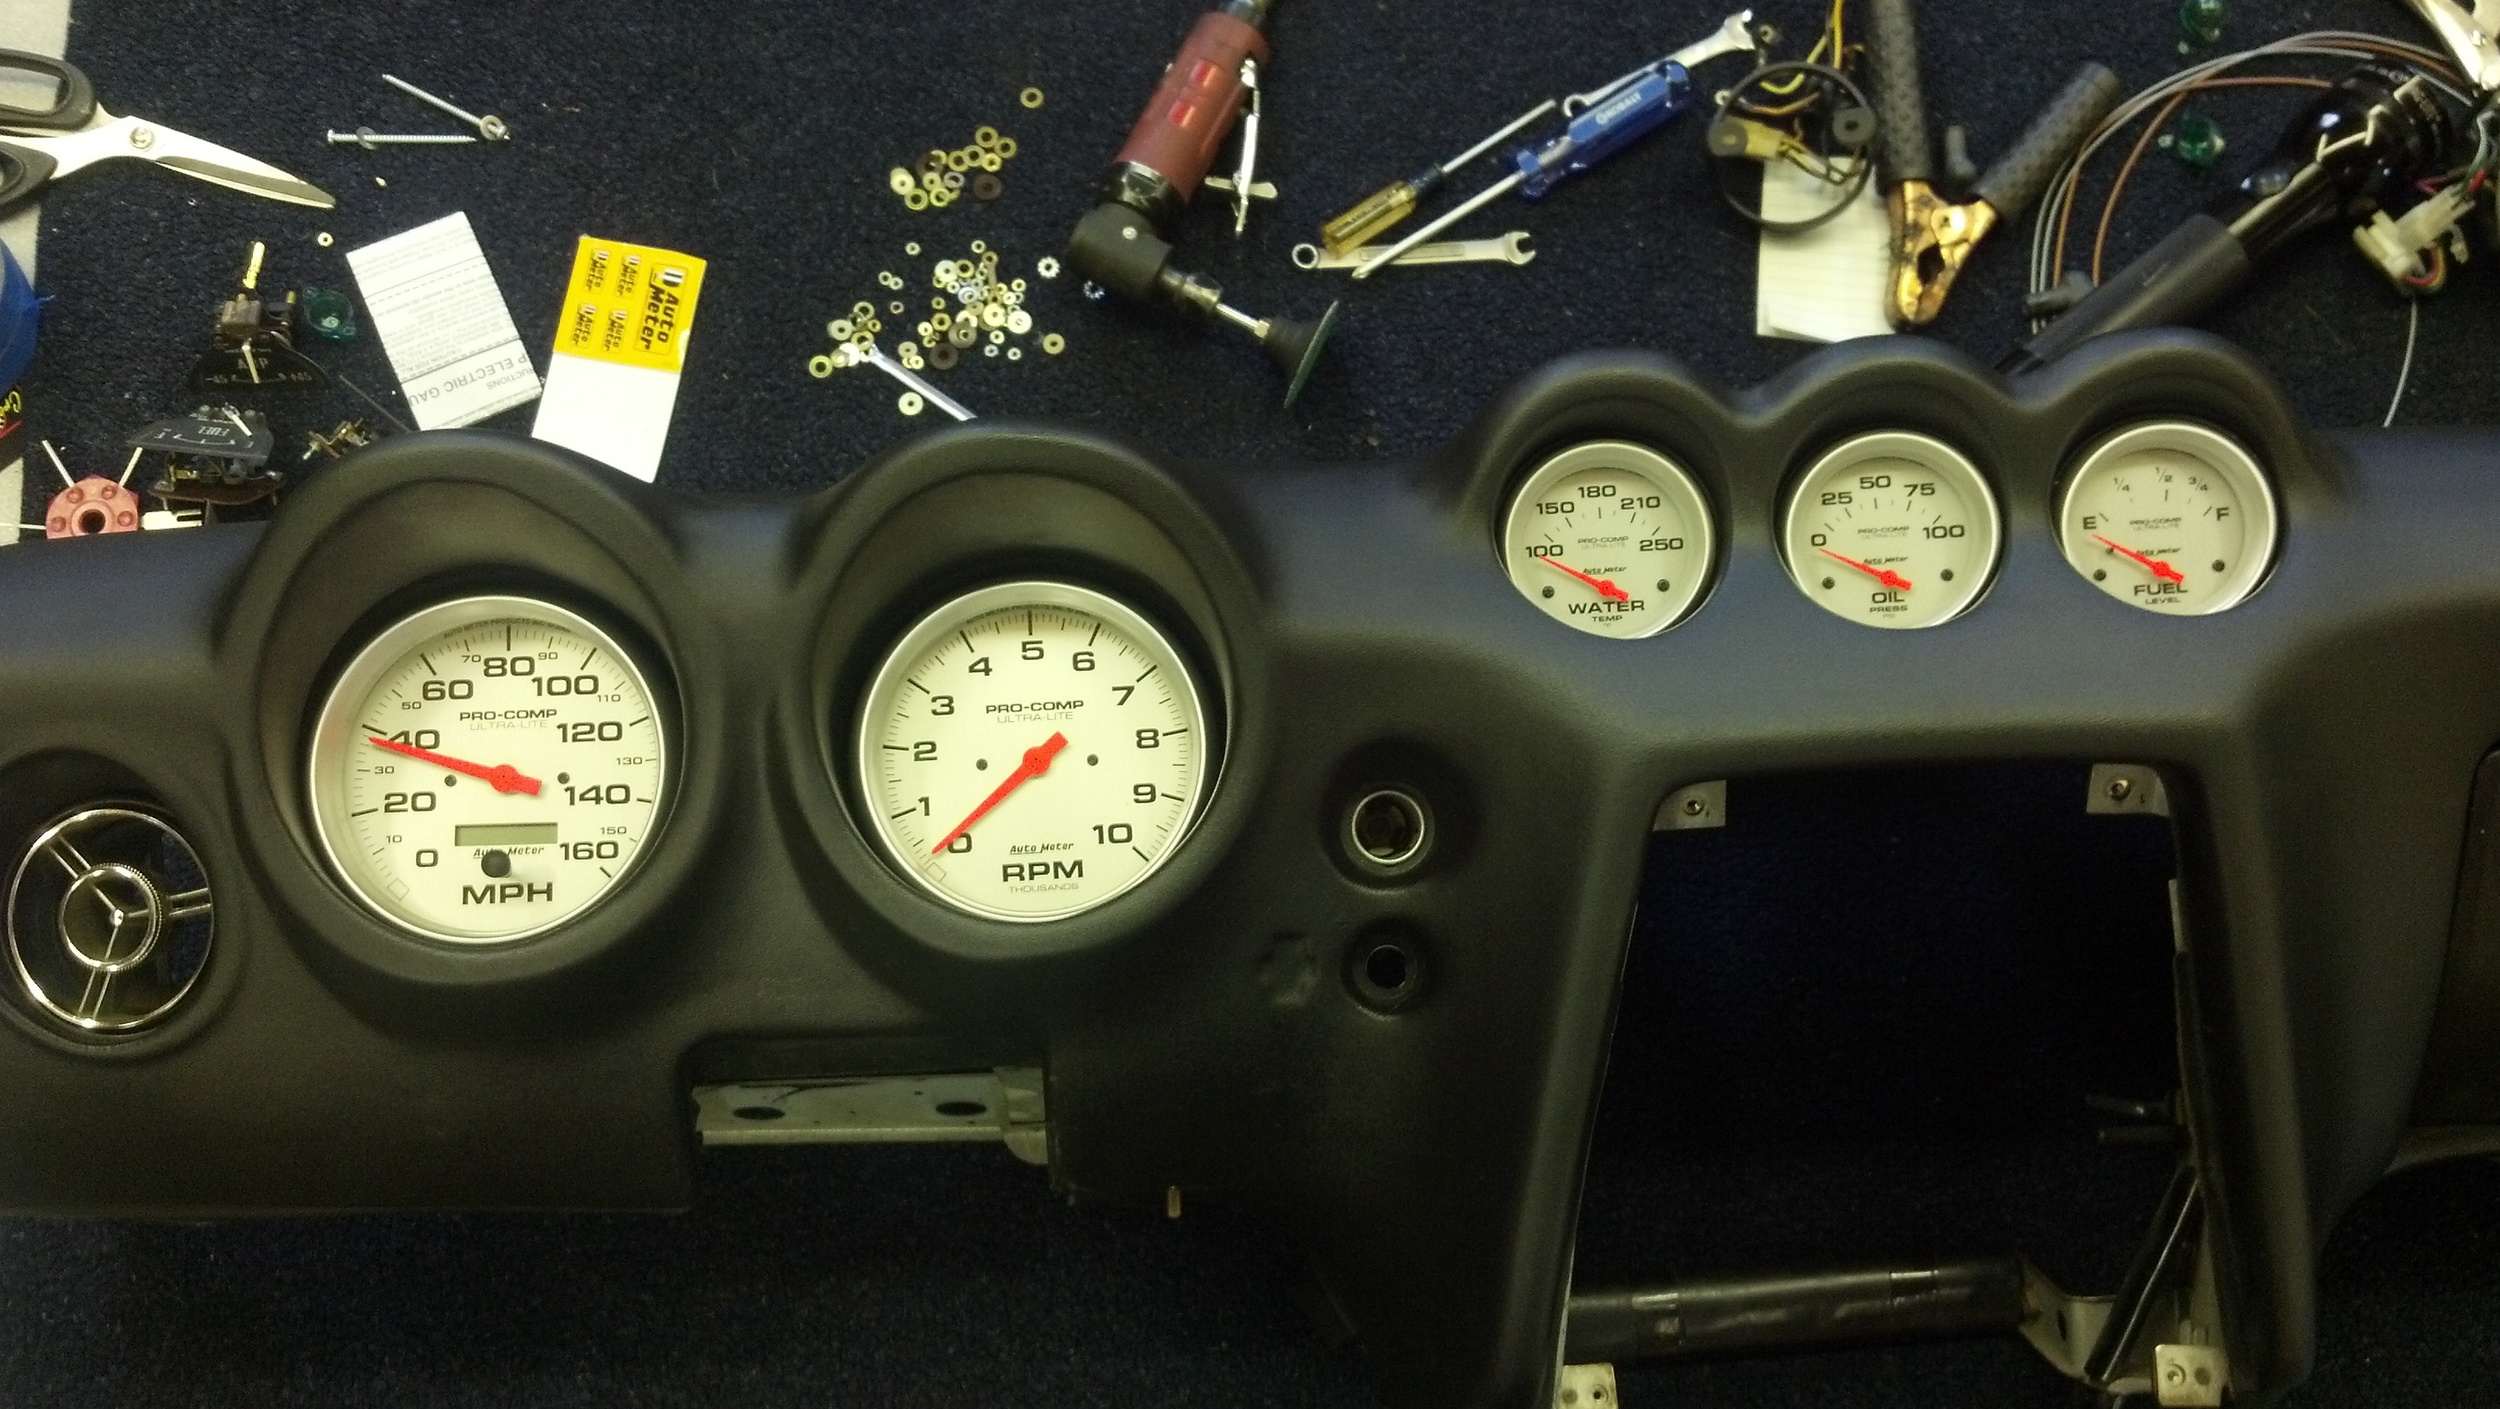
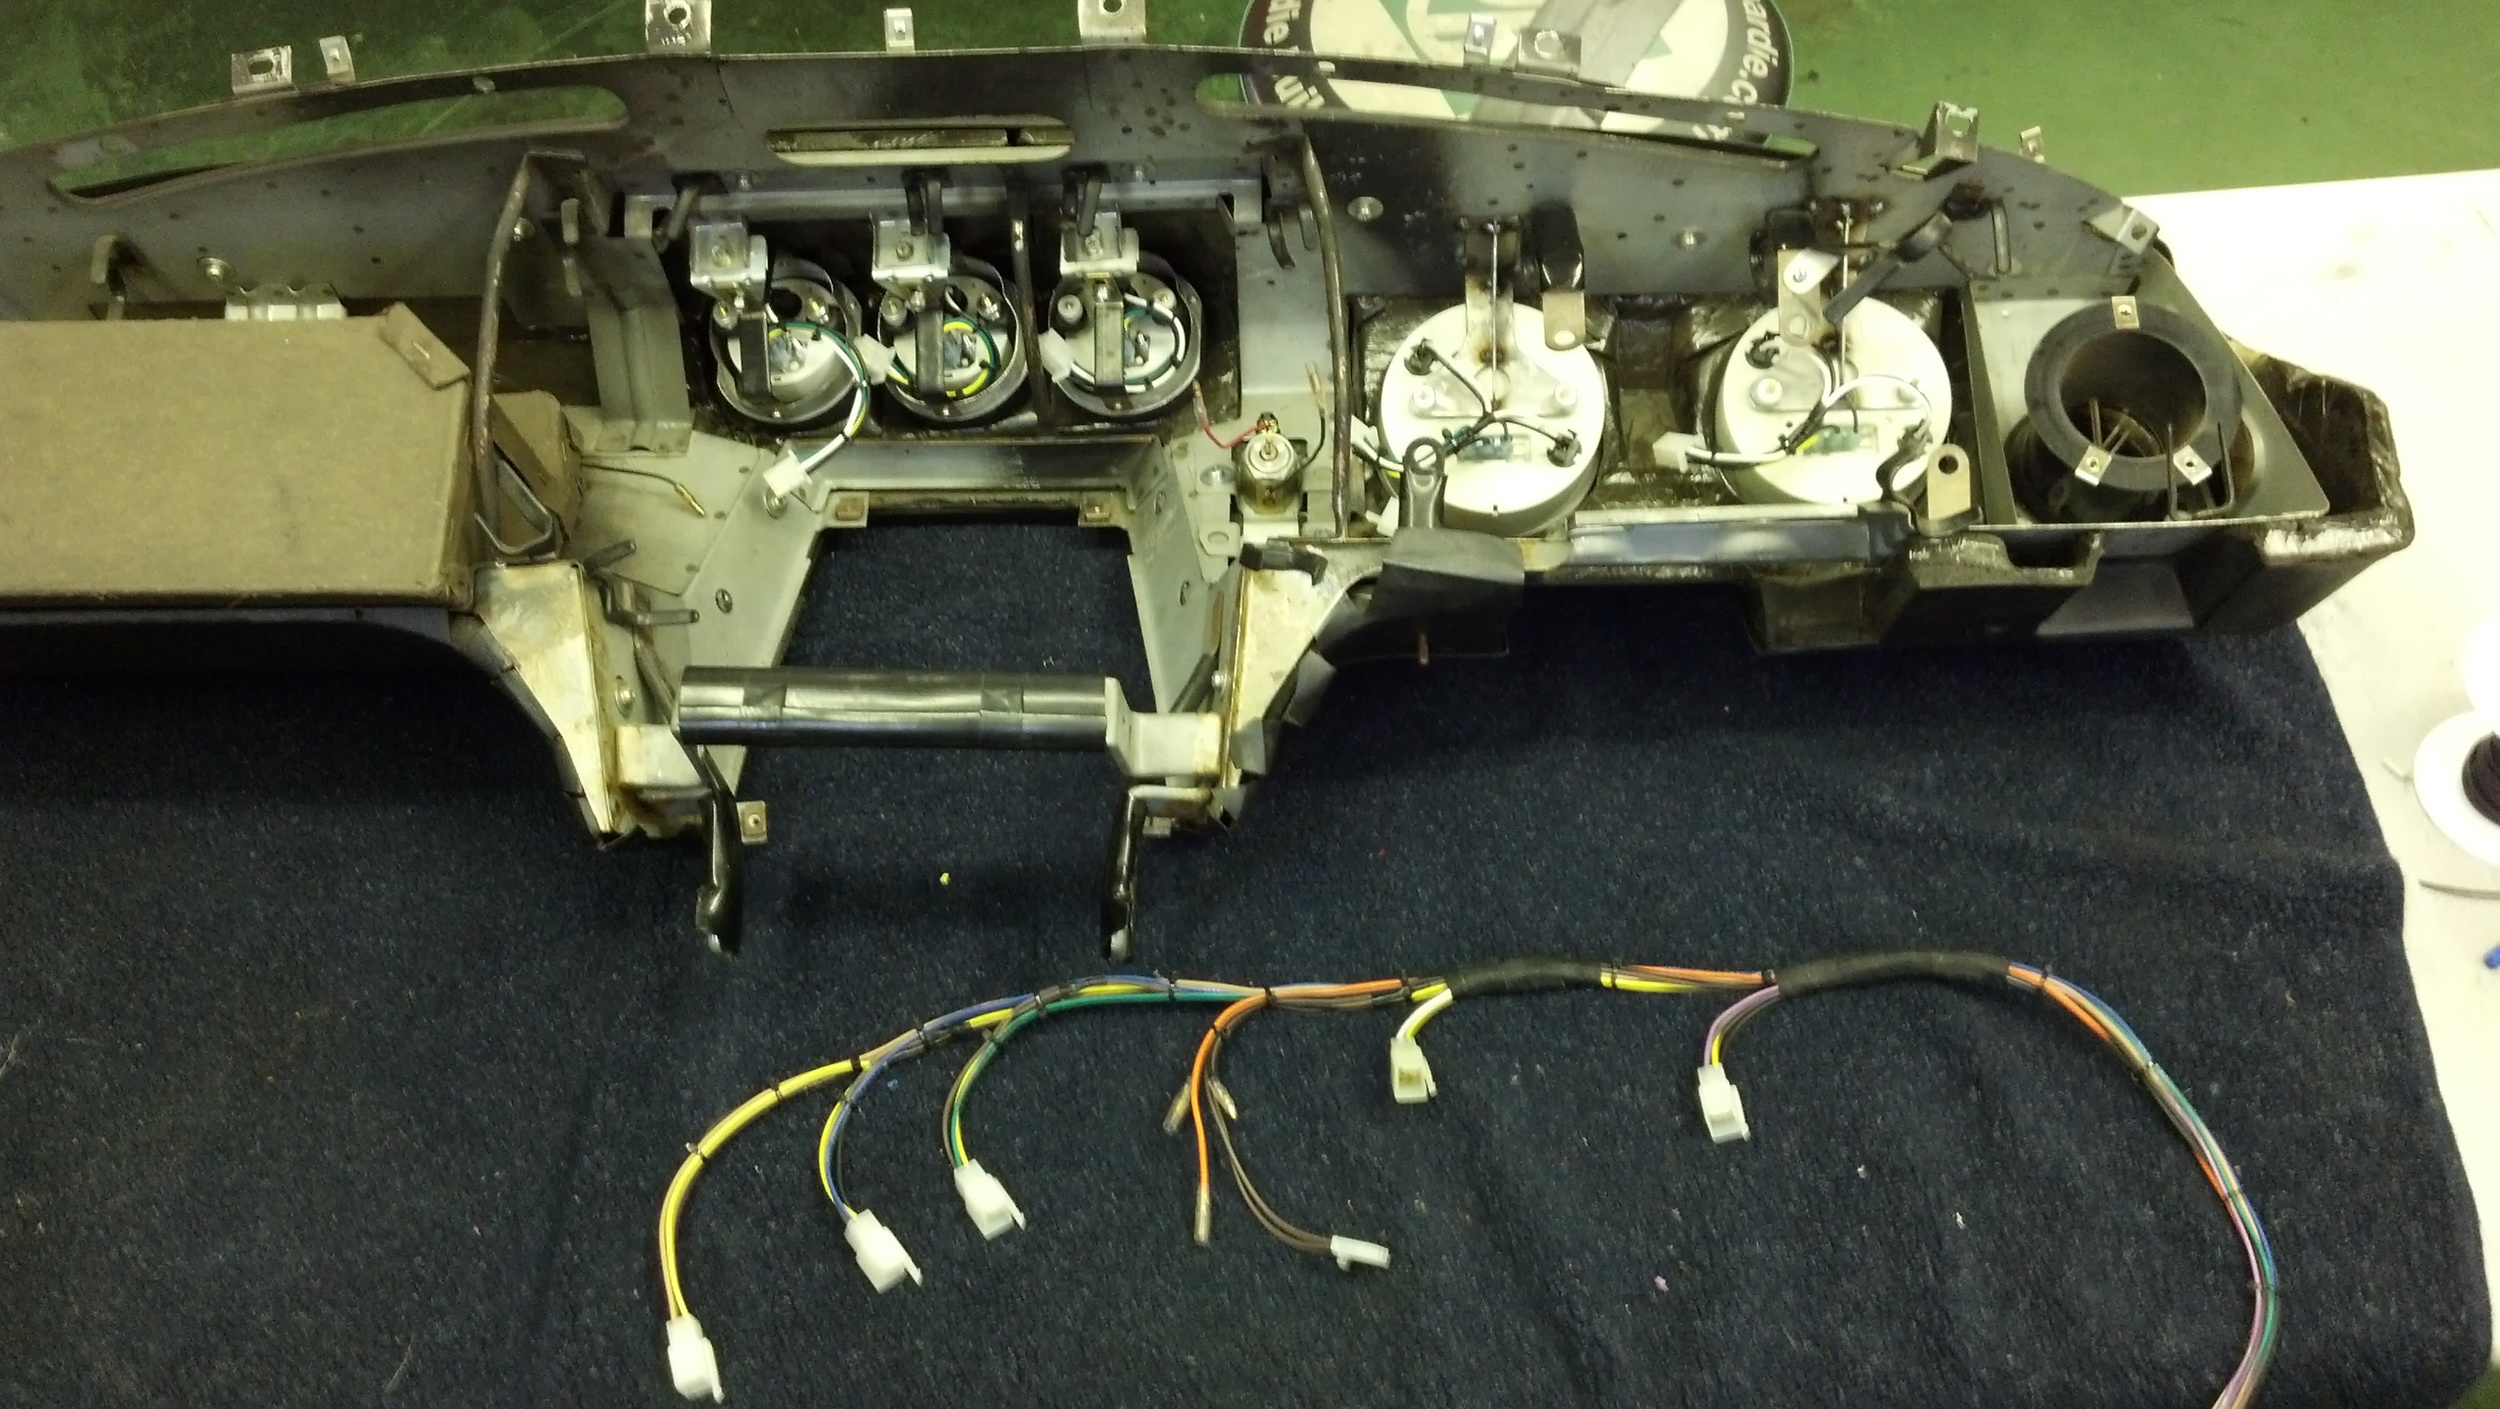
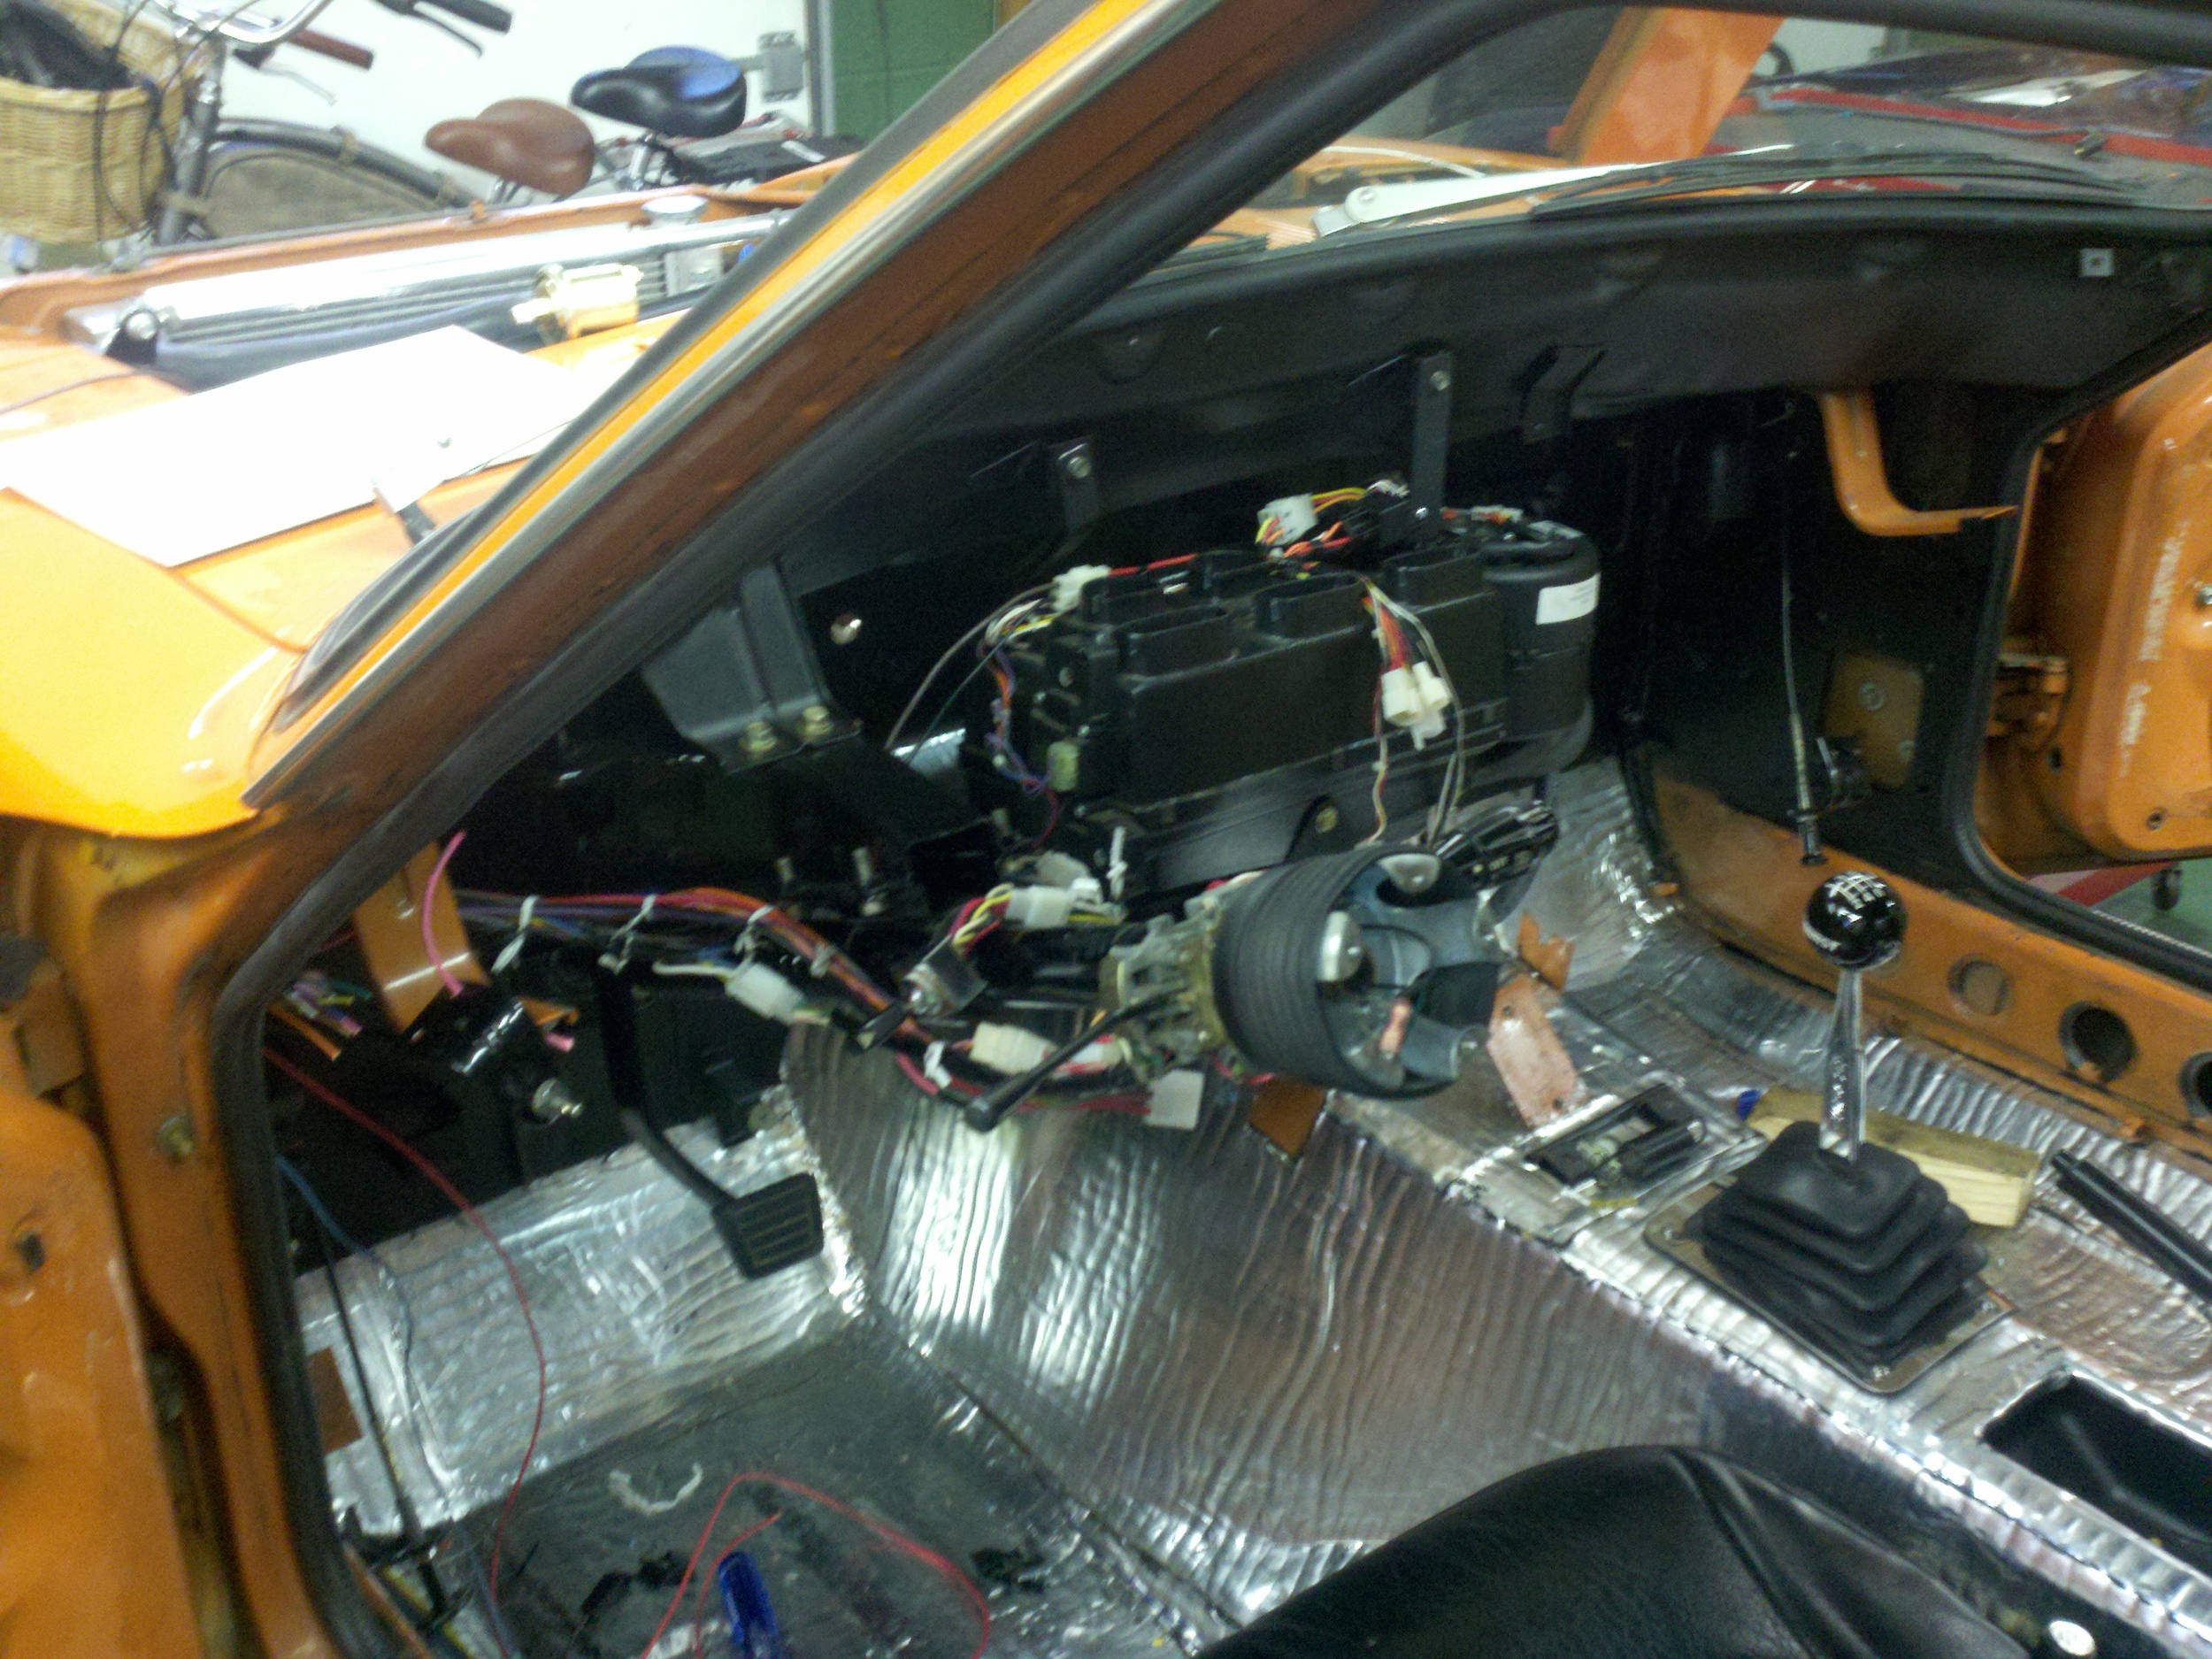
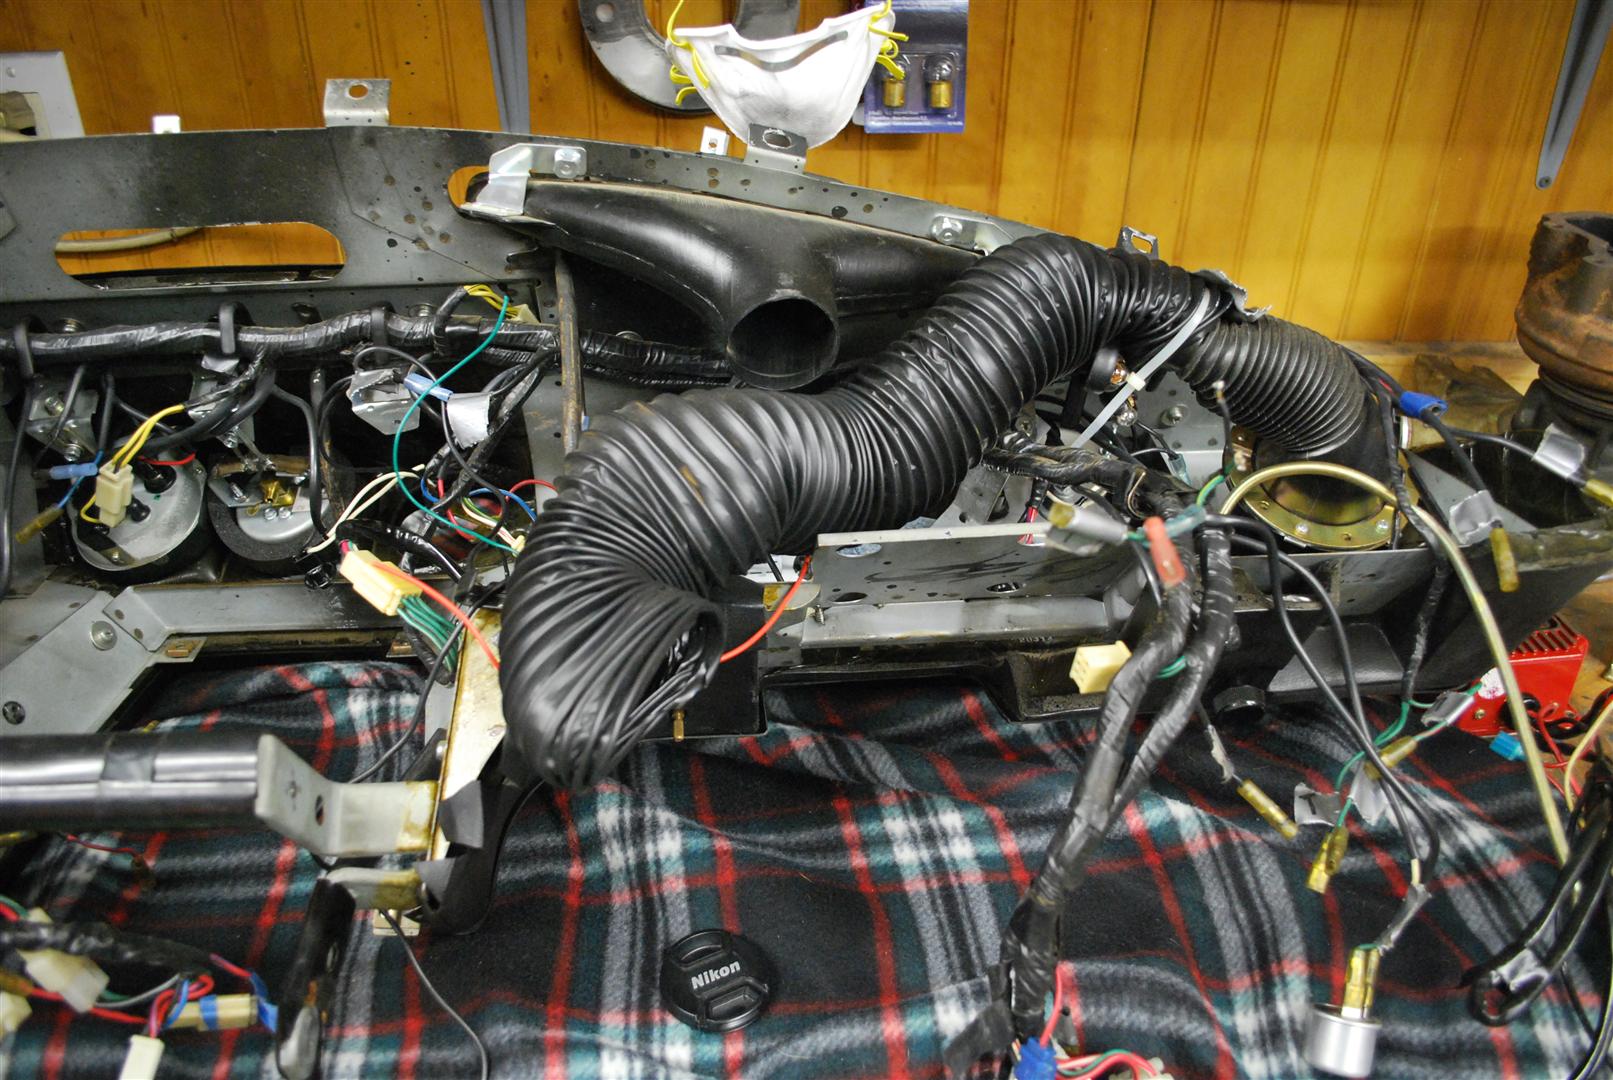
I started with the dash which received its own sub harness, separate from the HVAC and steering column. Each gauge also received a small sub harness and connector to allow for easy removal without requiring nuts and ring terminals to be disconnected. Gauges are Autometer UltraLites, 5" for the speedo and tach, 2 5/8" for the center gauges. The OE gauge housing were used in the center gauges with the rear sections cut out, this make for an easy installation using the factory hardware. Brackets were fabricated for the tachometer and speedometer and tack welded to the dash frame. The dash was given final touch with Duplicolor vinyl die giving it a new look.
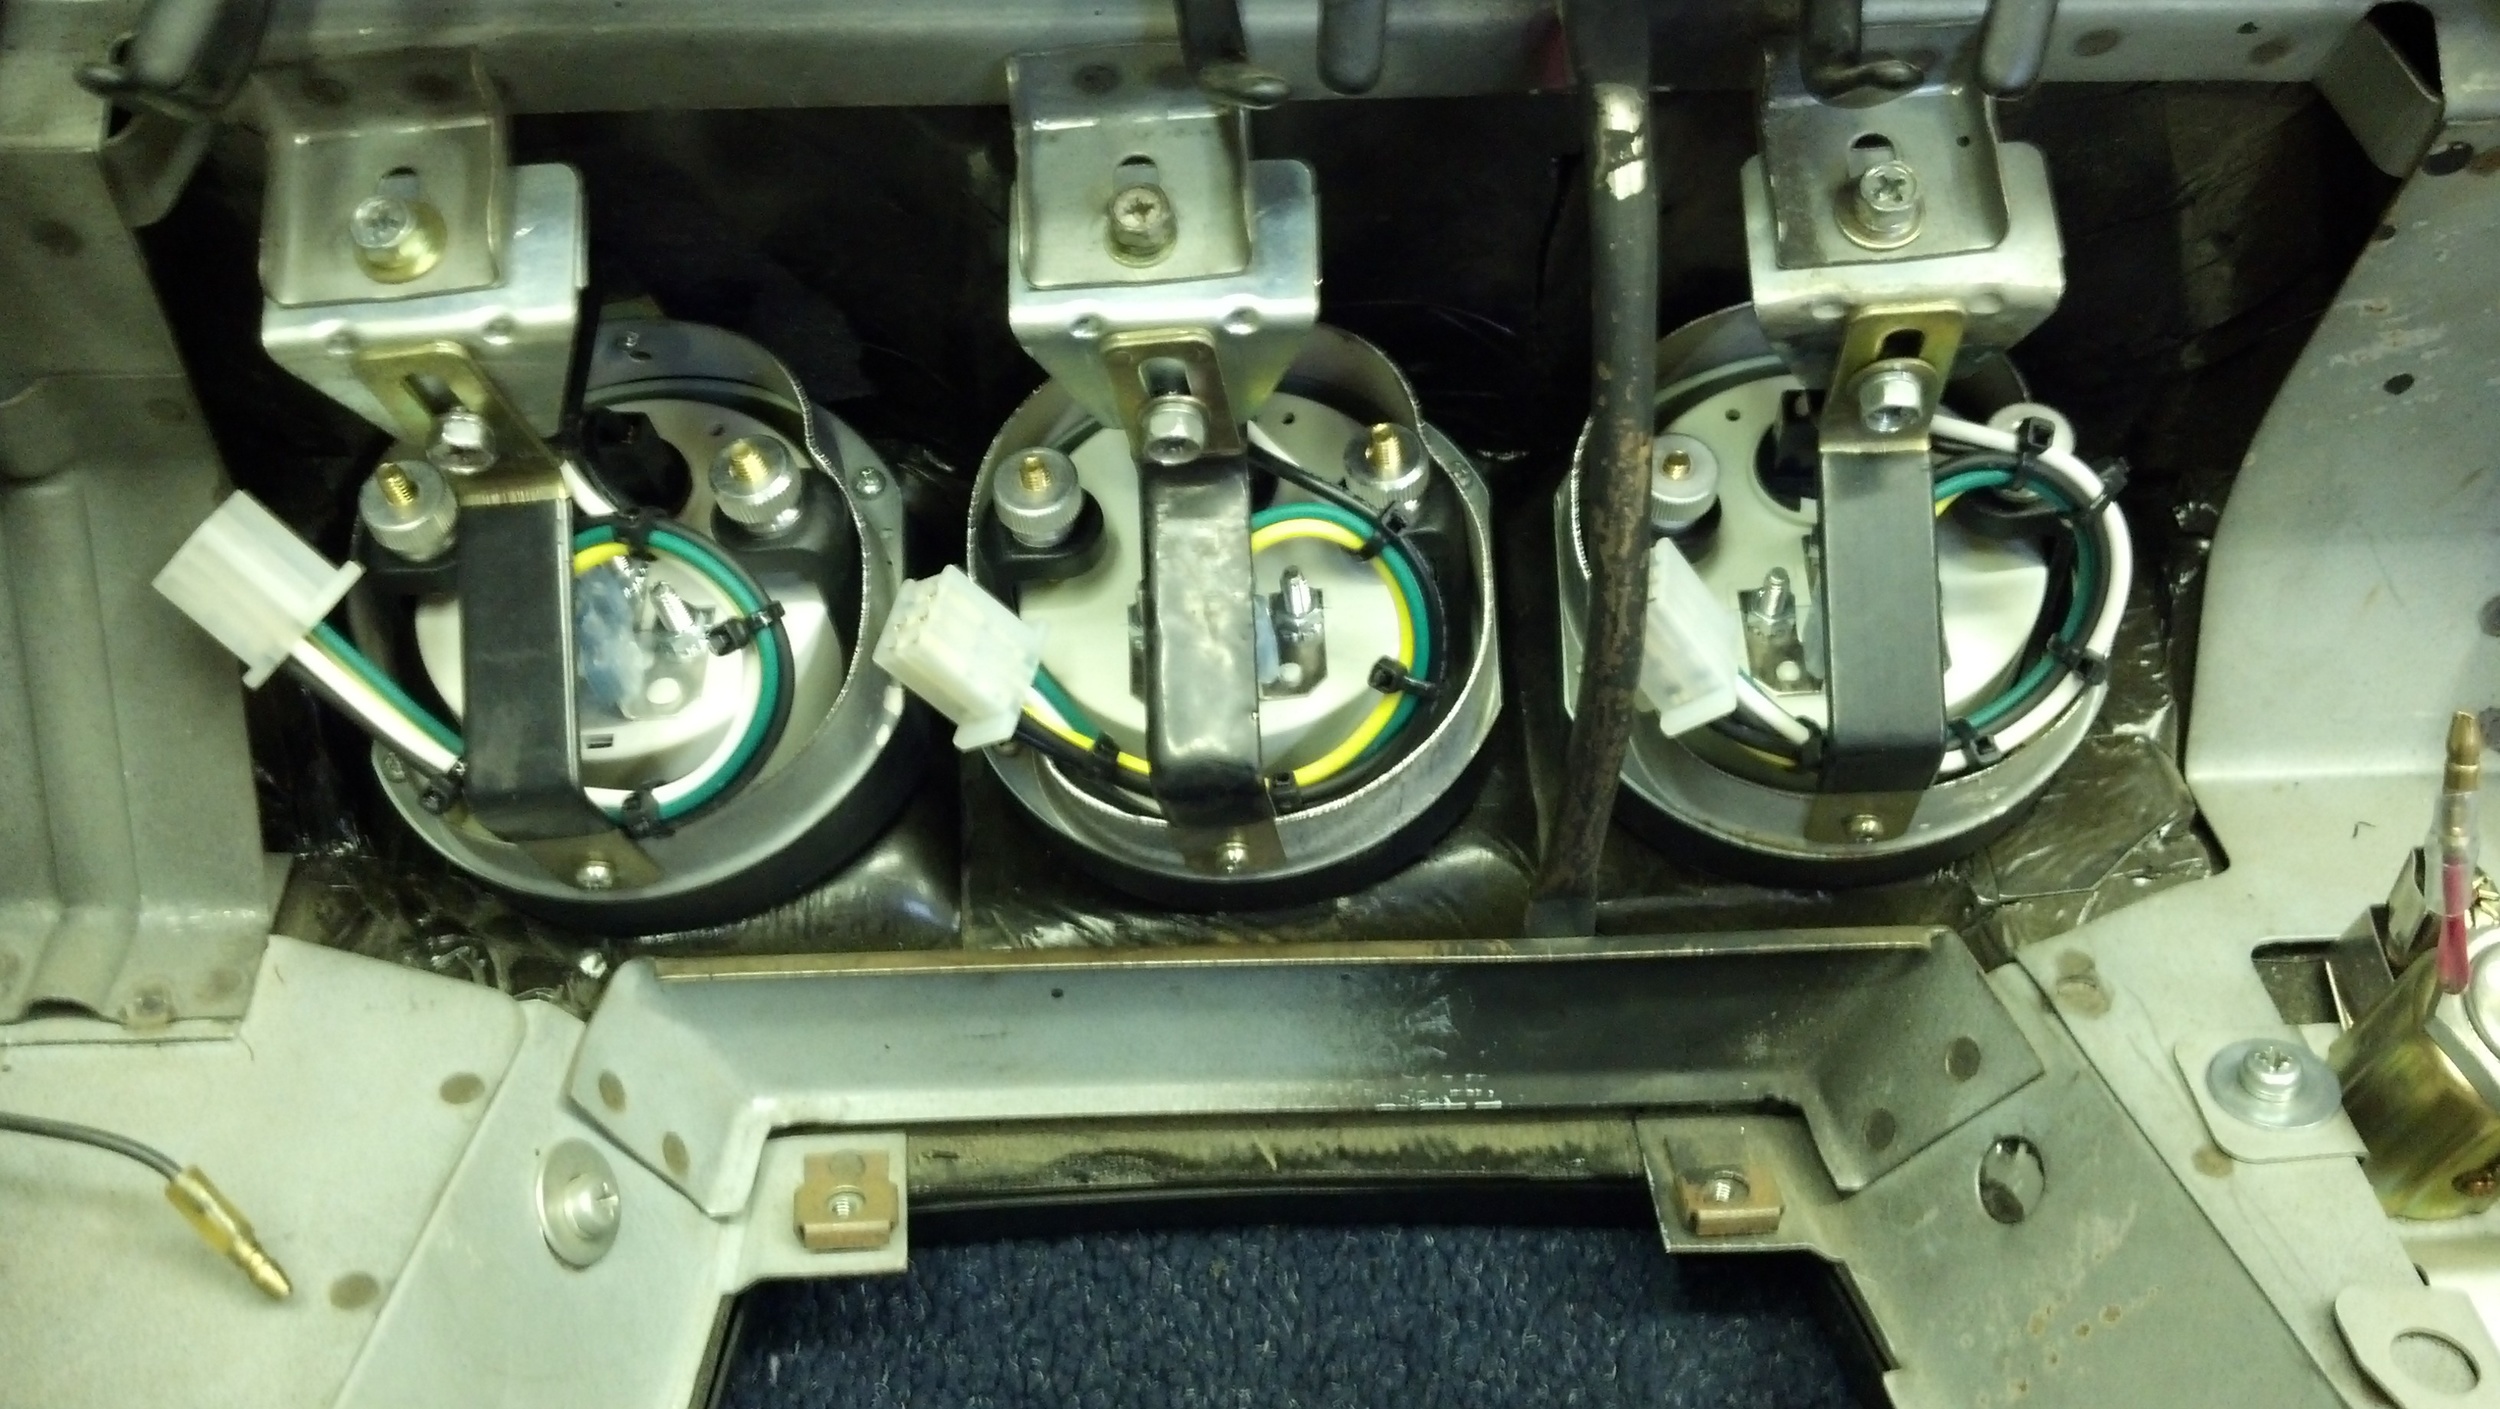
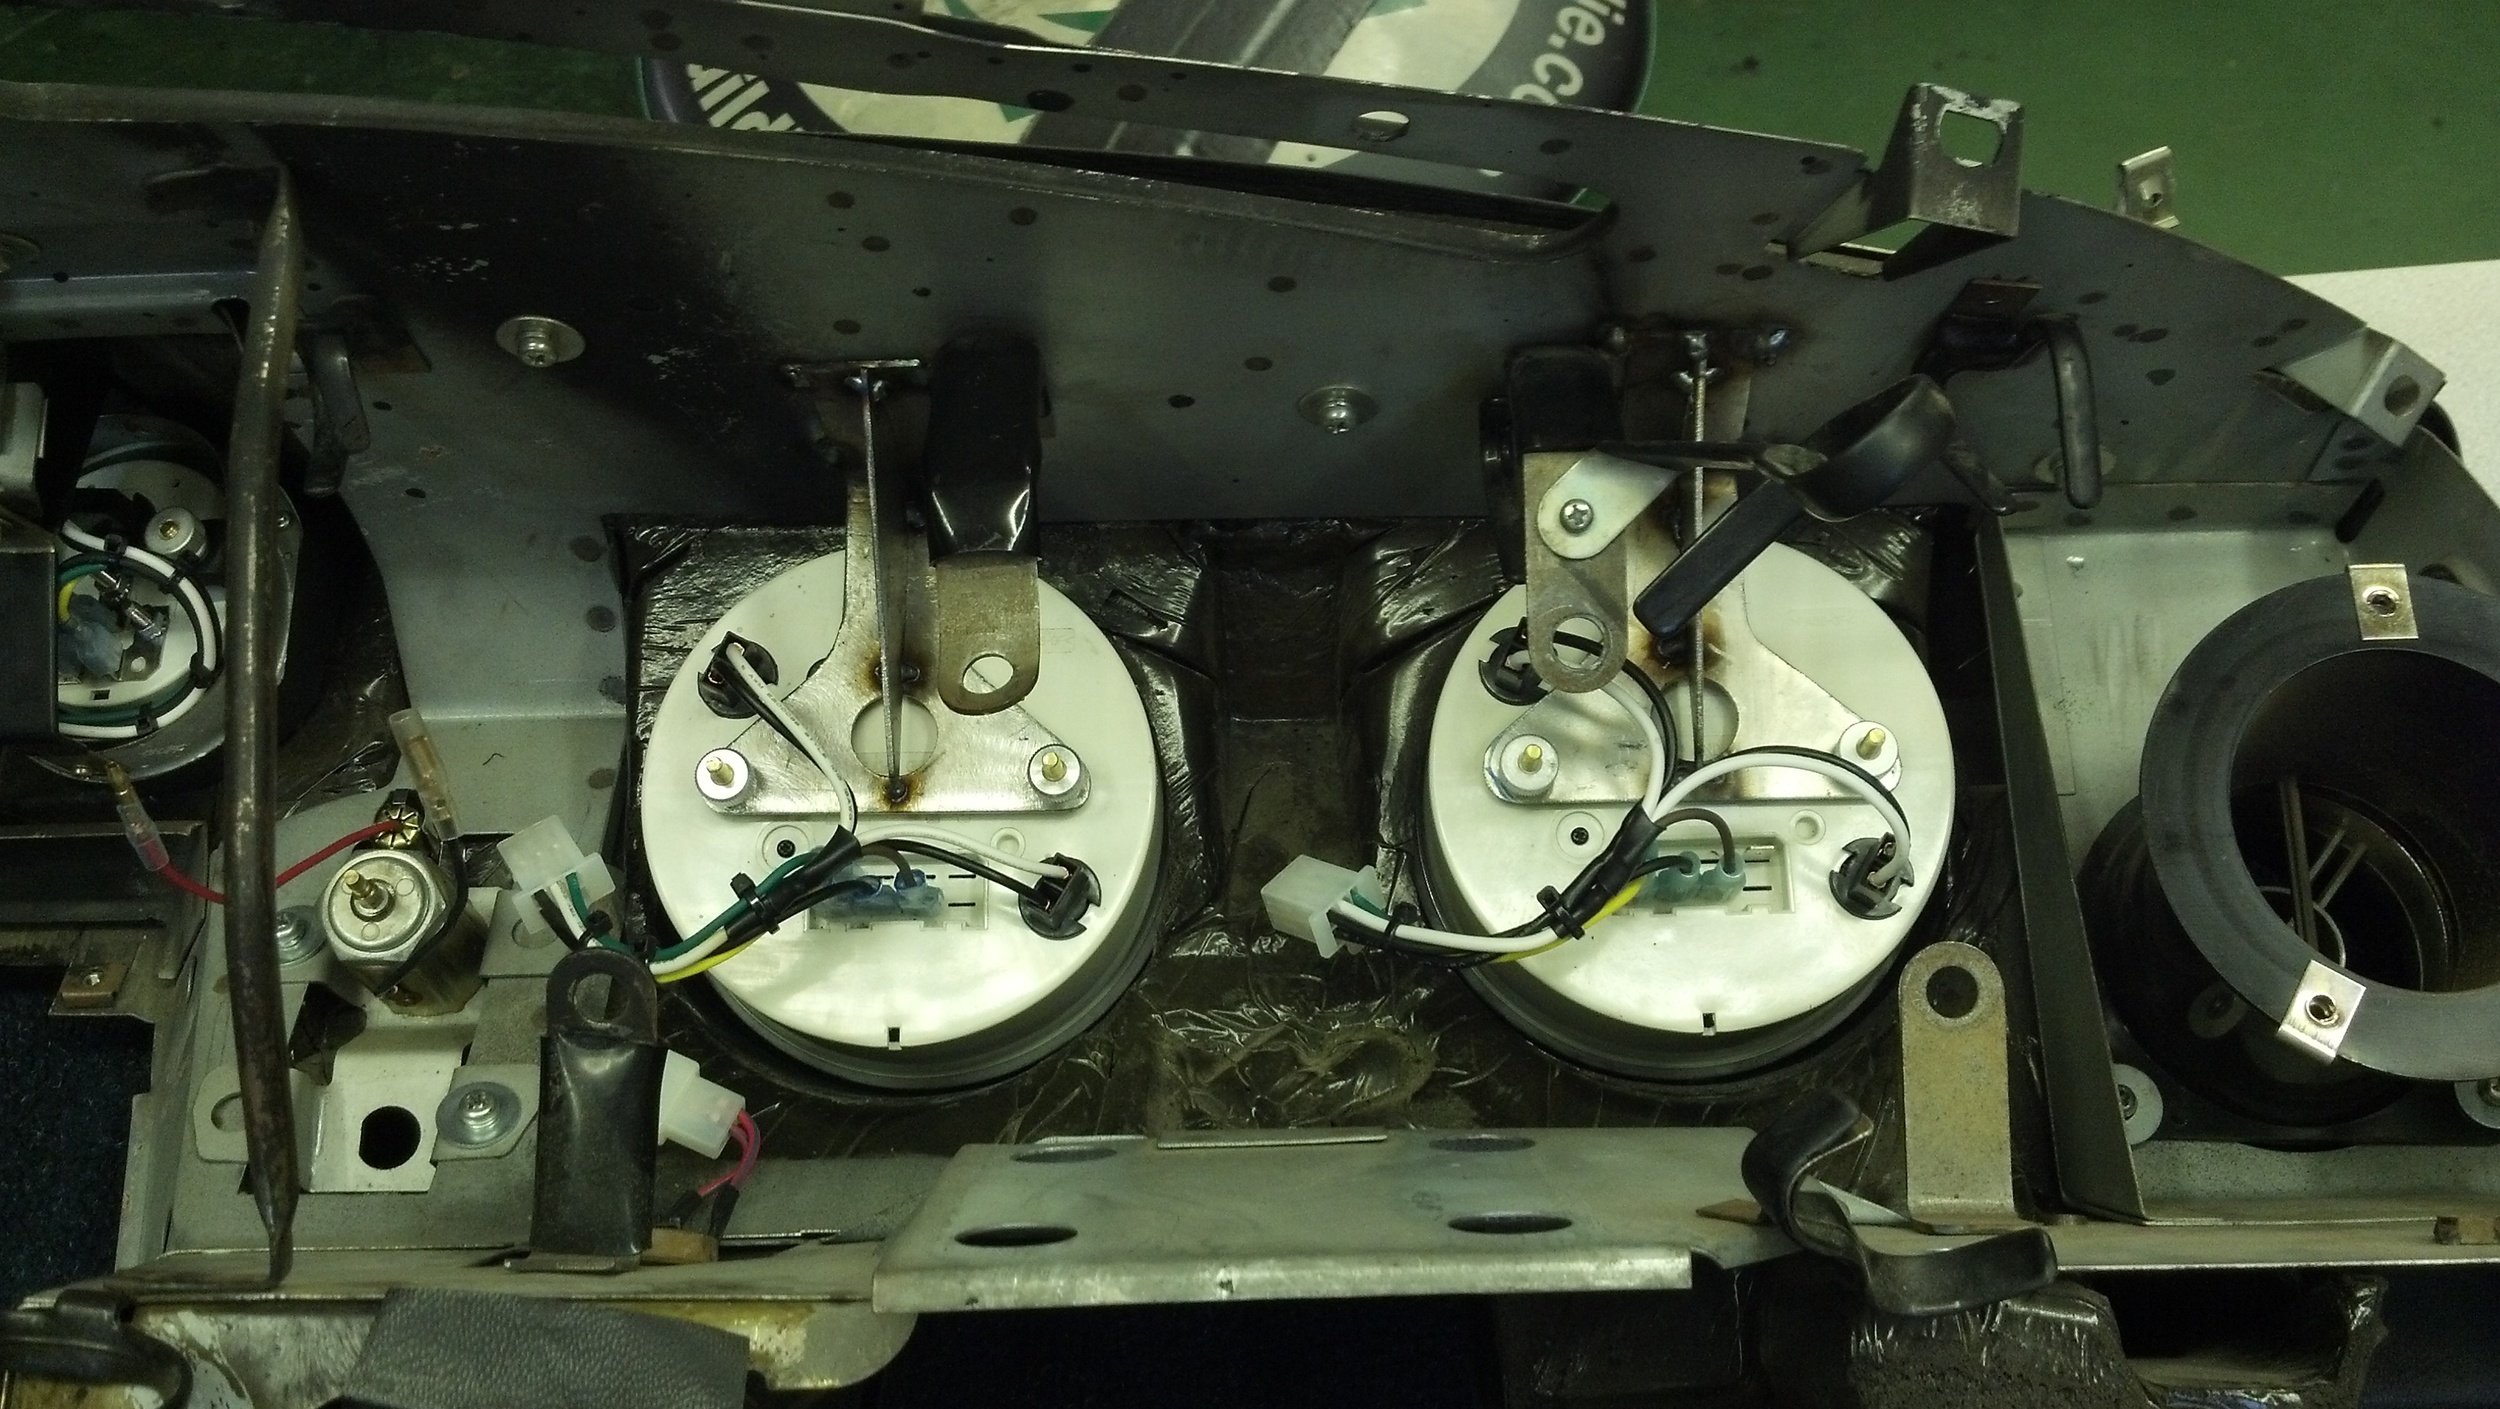
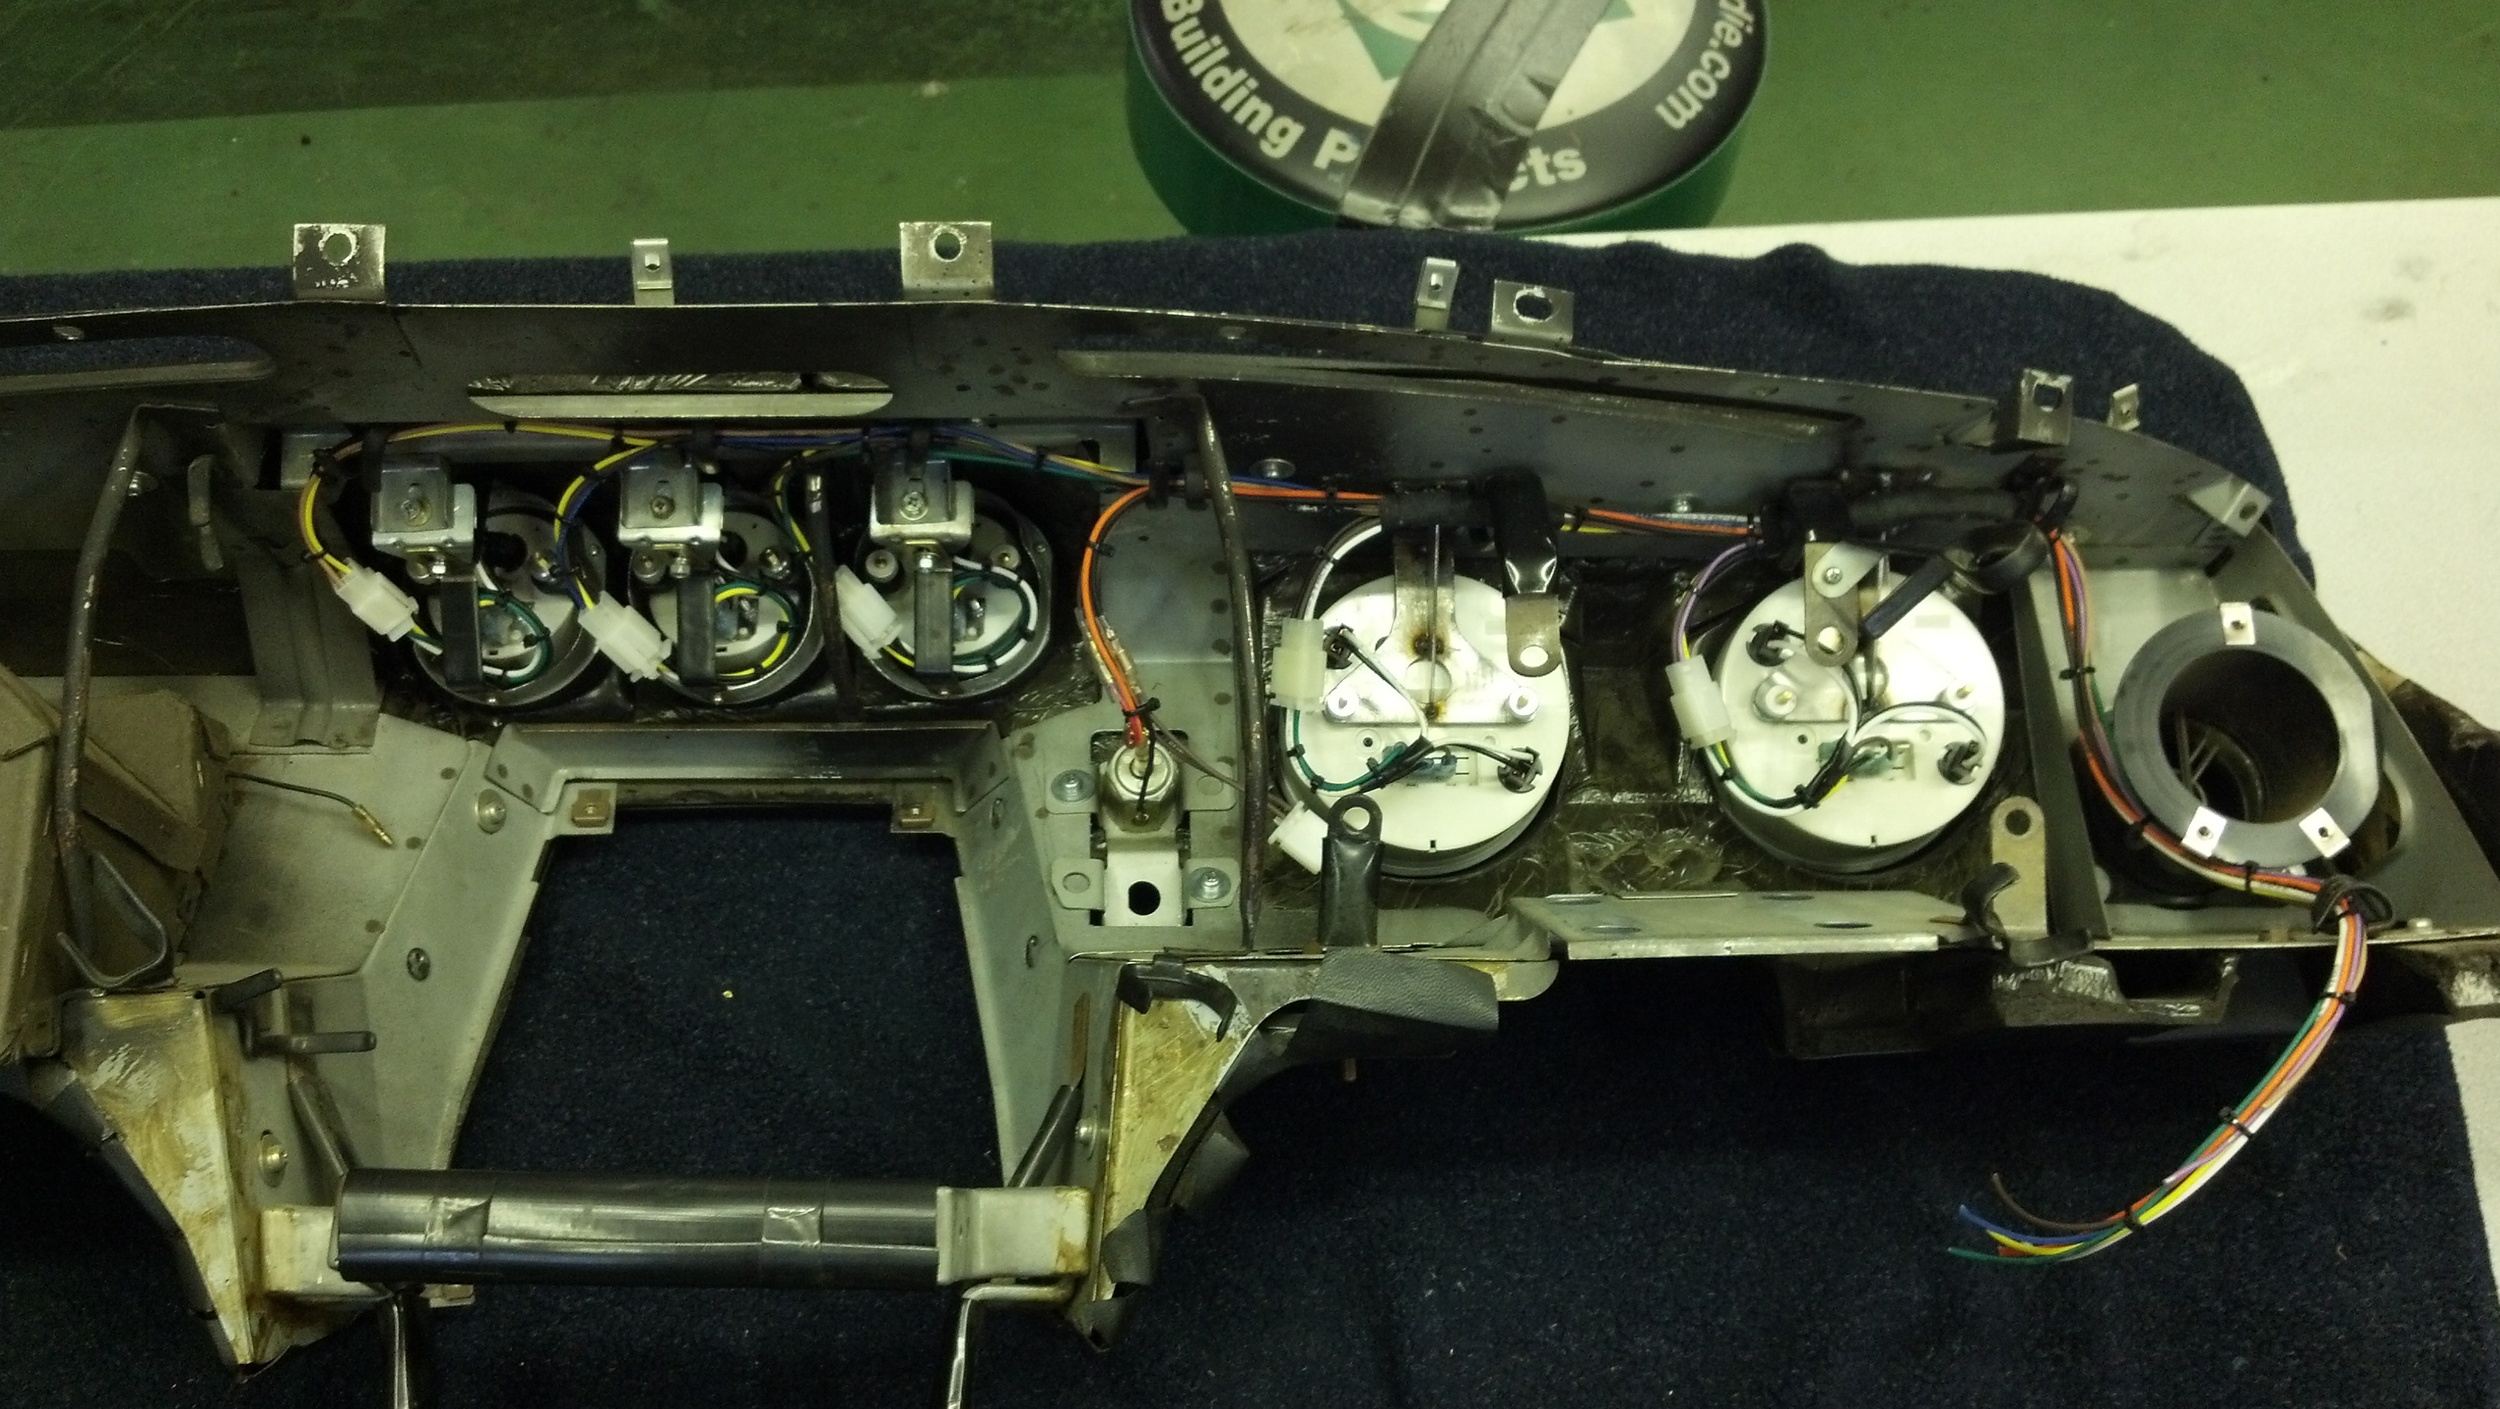
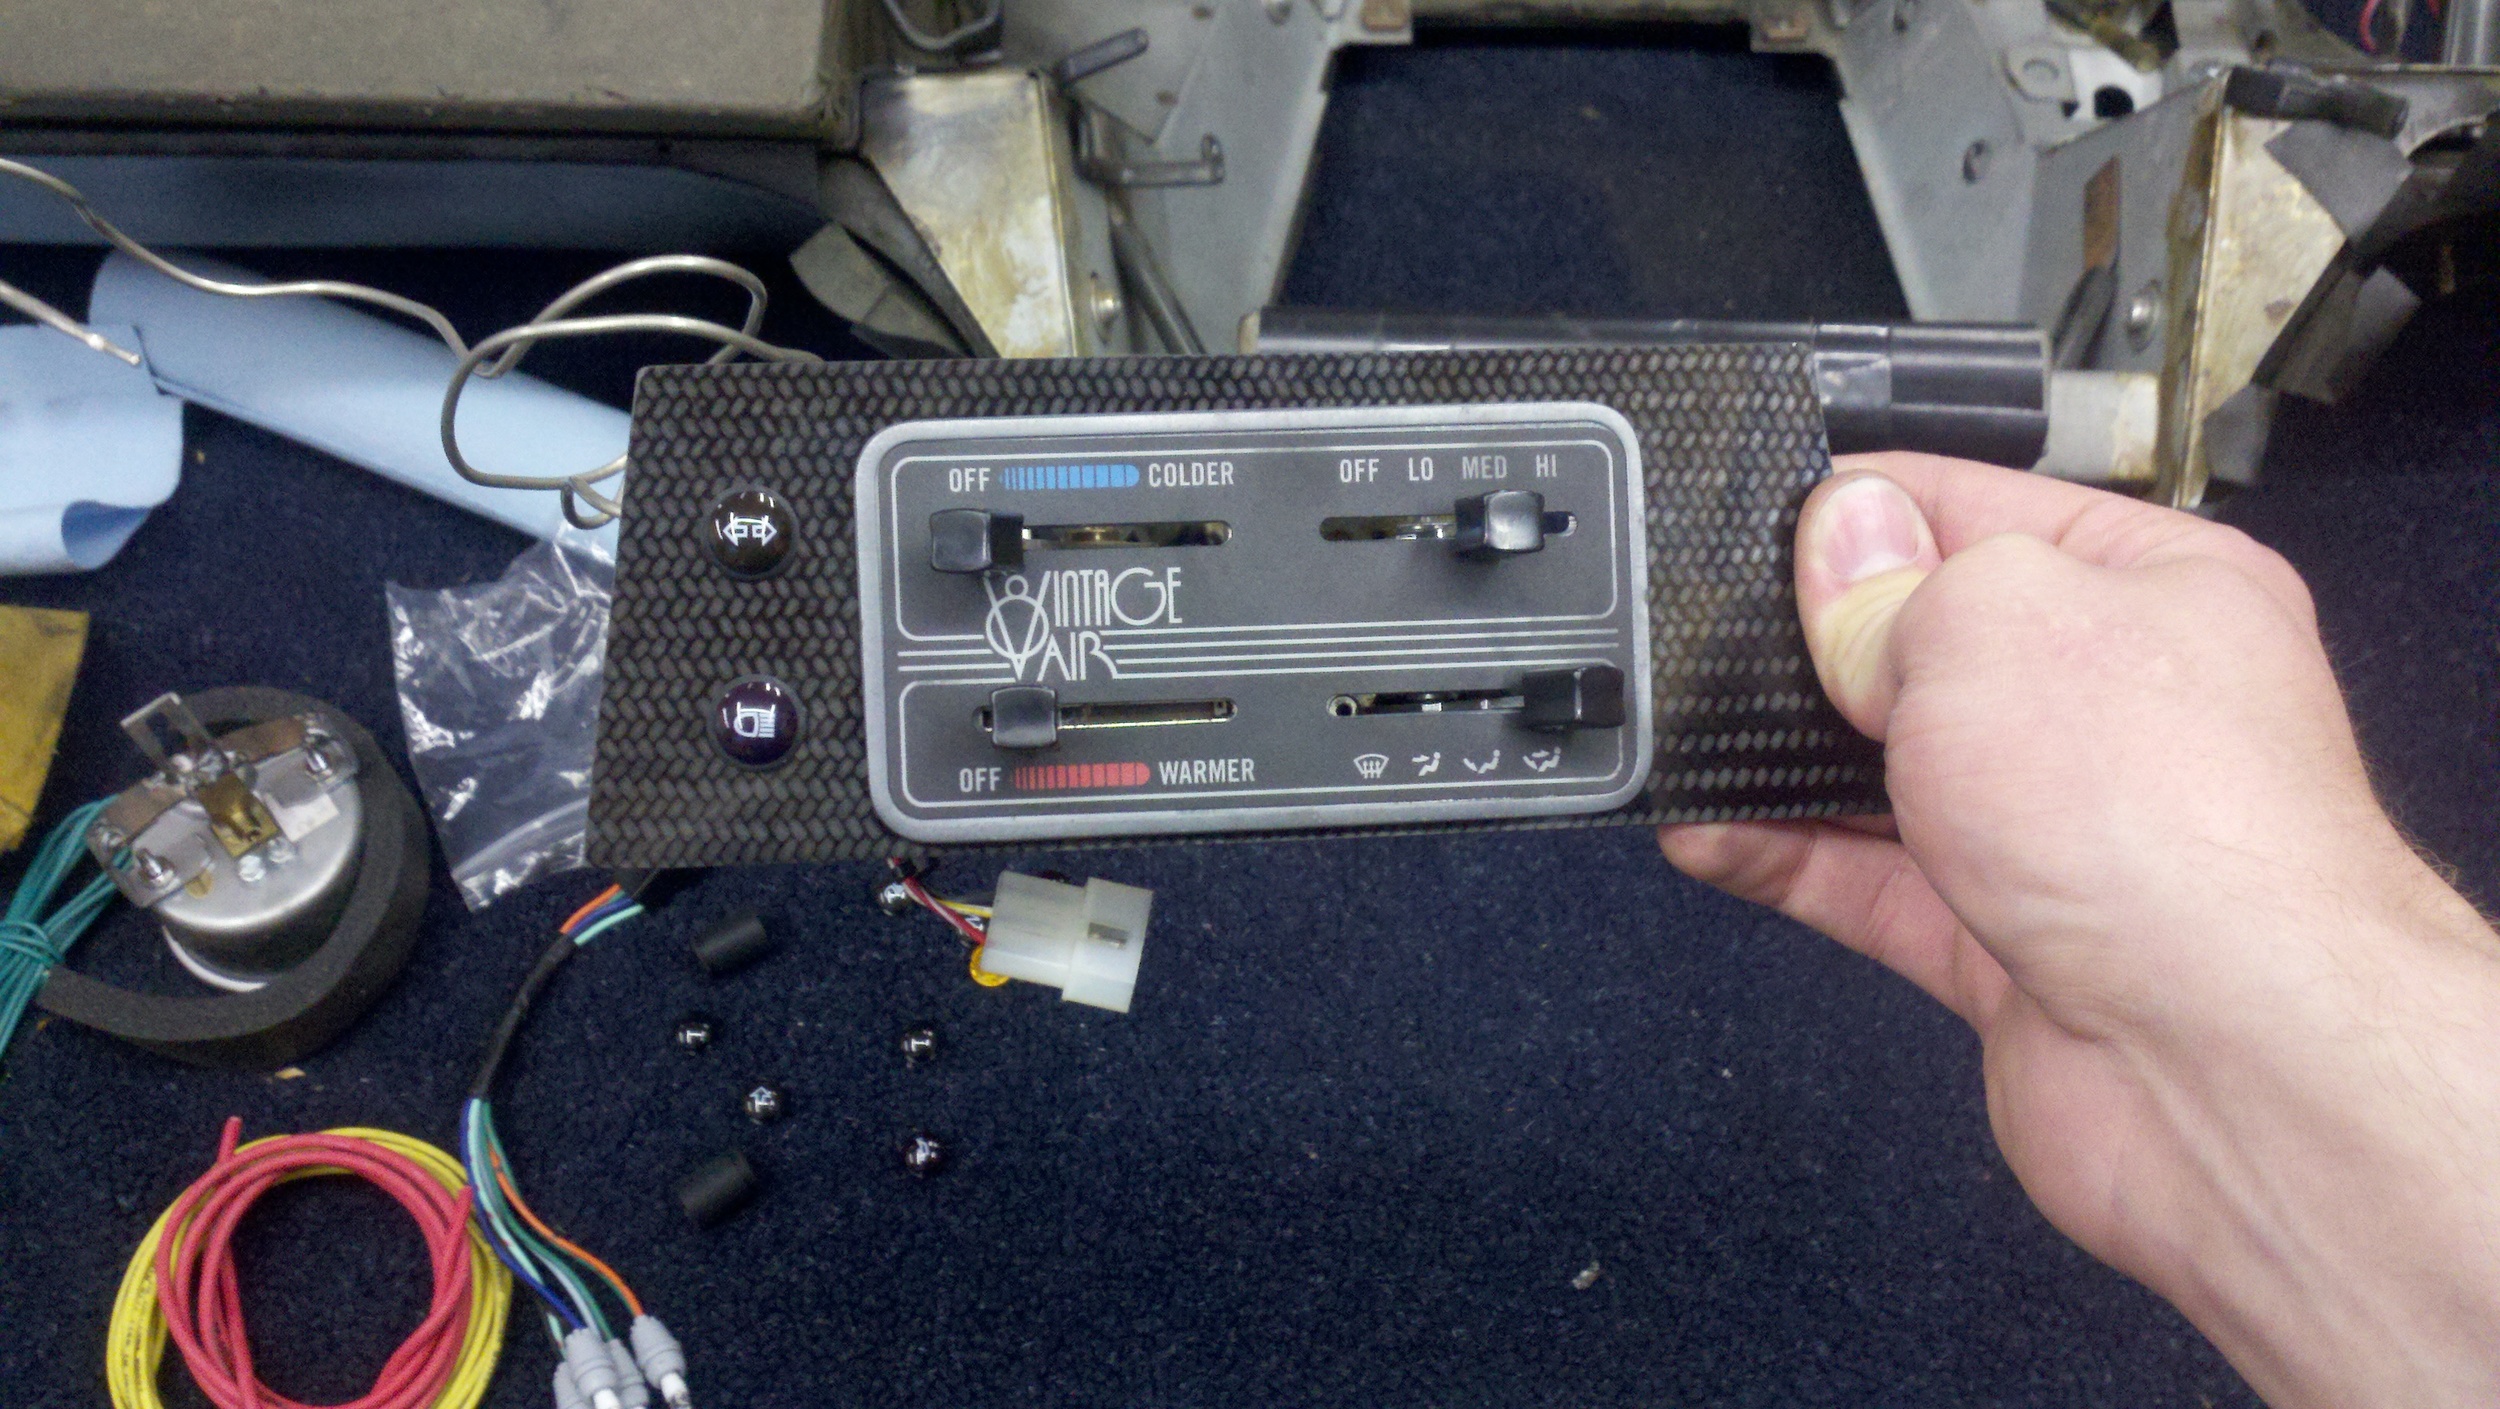
The car already had a Gen III vintage air kit although installed poorly. New brackets were fabricated to mount it. One great thing about the vintage air kit is the updated controls interface which allows for the removal of Datsun cable controls. A carbon plate was made to fit in the dash center panel the the Vintage Air dash panel was installed. Indicators were also added to this panel using lights from a Vapor Motorcycle dash.
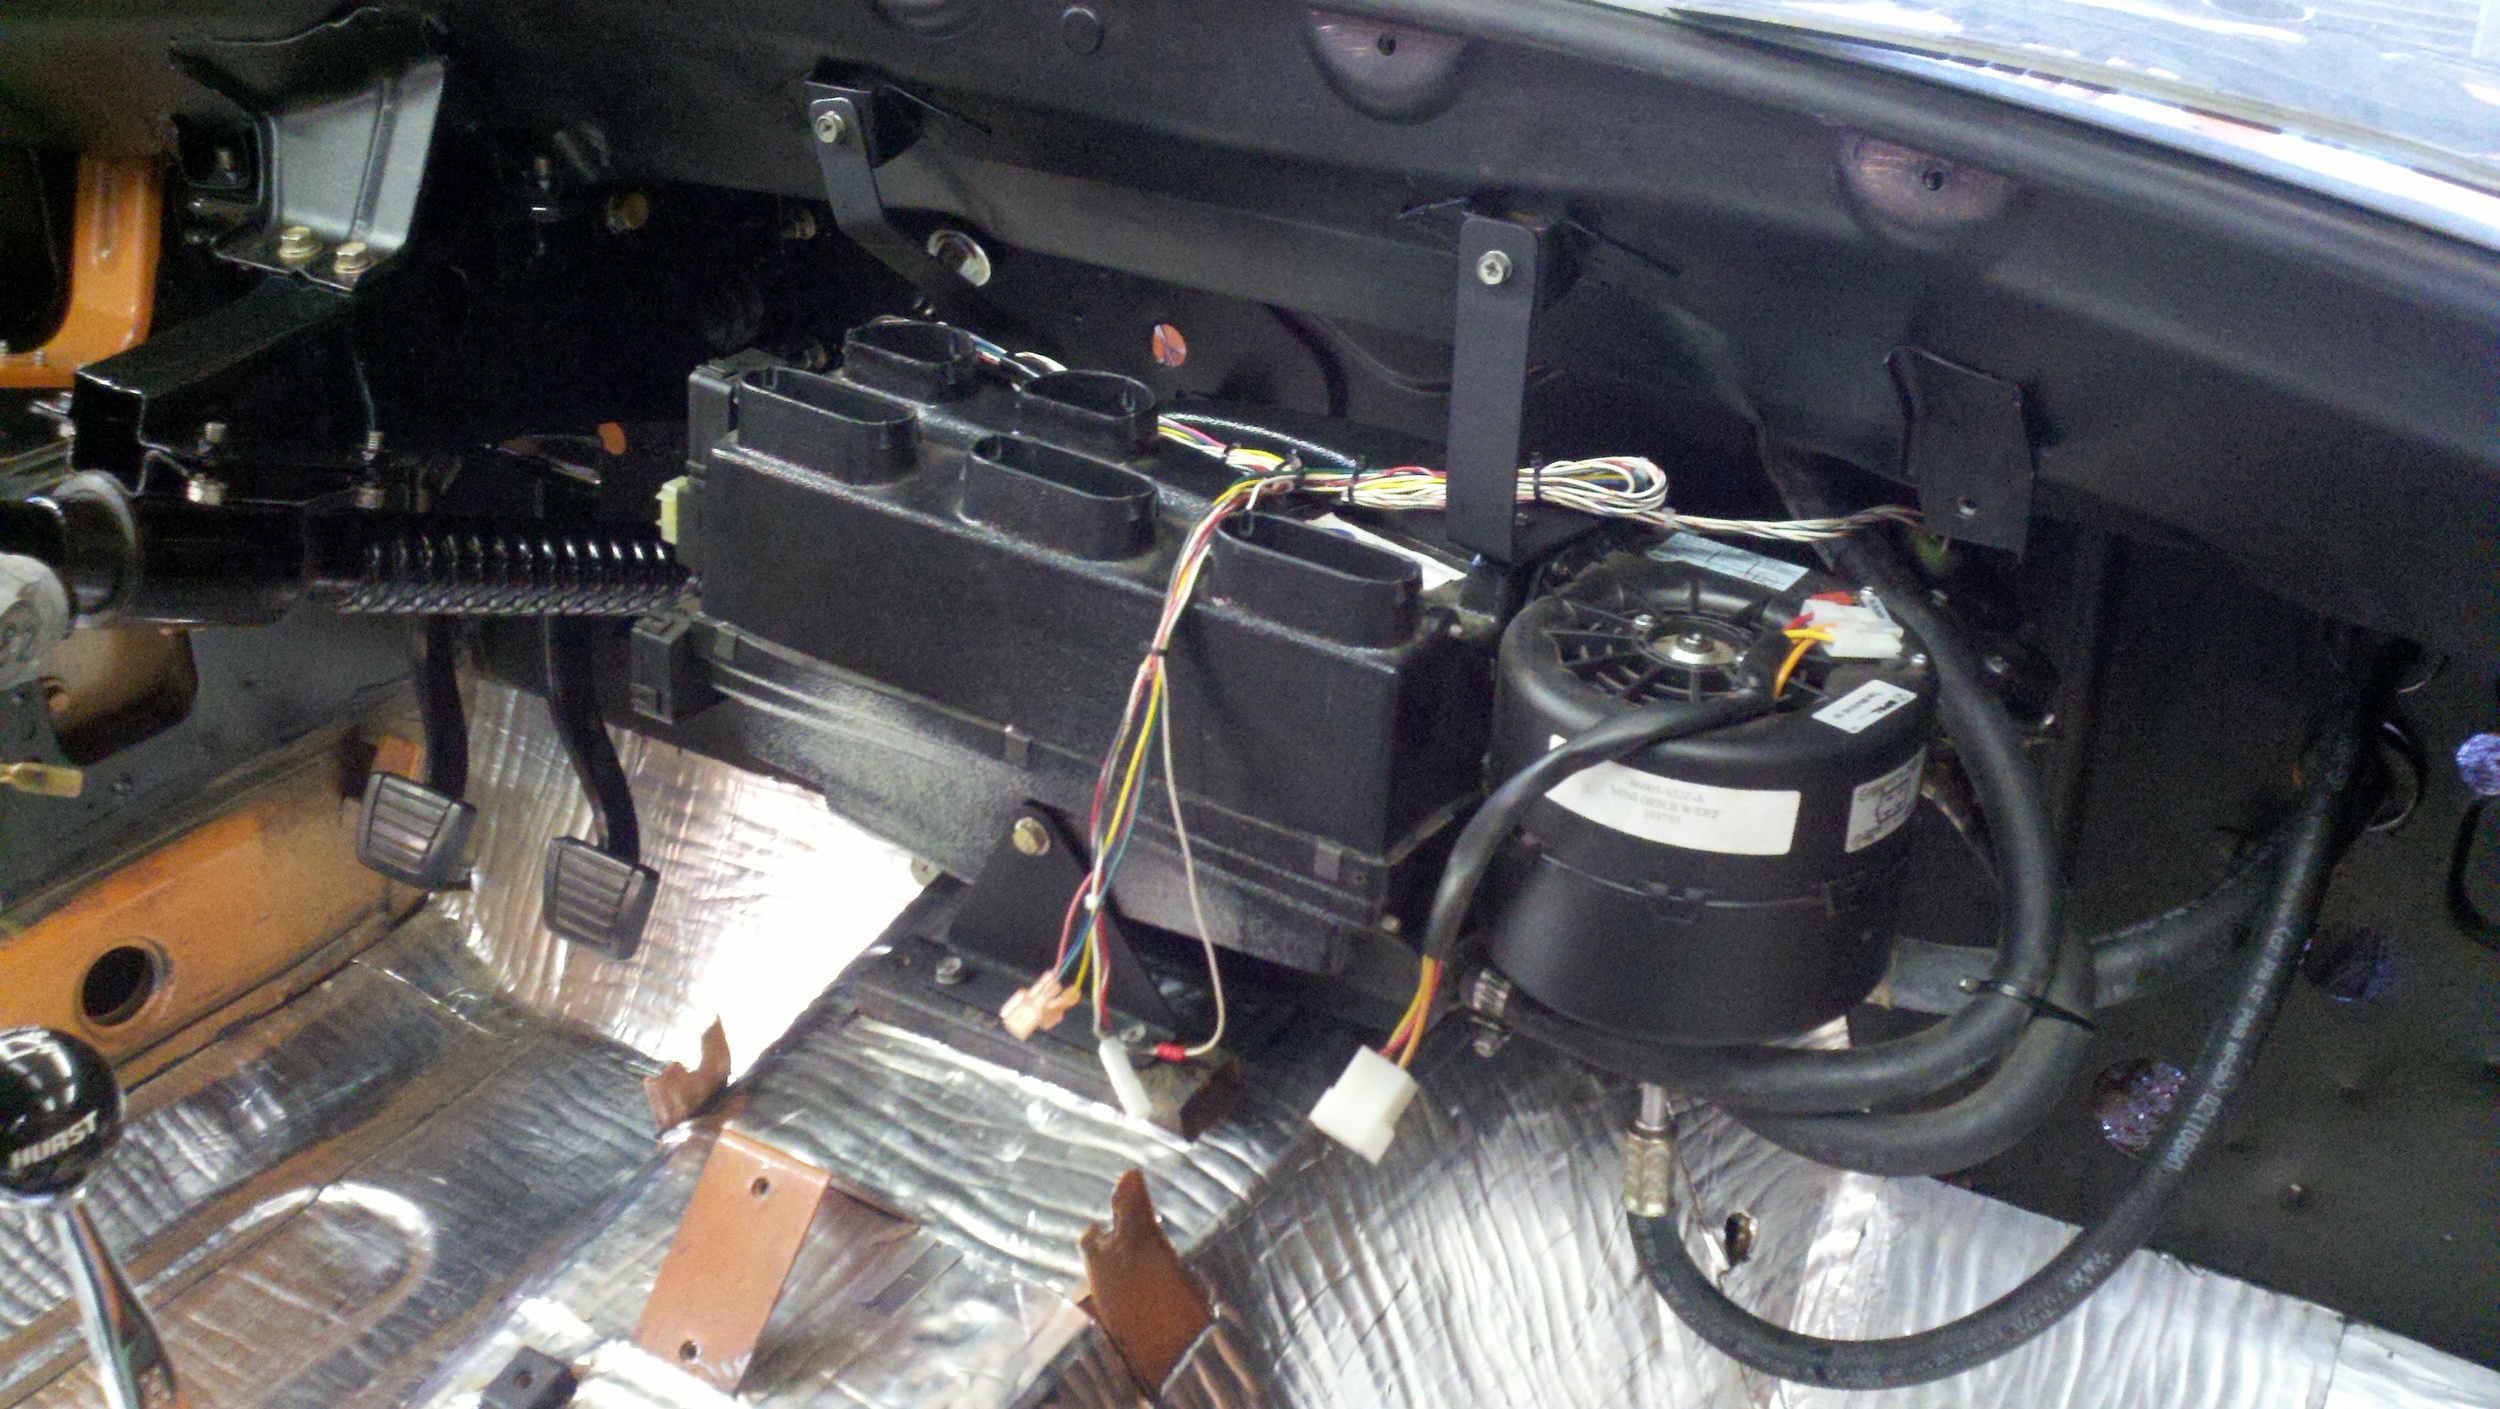
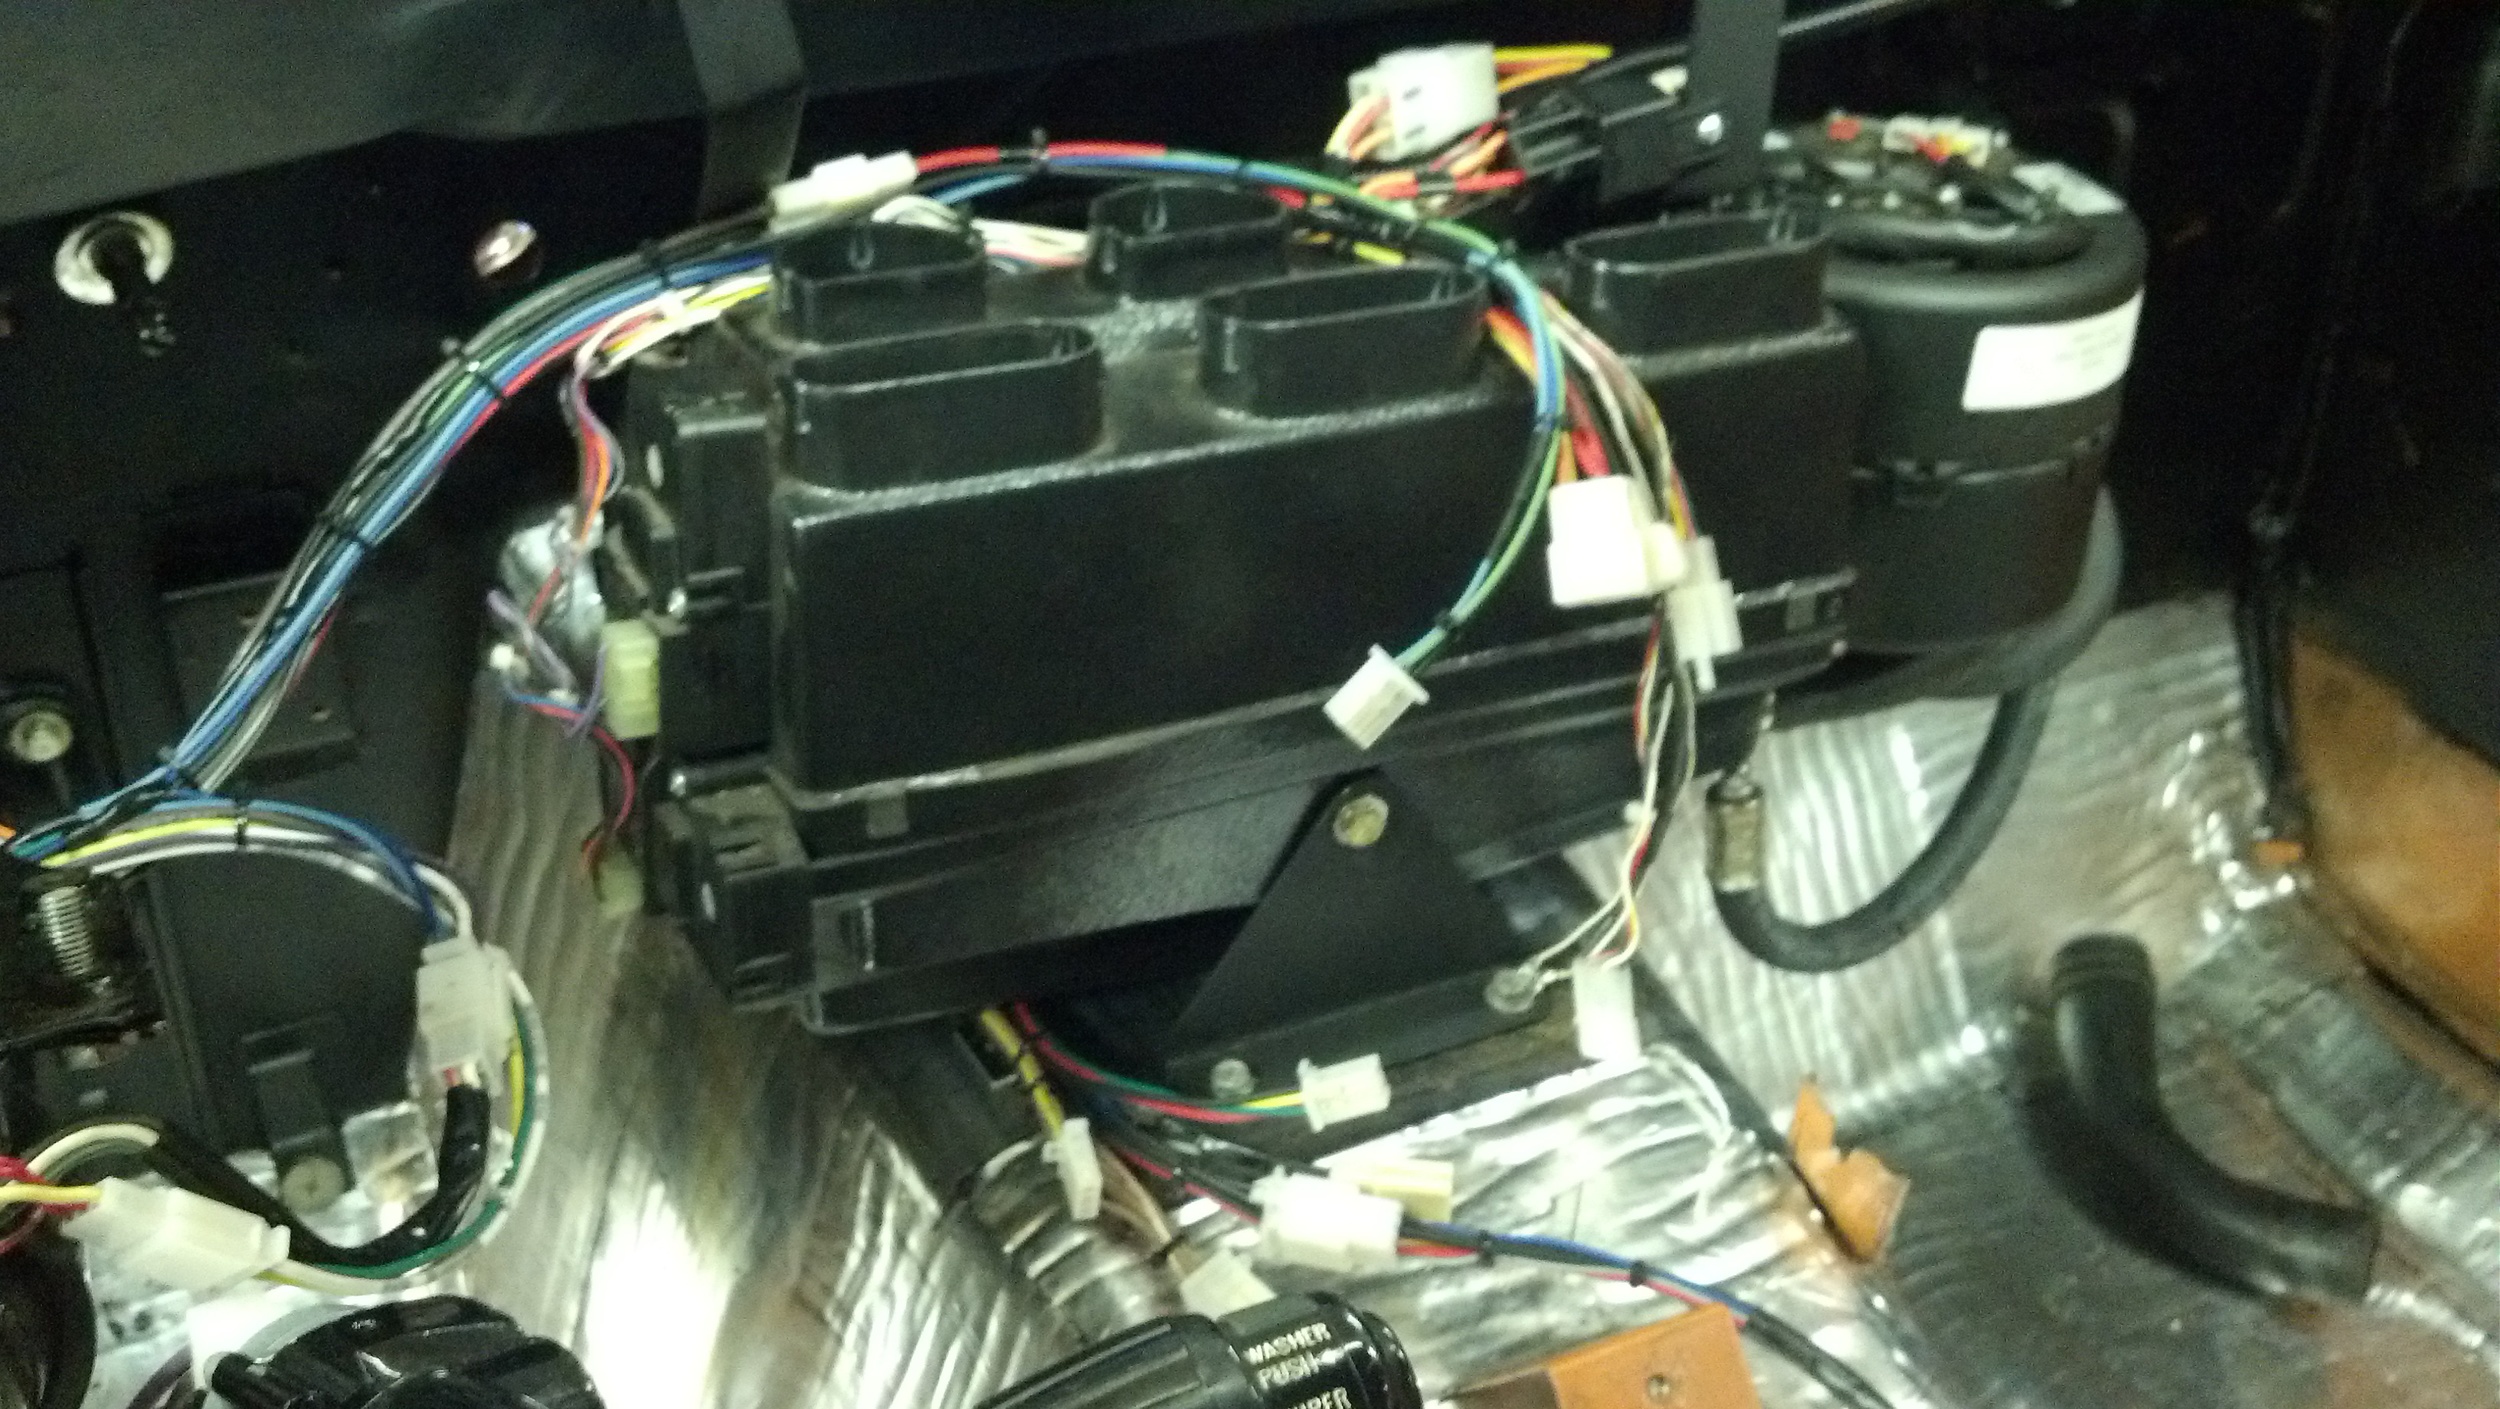
The fuse panel was installed on the side of the drivers footwell and harnesses were run to the engine bay, tail lights, and combination switch / HVAC system. Unfortunately I don't have too many pictures of the harness installed, I need to snap a few of the finish install to update this, here a couple shot during the build:
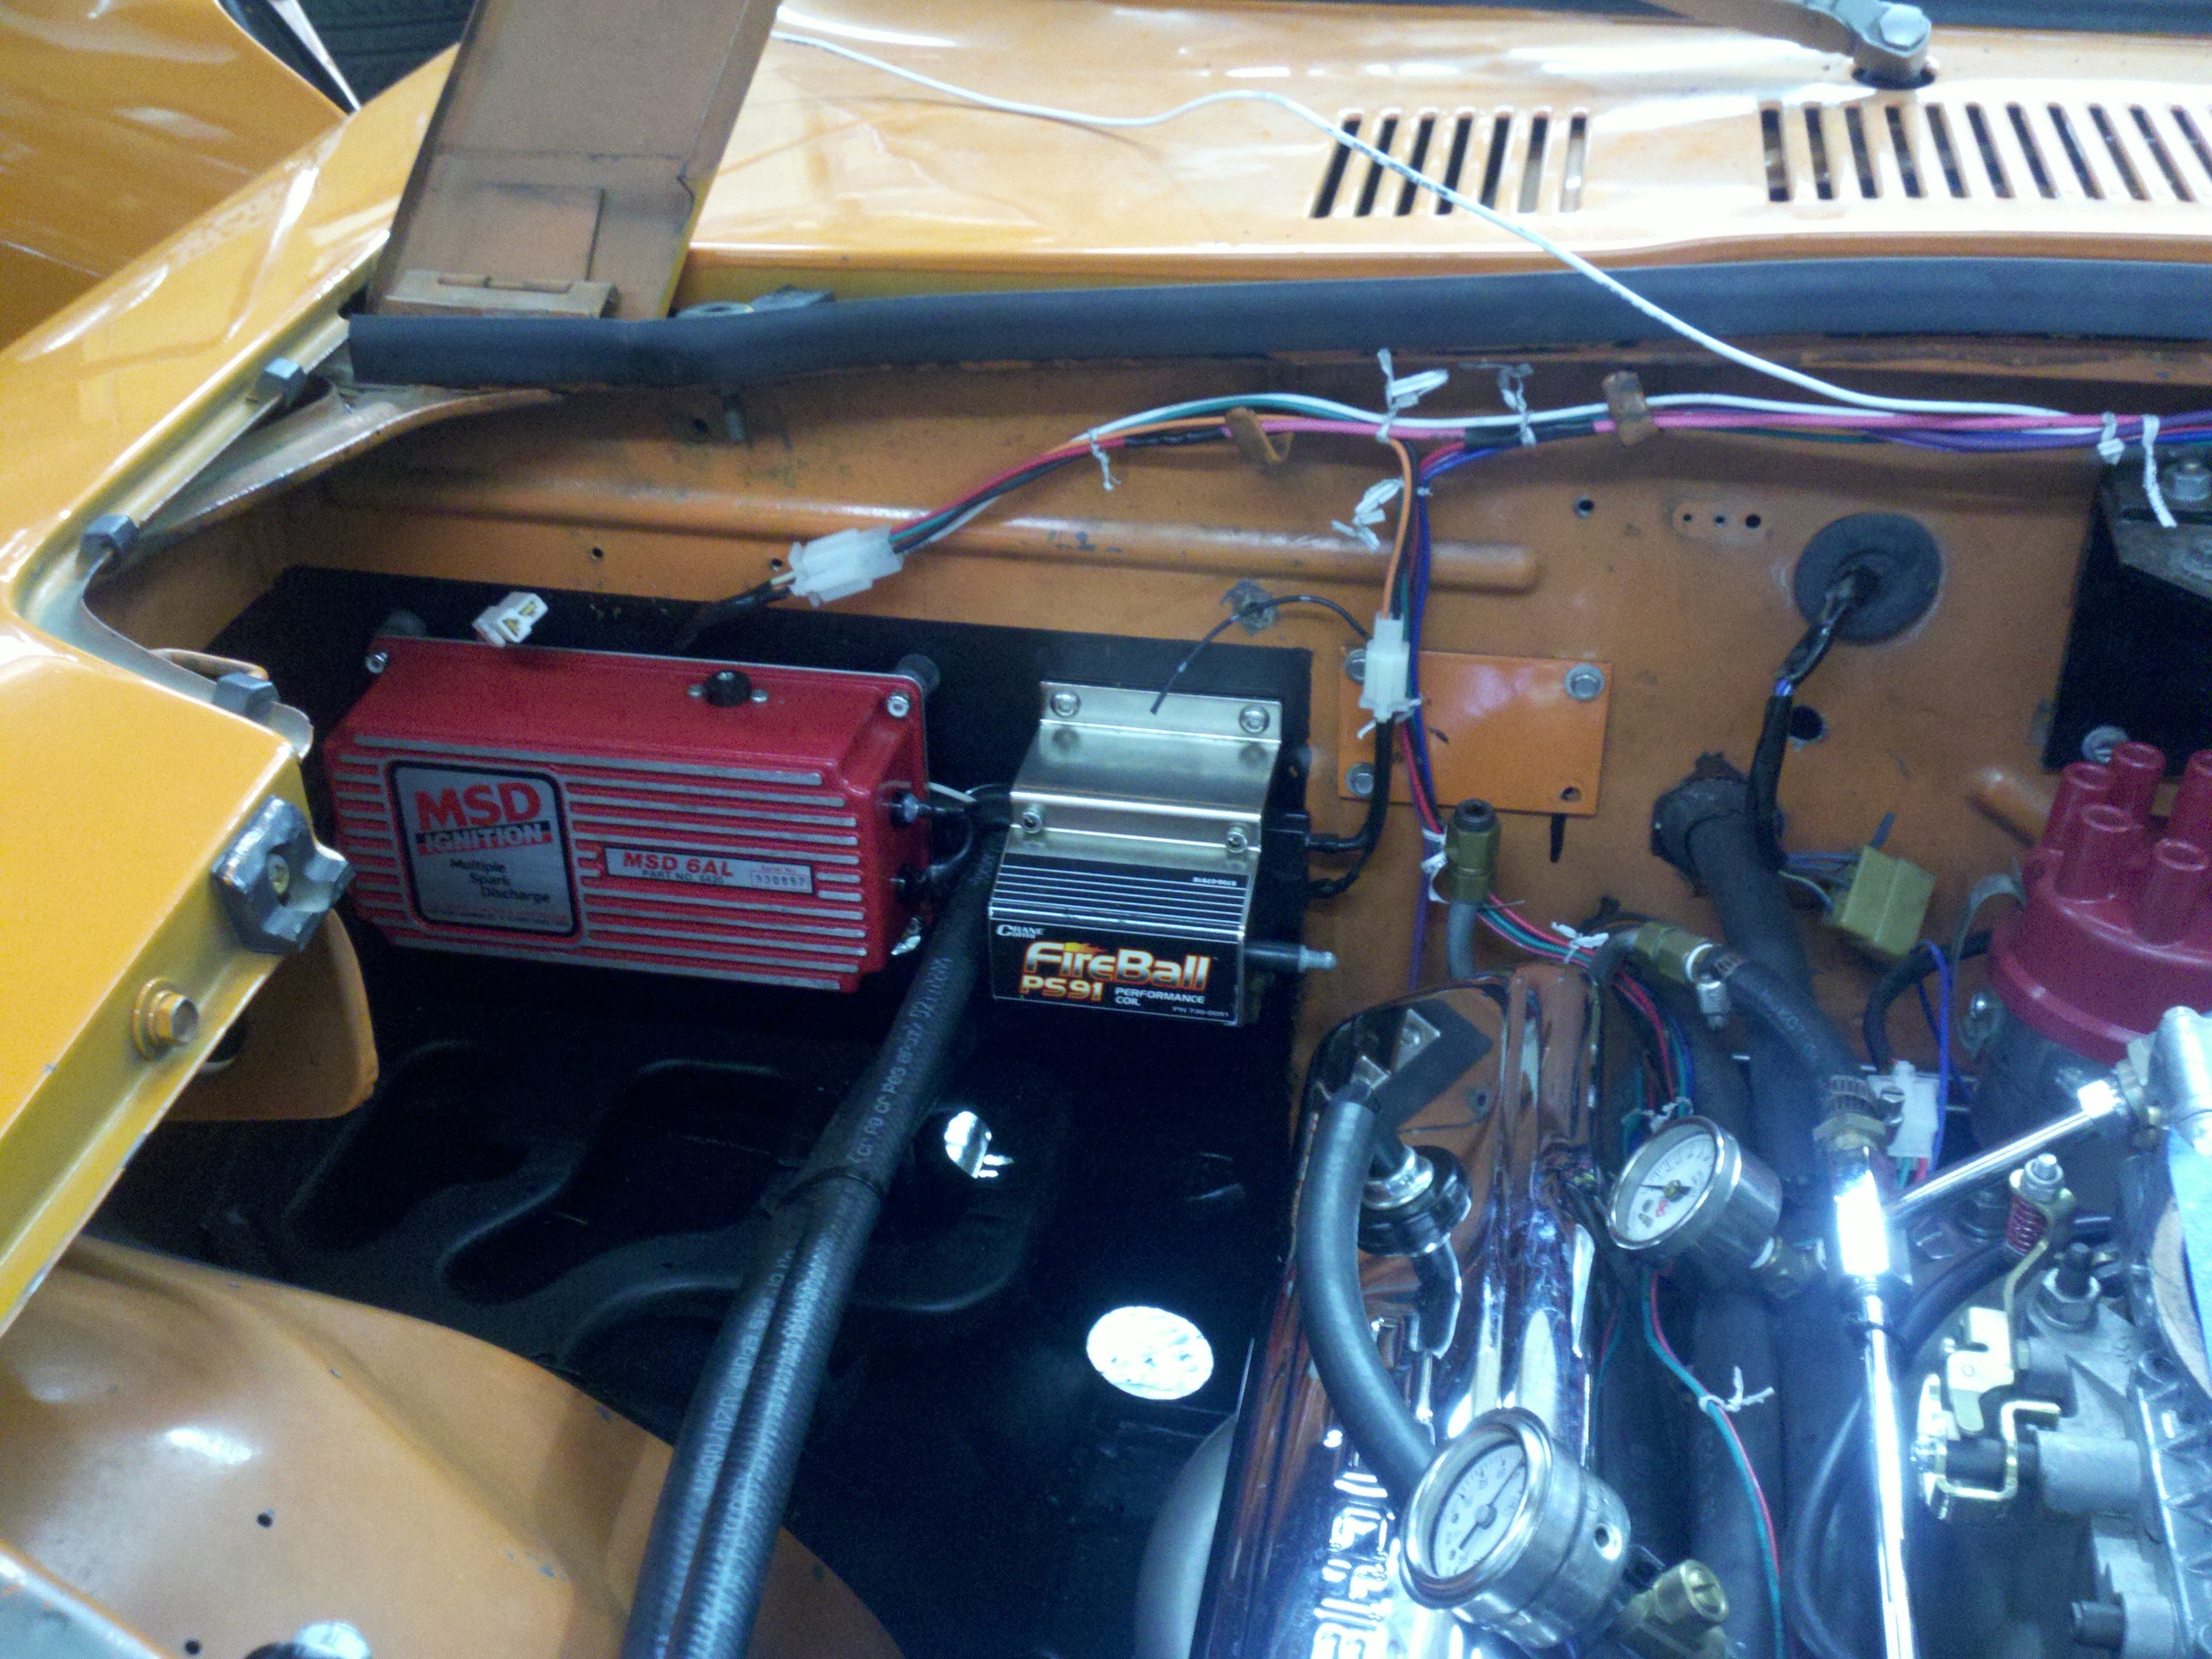
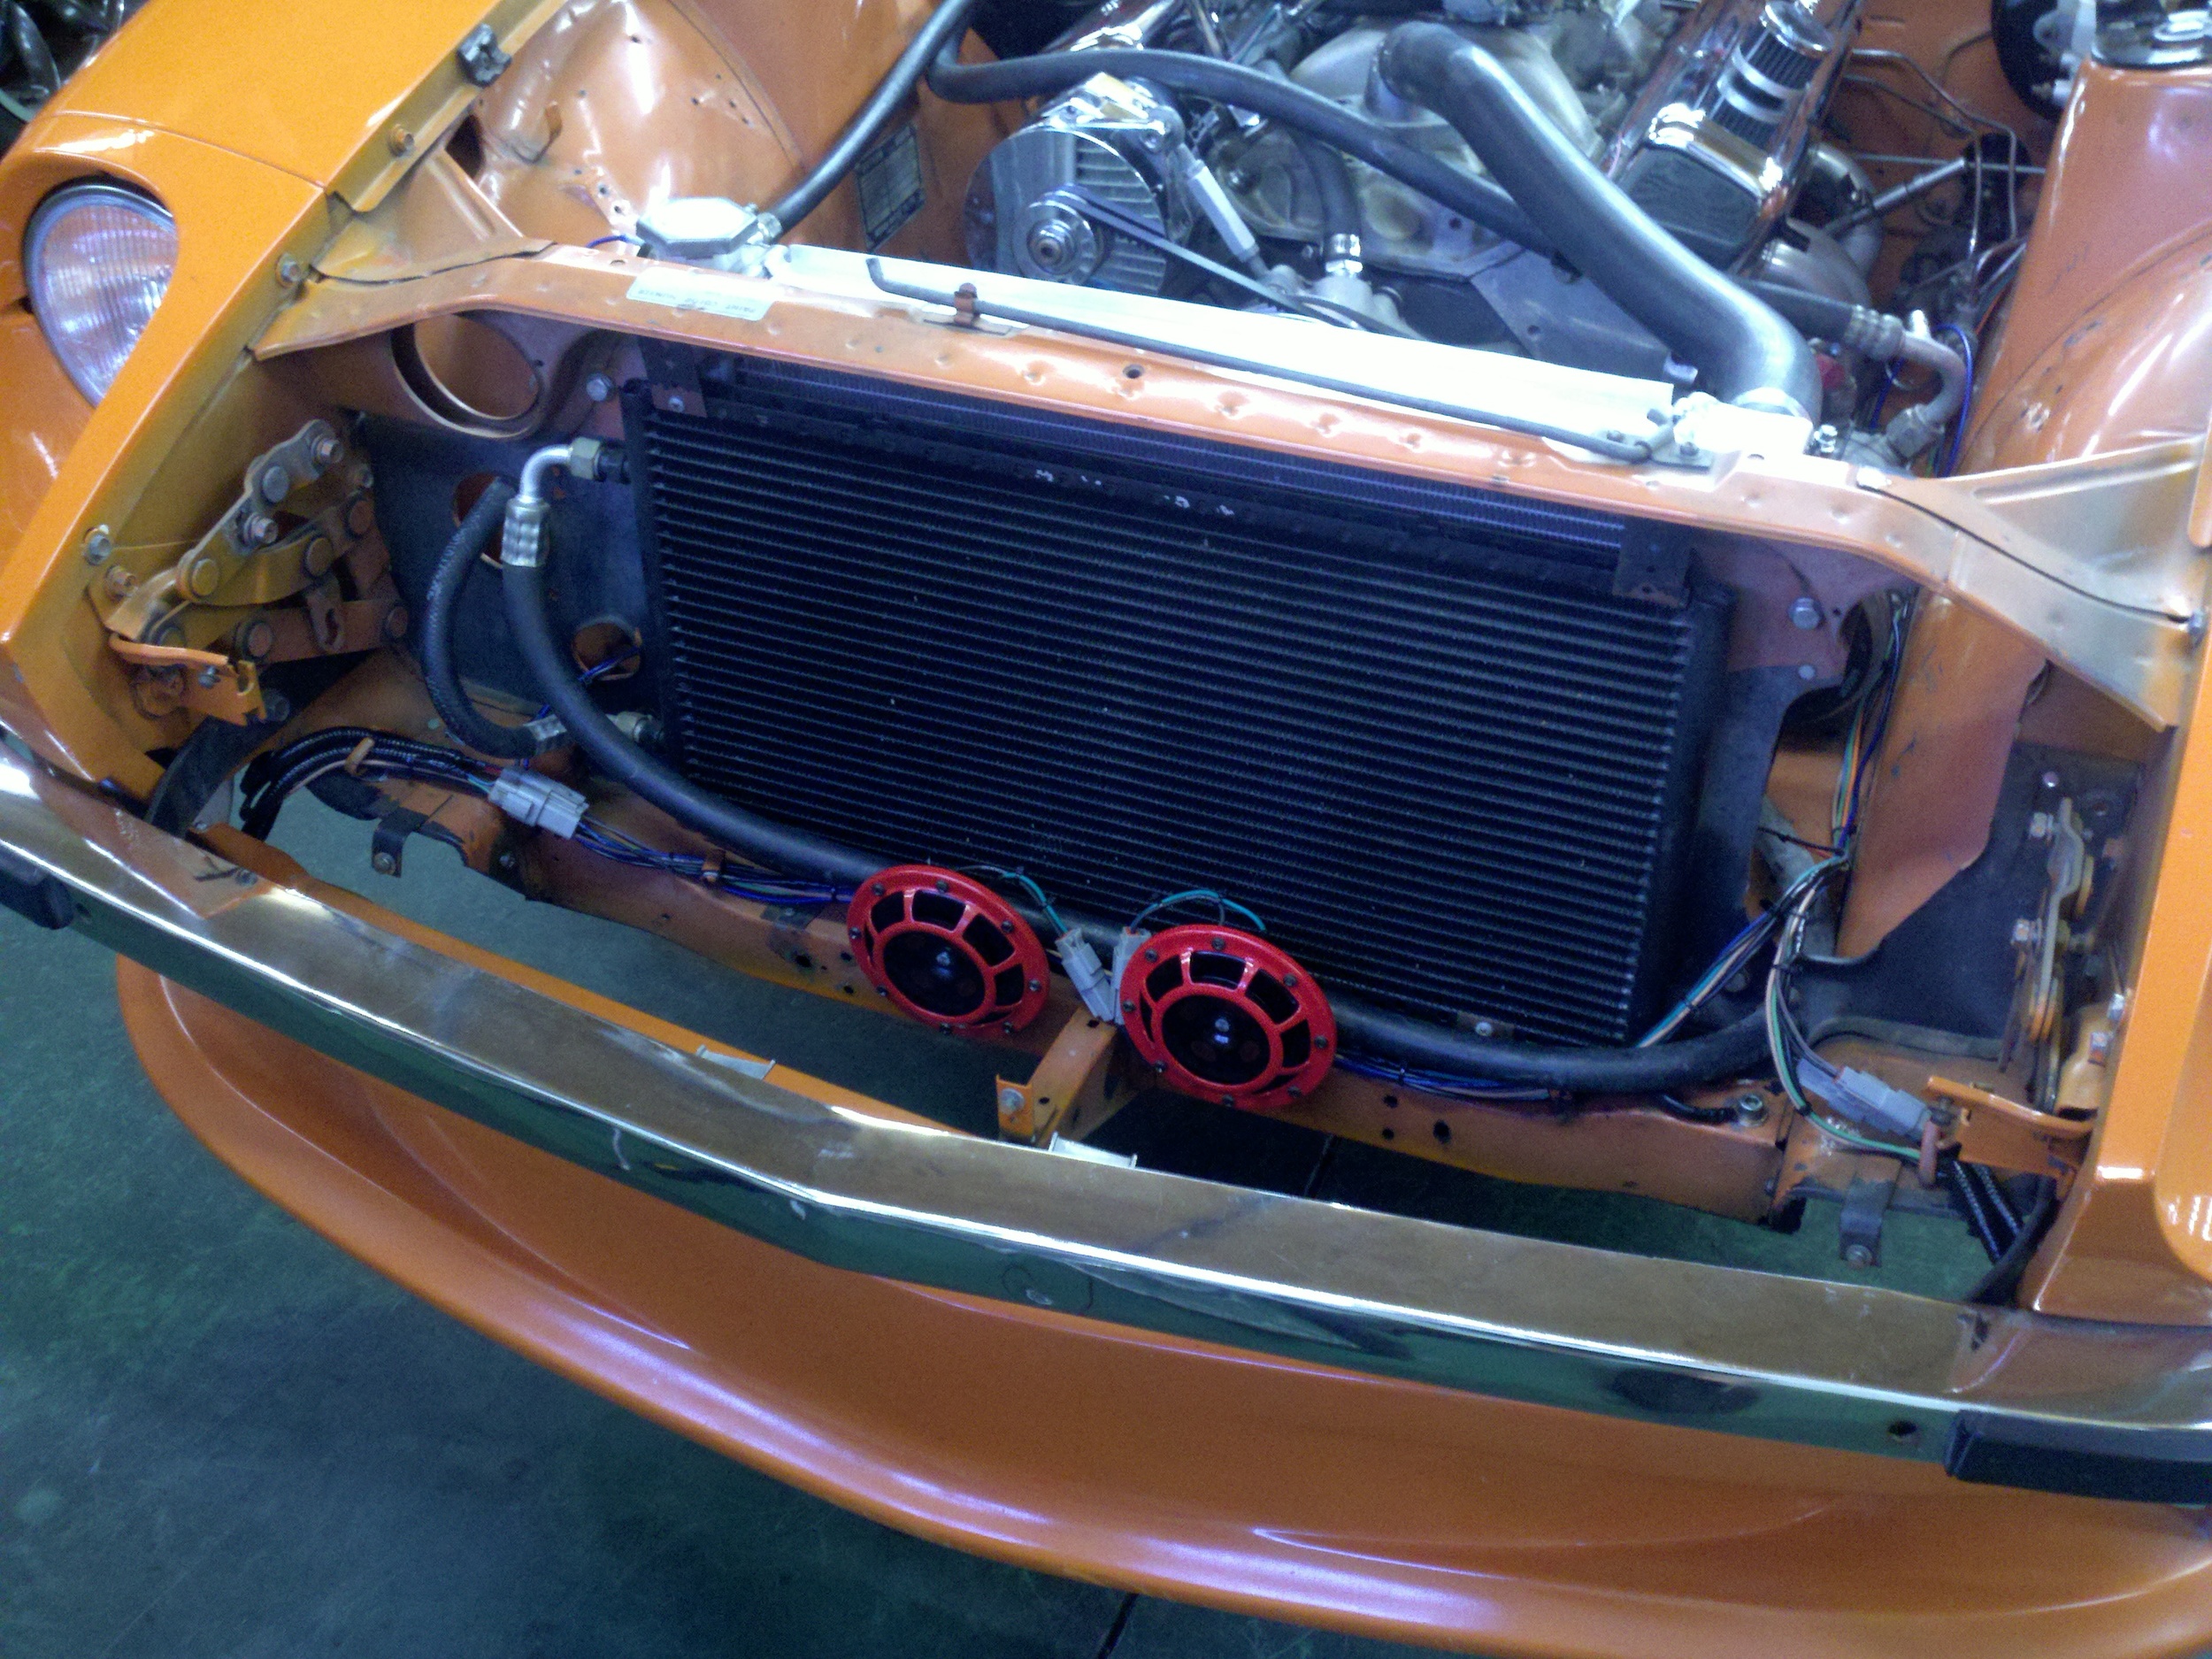
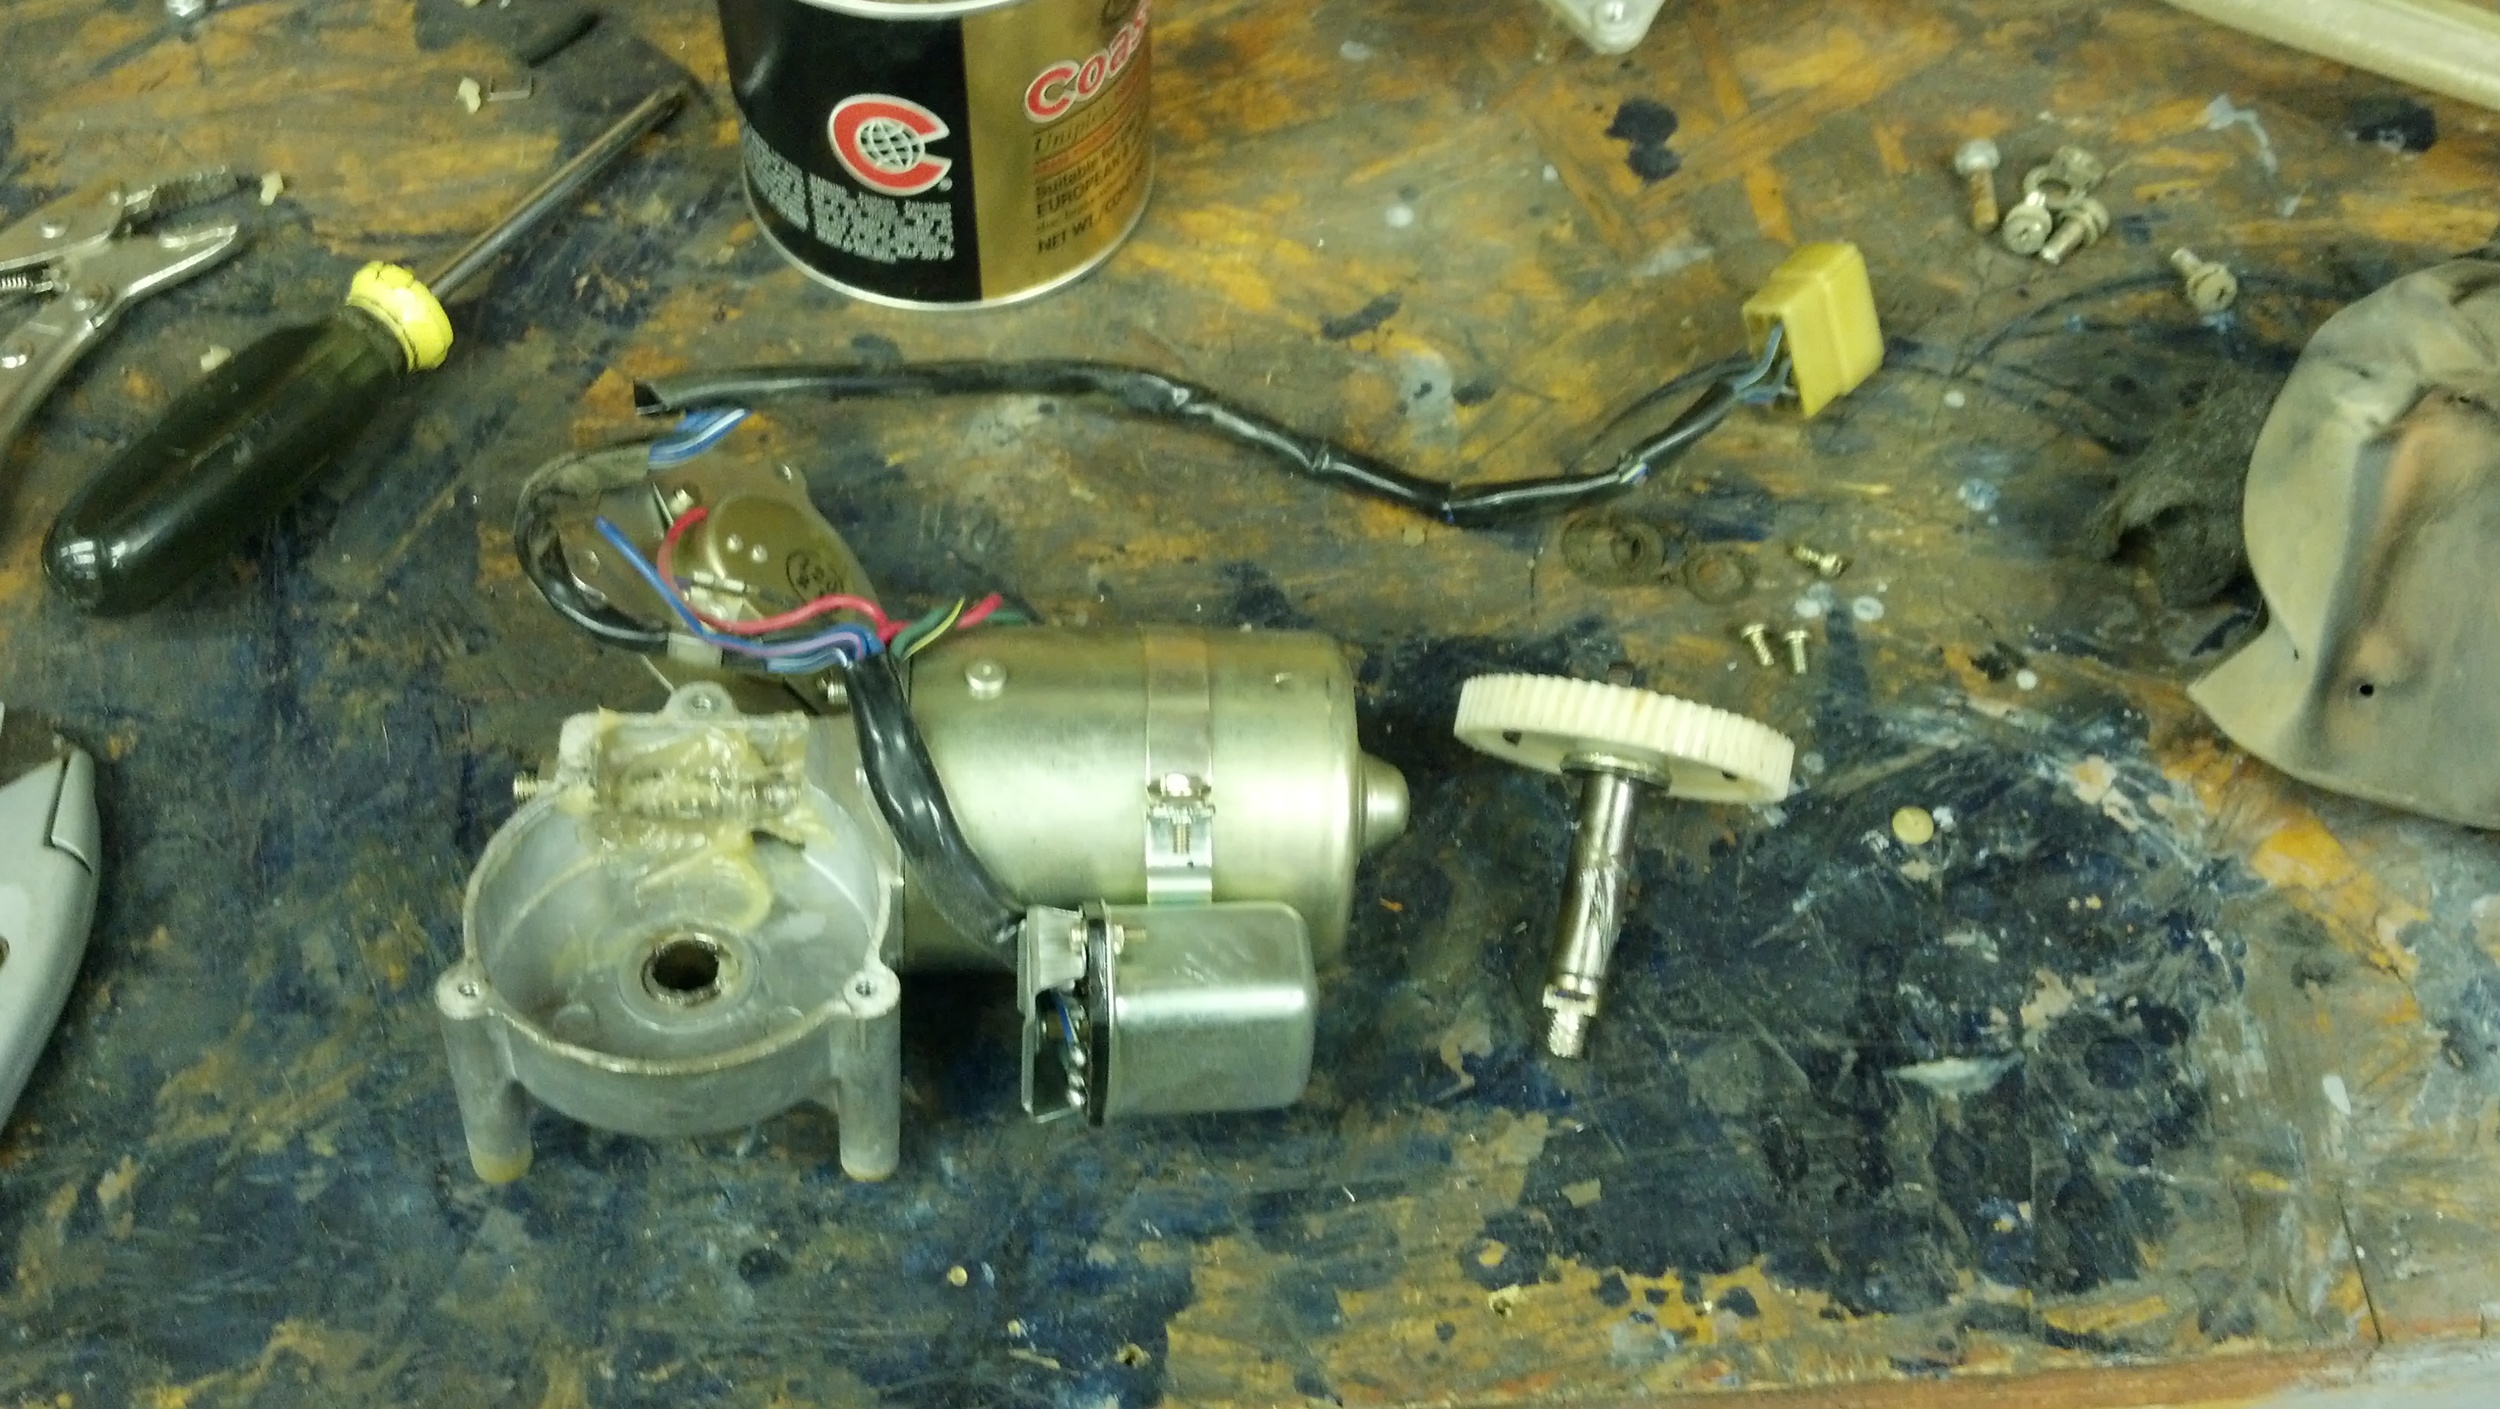
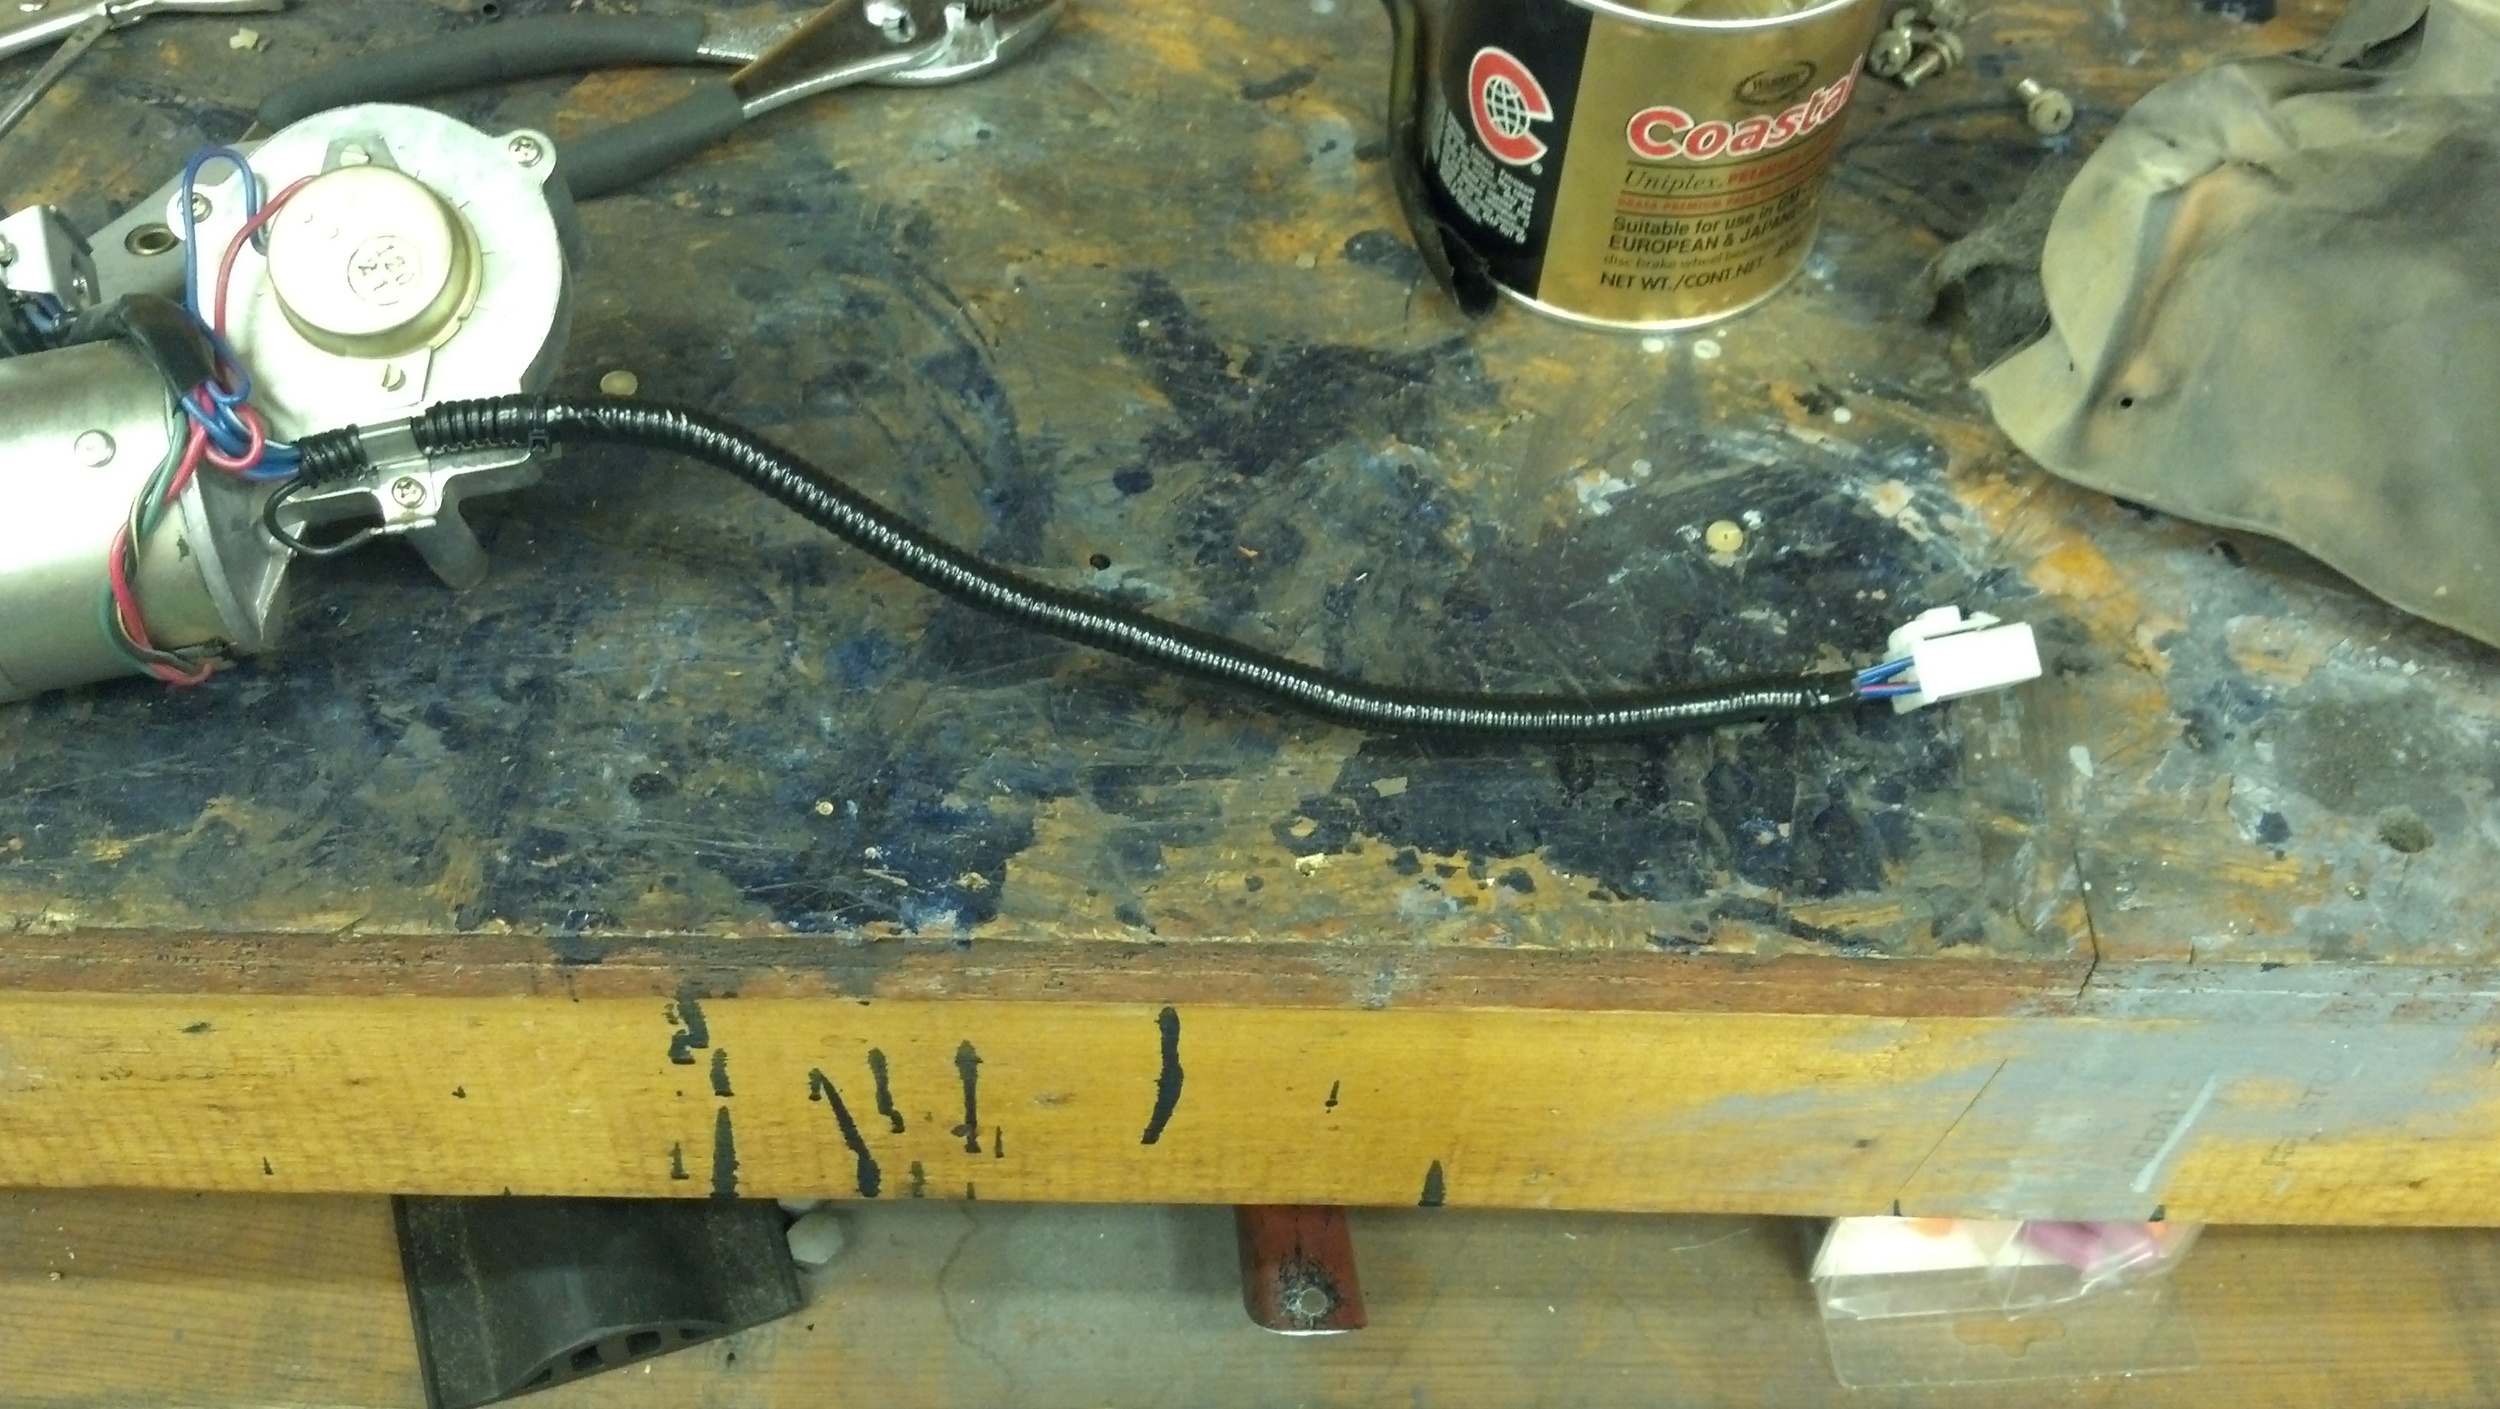
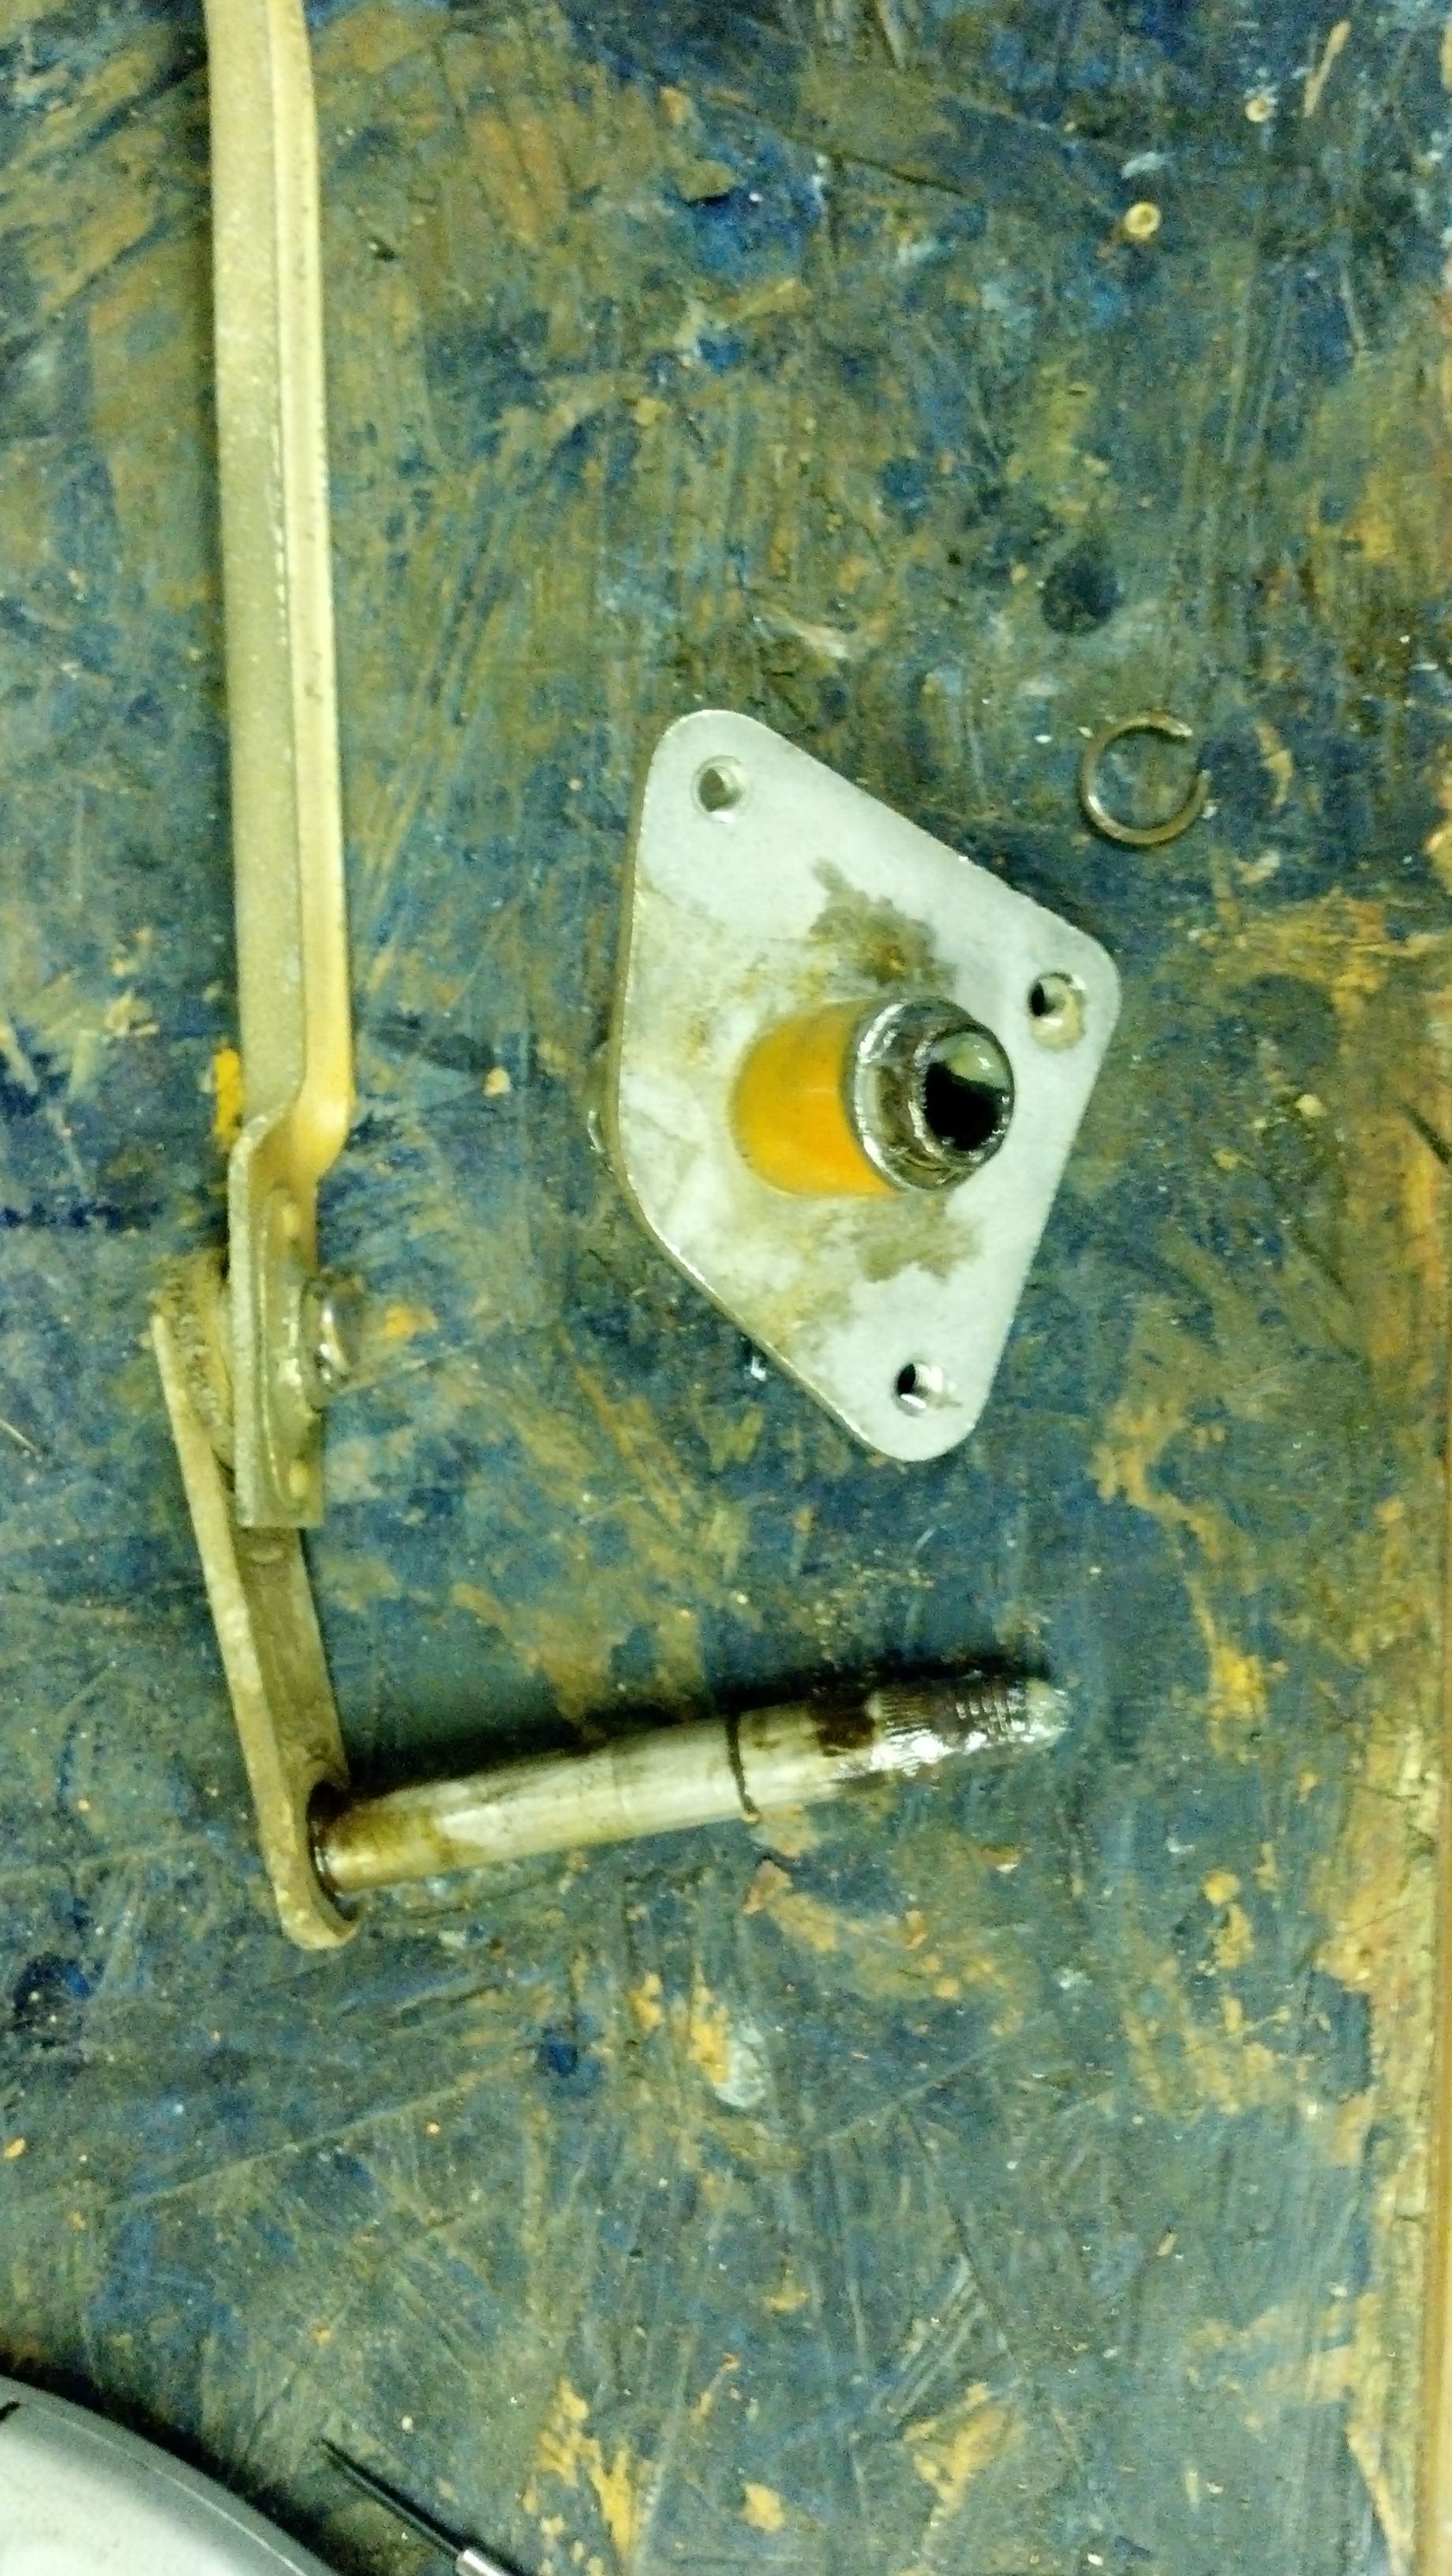
A few other modification were made during the wiring installation including SPAL power windows, Hella Horns, and a refurbish of the windshield wiper gear box. The windshield wipers often are almost unusable in this cars for solidified grease in the gear boxes, a quick cleanup and they are much improved. Cooling the V8 had also proved to be challenging in traffic so a SPAL 16" high performance fan was installed with the a shroud.
.jpg](https://images.squarespace-cdn.com/content/v1/53054f3be4b06b3a5cccd136/1417291907053-XGT5T3N83G2SW9HEO8T2/%5BUNSET%5D%288%29.jpg)
.jpg](https://images.squarespace-cdn.com/content/v1/53054f3be4b06b3a5cccd136/1417291909955-FKGQIIZB03KSUIA2K726/%5BUNSET%5D%289%29.jpg)
.jpg](https://images.squarespace-cdn.com/content/v1/53054f3be4b06b3a5cccd136/1417291913621-NG2NX9059SDY8ACV2E2E/%5BUNSET%5D%2810%29.jpg)
.jpg](https://images.squarespace-cdn.com/content/v1/53054f3be4b06b3a5cccd136/1417291918029-XUYU3PTN07NK67ZNMHC6/%5BUNSET%5D%2812%29.jpg)

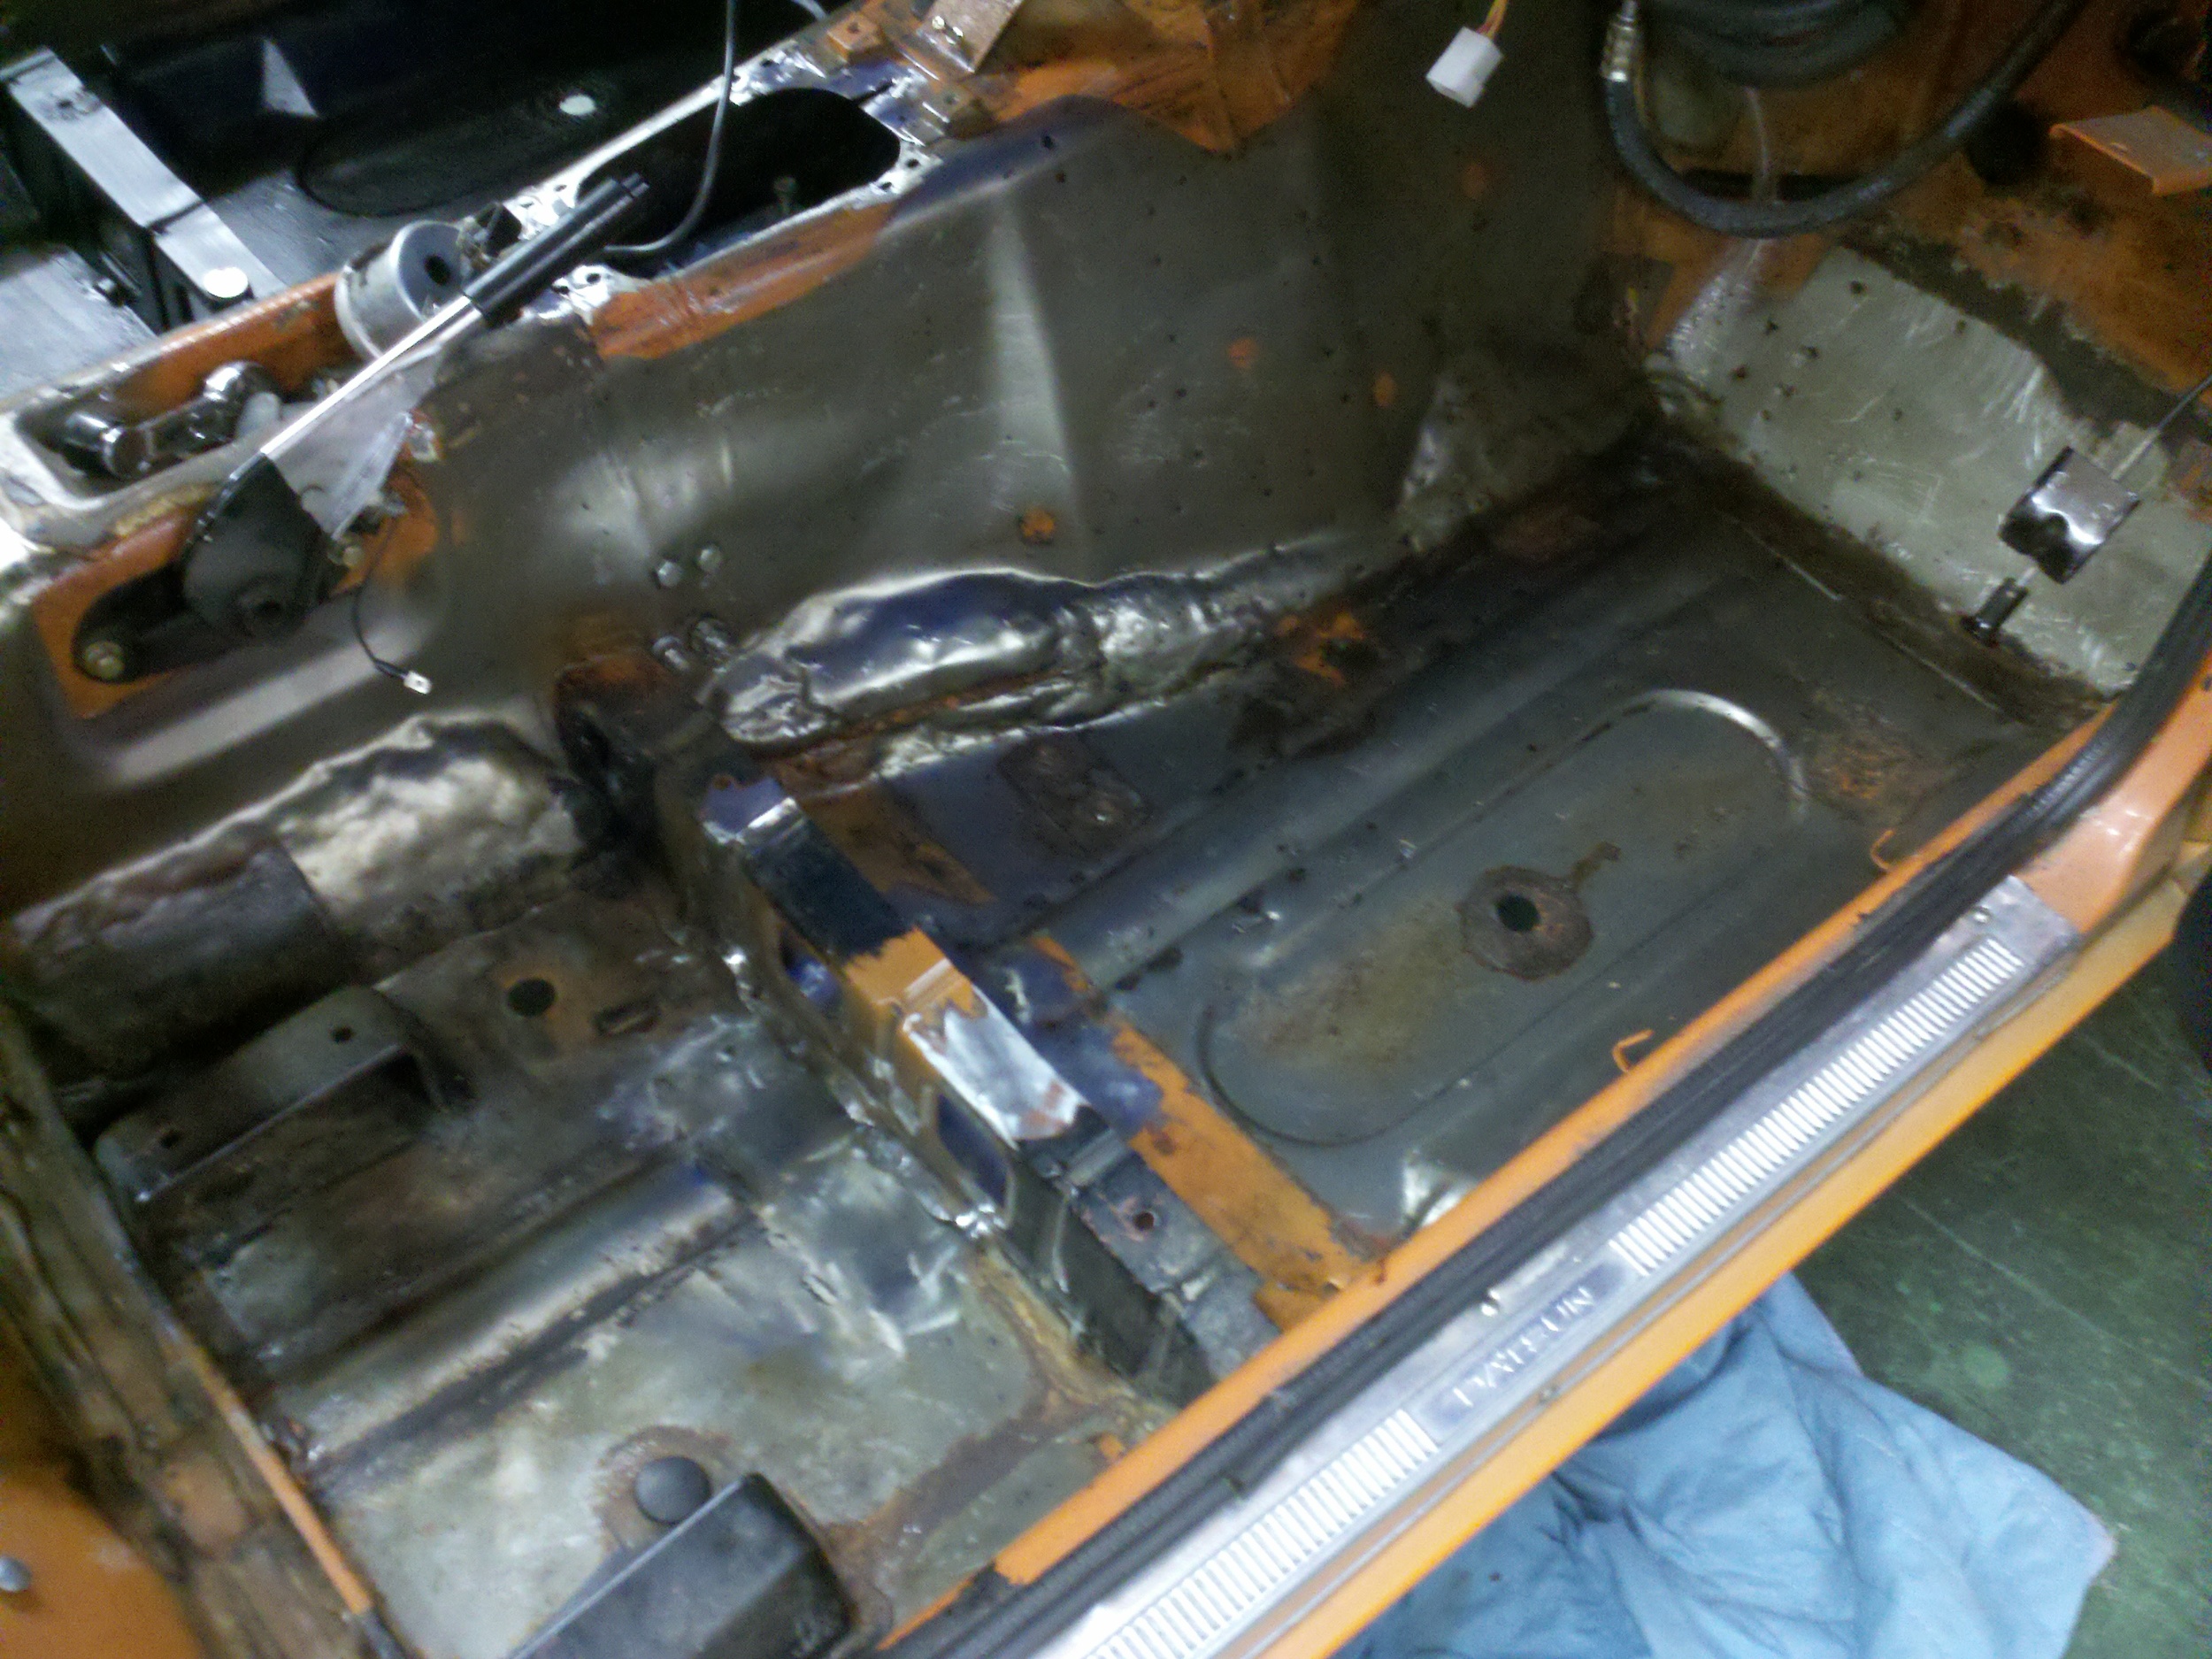
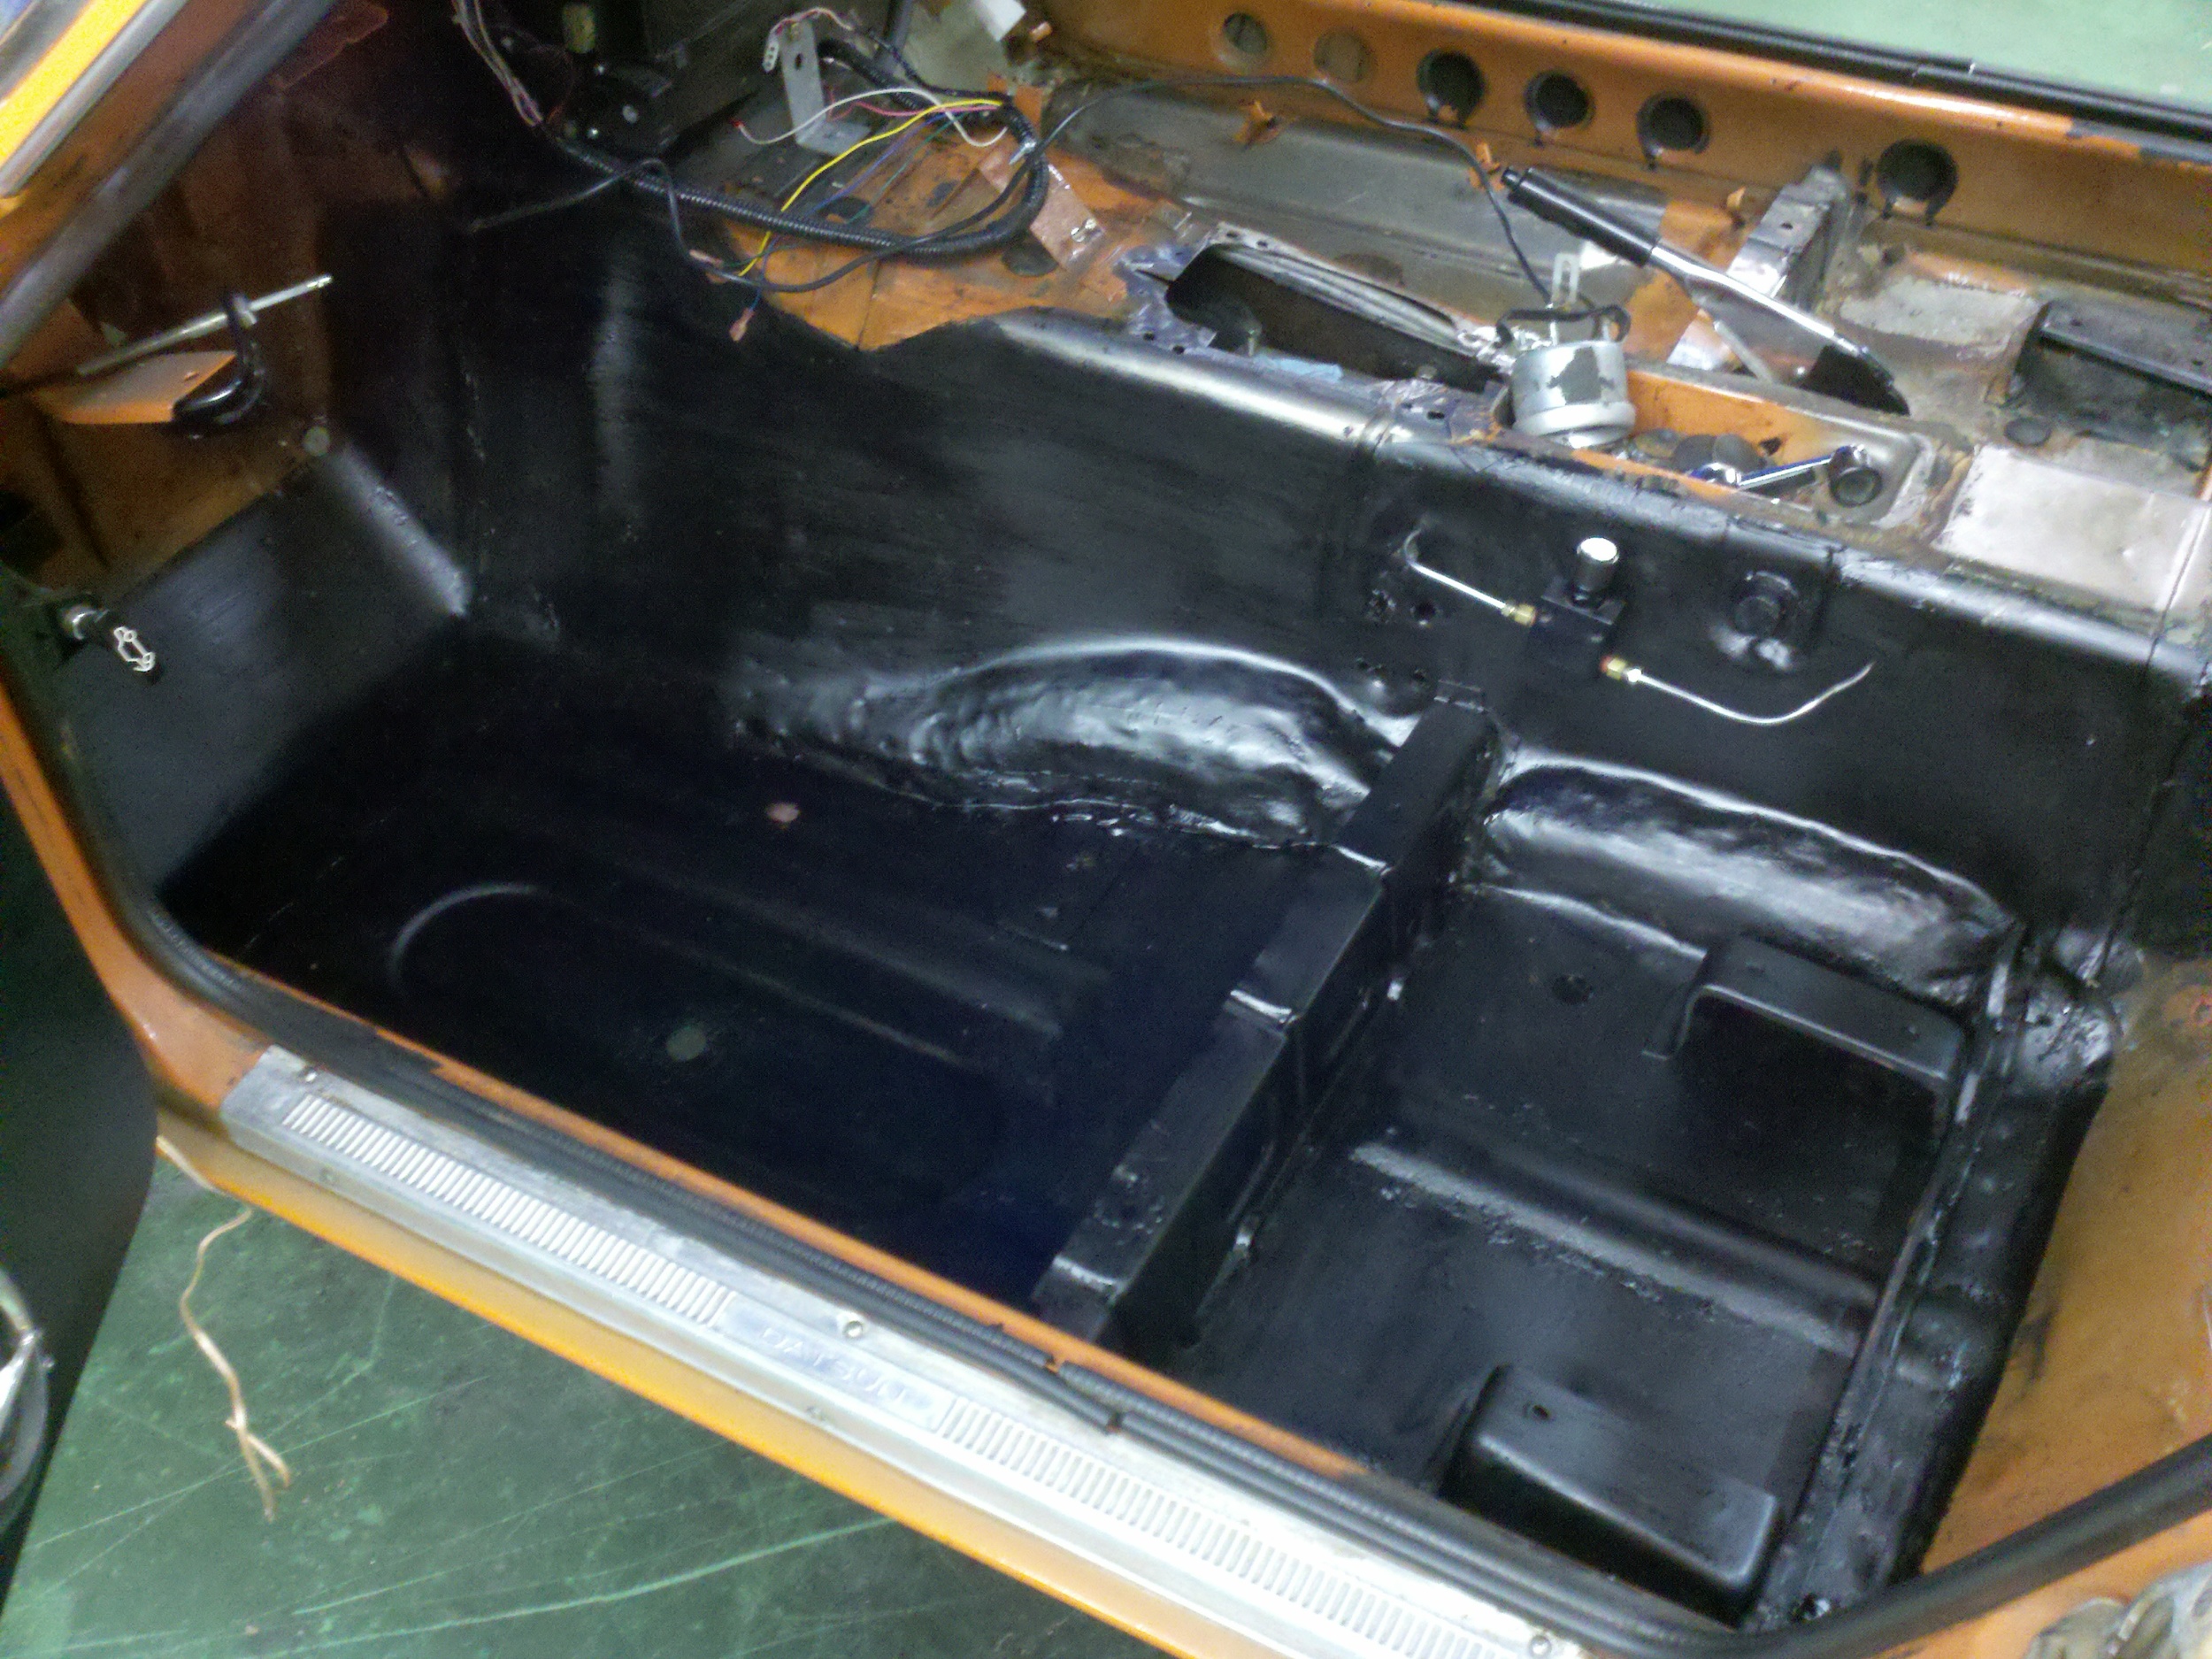
With the wiring complete the interior was re-installed. Most of the interior was in good condition but new vinyl was installed on the transmission tunnel and strut towers. Eventually the seats will be swapped out for more modern and supportive units but they look great for now!
.jpg](https://images.squarespace-cdn.com/content/v1/53054f3be4b06b3a5cccd136/1417292400942-TX2RH5KDKNLUHOEV4IDT/%5BUNSET%5D%2814%29.jpg)
.jpg](https://images.squarespace-cdn.com/content/v1/53054f3be4b06b3a5cccd136/1417292402326-OT3EAPFAO7HONOB6E1U0/%5BUNSET%5D%2816%29.jpg)
.jpg](https://images.squarespace-cdn.com/content/v1/53054f3be4b06b3a5cccd136/1417292406800-5JIK90CDYZ3DF3WS3EHH/%5BUNSET%5D%2817%29.jpg)
Electrical and Interior Restoration - Part 1
Matt continued to drive the car but as I foreshadowed earlier there were some pretty serious underlying issues present when he bought the car. The car had a few quirks like a shift light that would come on with the turn signal, and headlights that would turn off when you used the windshield wipers! The car eventually quit running completely, forcing the long overdue electrical restoration. Matt once again brought it in for a complete re-wire along with a full sweep of autometer gauges. Like usual though the project got a little bigger as we tore into the car.
It was truely incredible how the car had been wired over the years, the were so many extra wires under the dash it's amazing the original harness didn't melt down! Here are a few pictures from the beginning


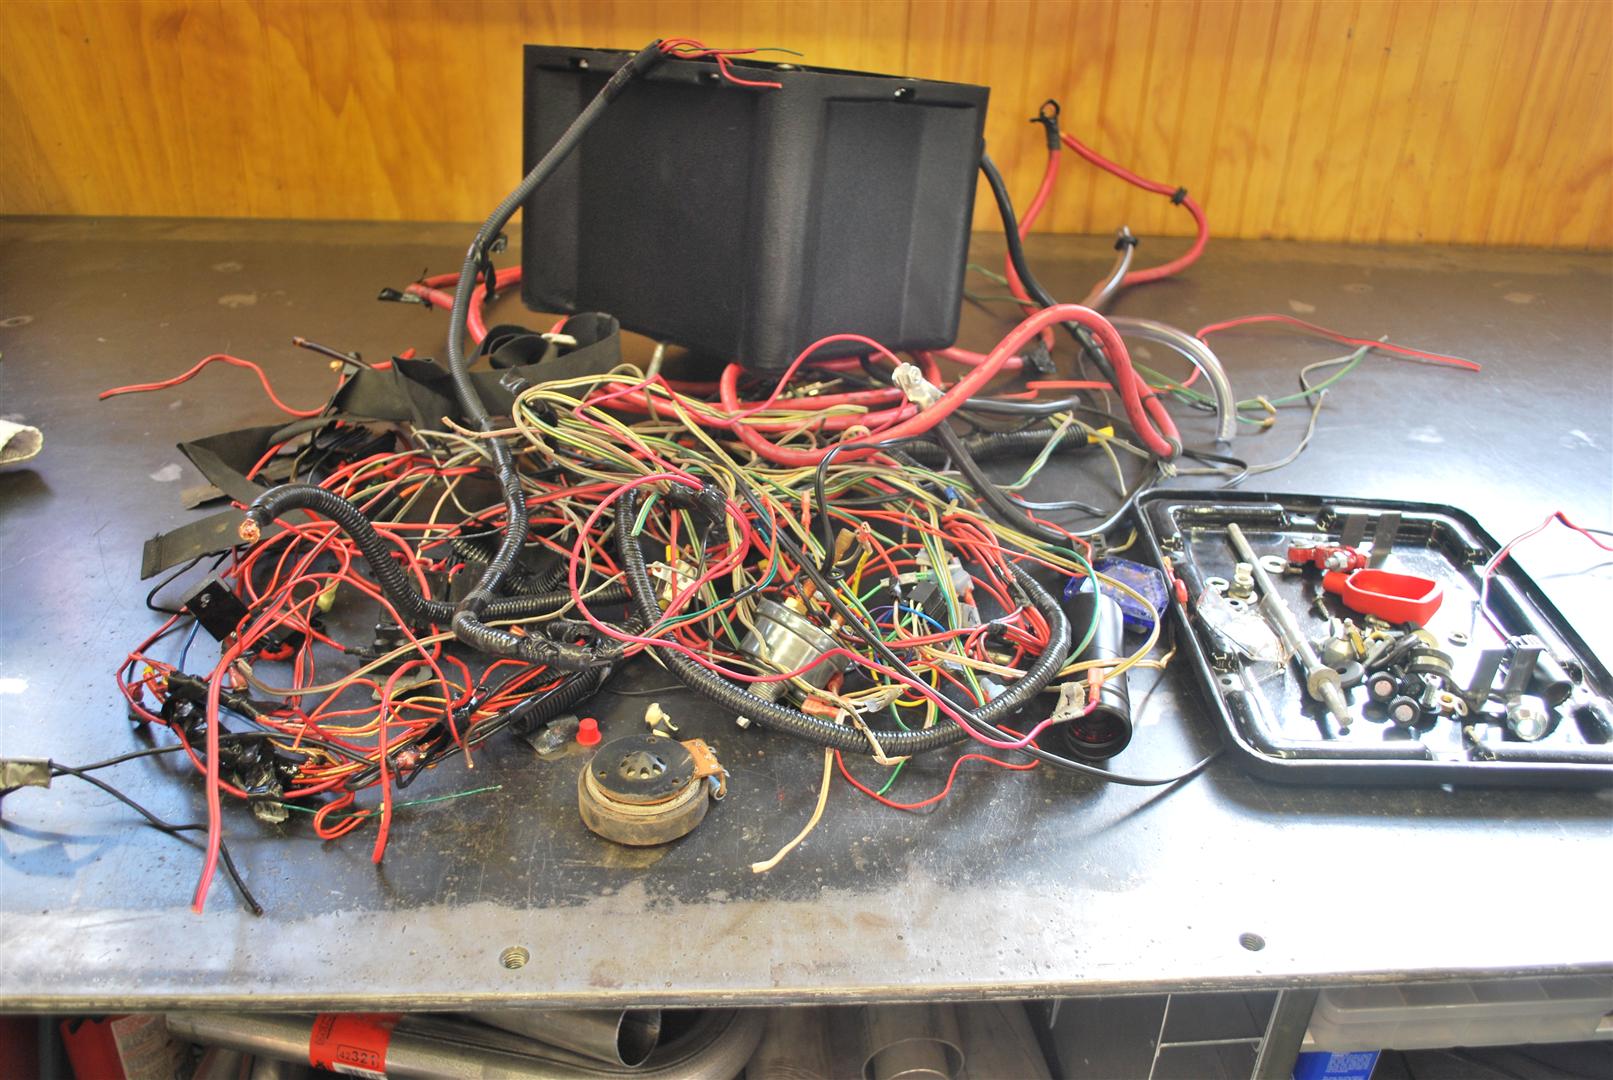
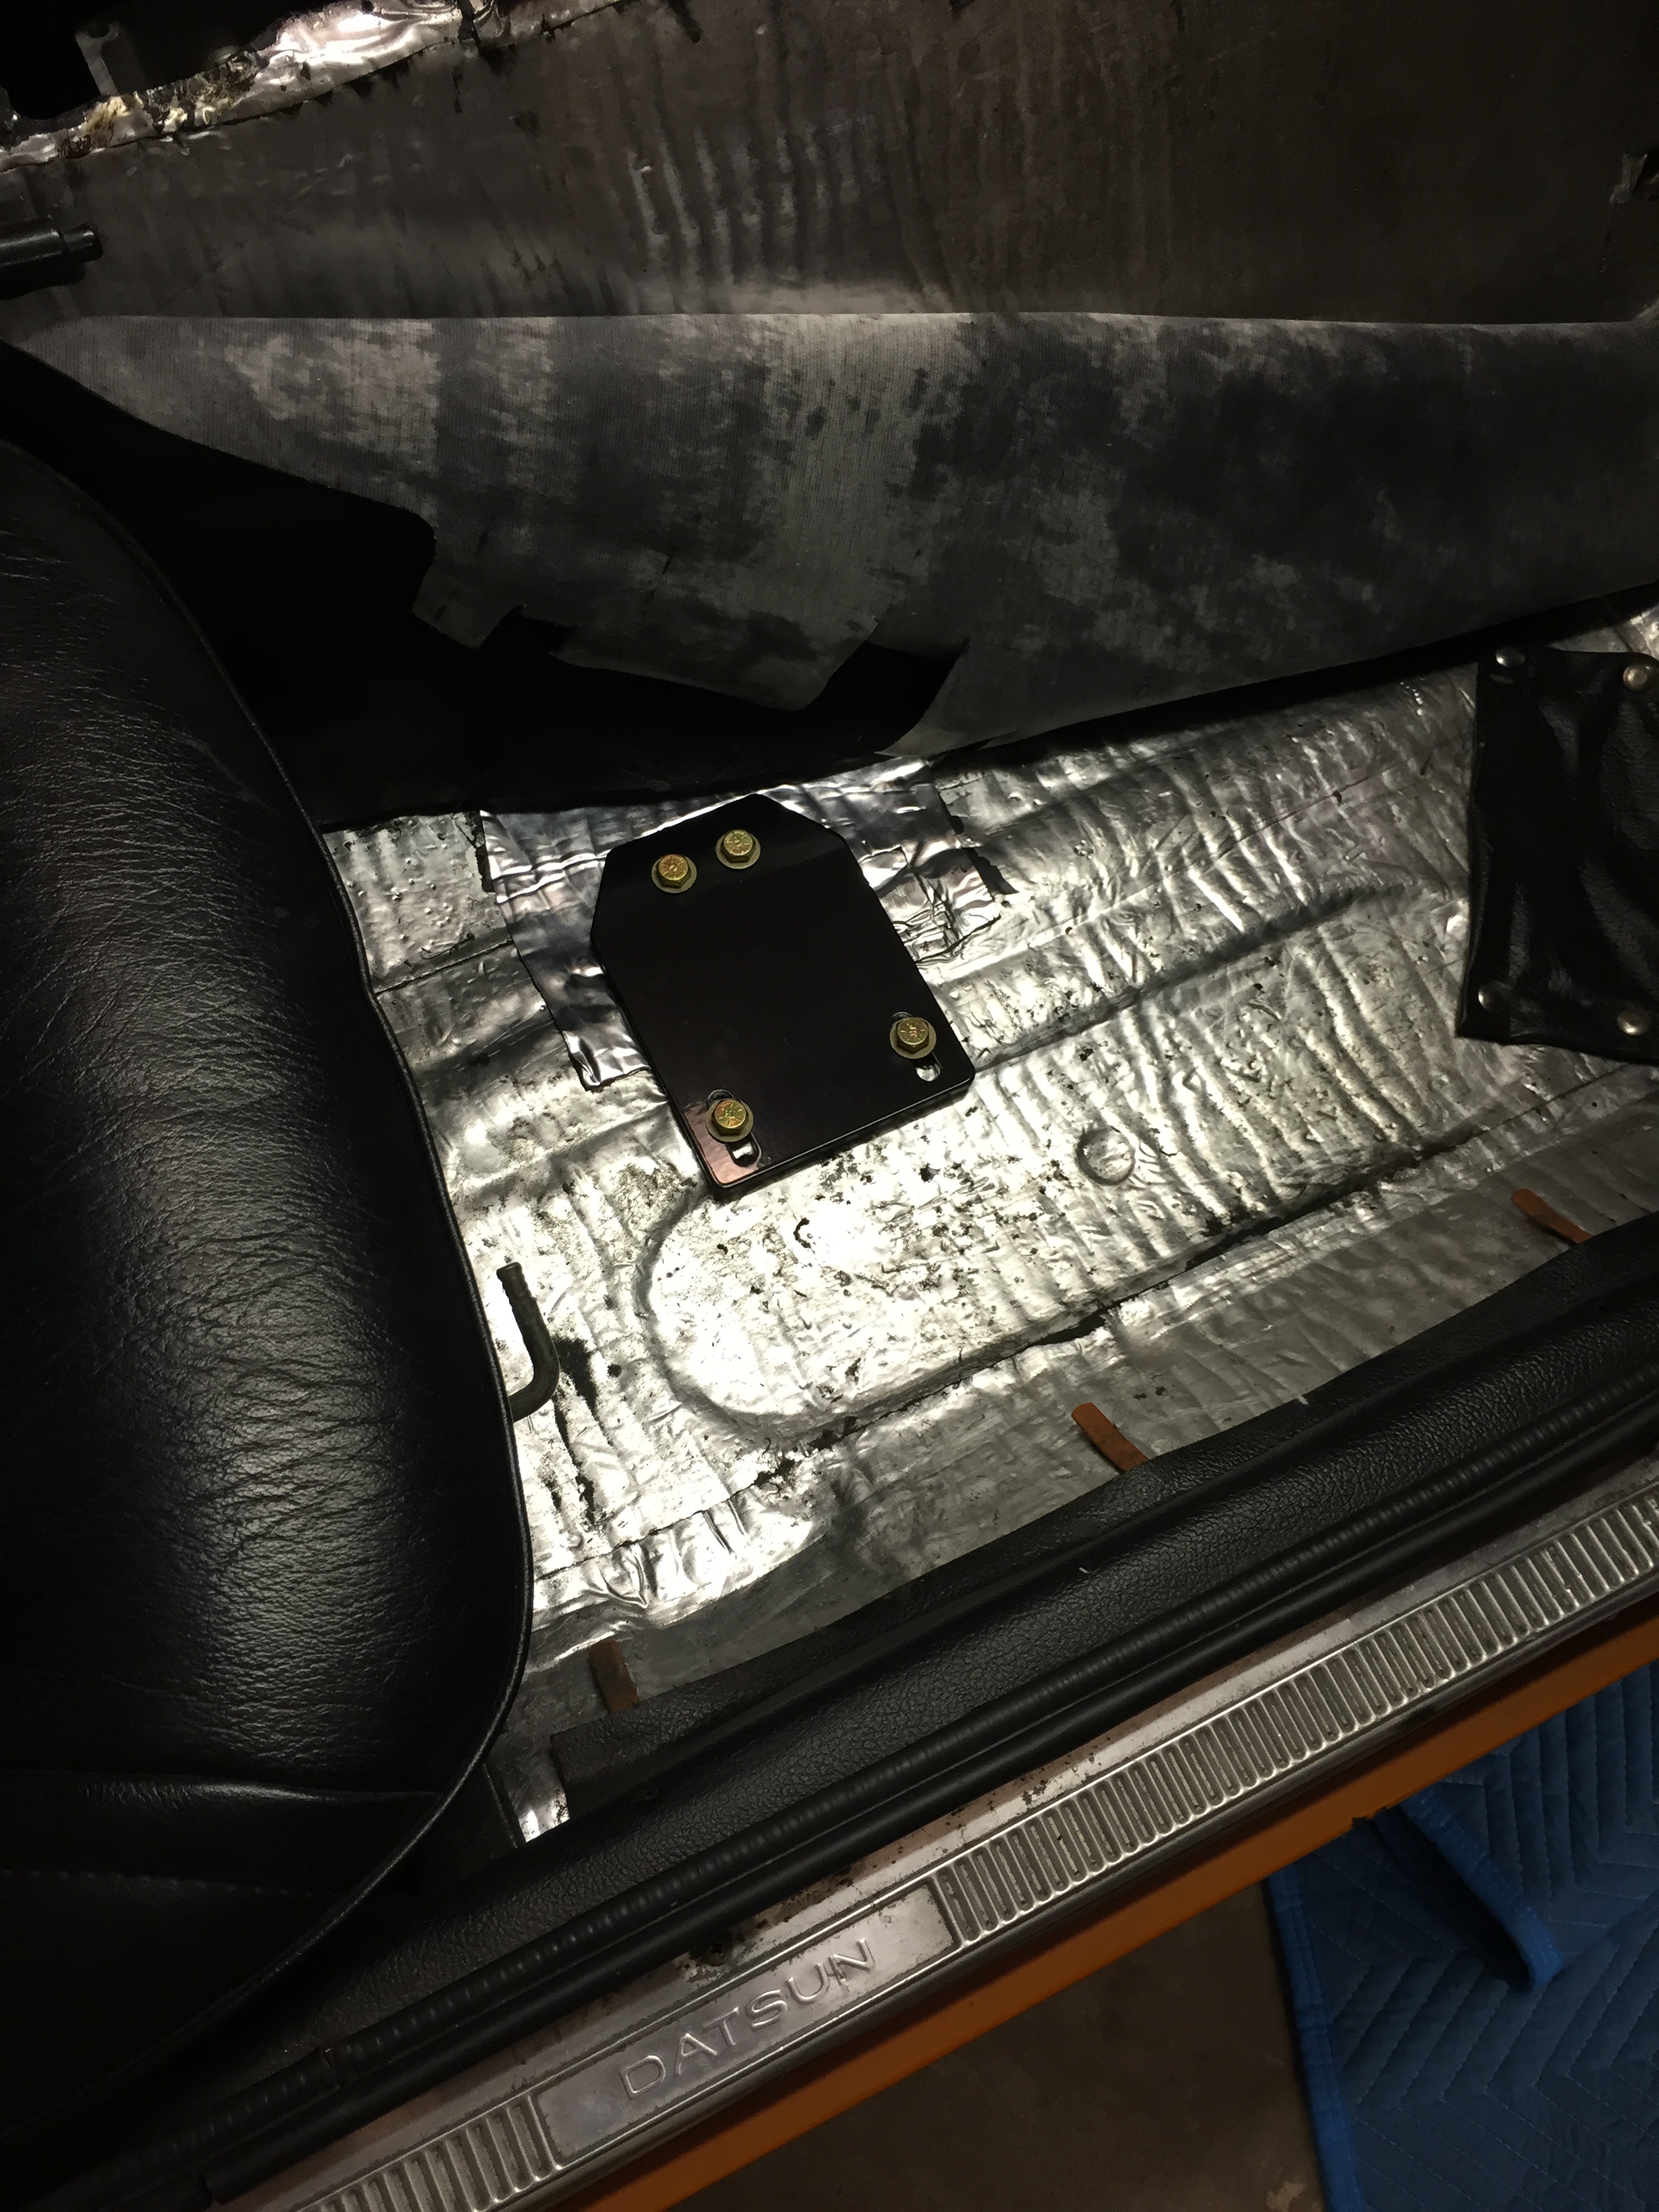
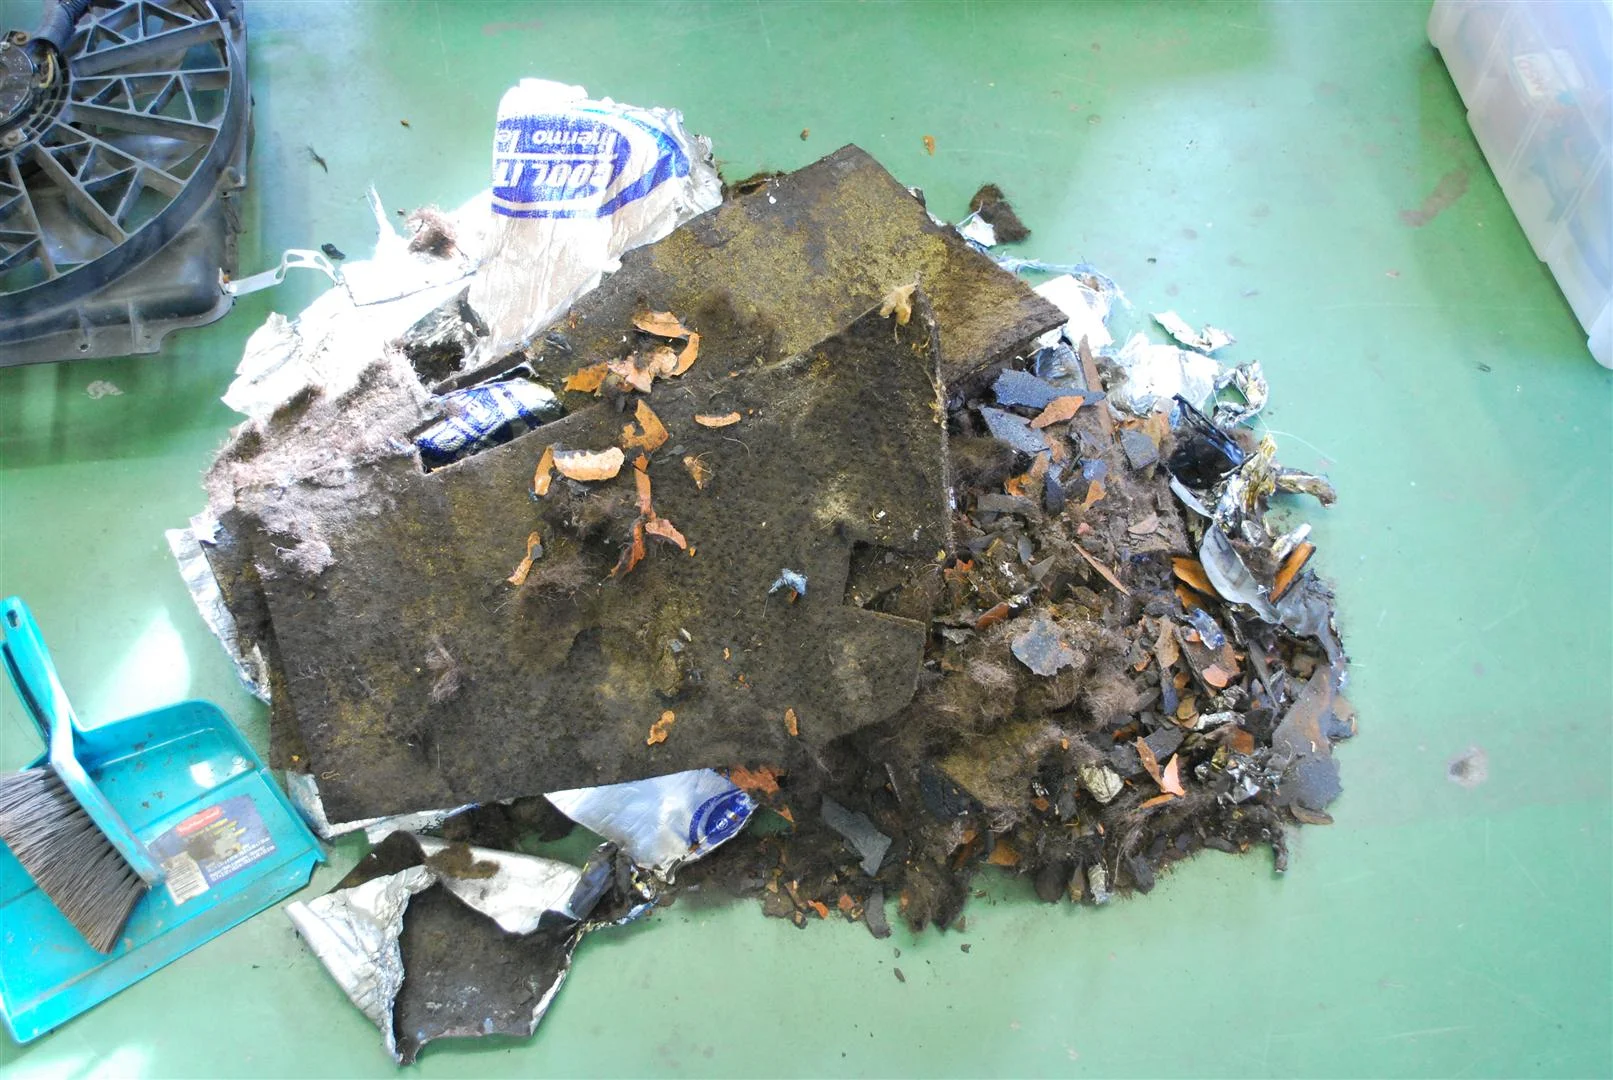
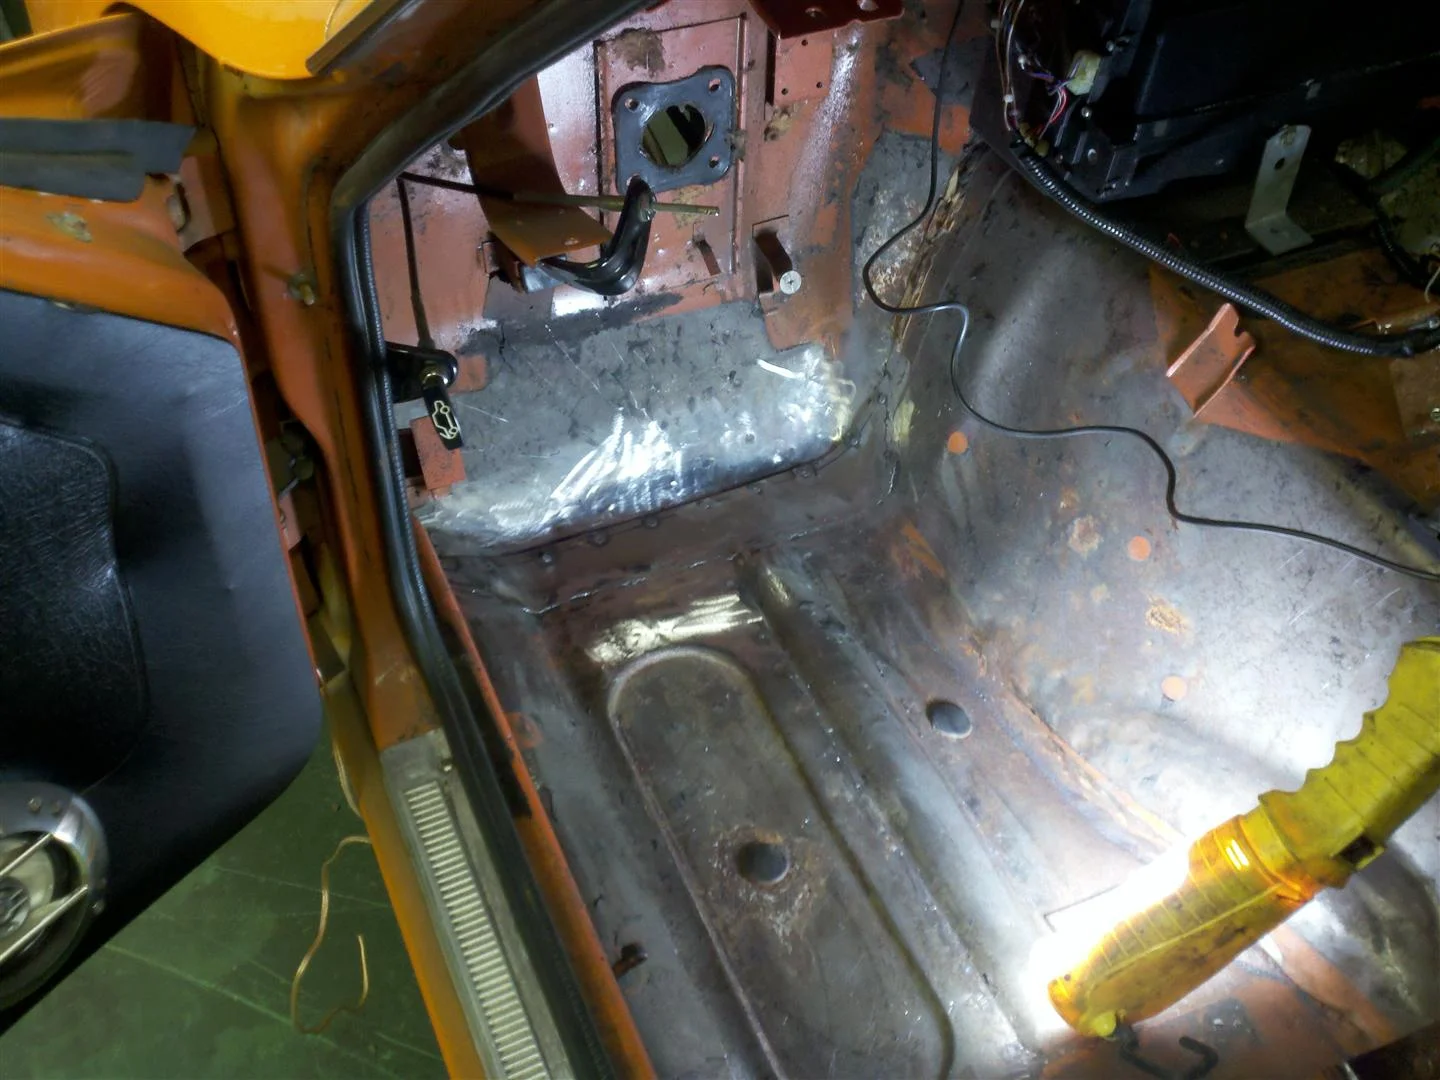
The entire electrical system was gutted from the car, every wire. In doing so I pulled up the carpet and uncovered more trouble. The previous owner had installed sound deadening, however it was installed over the original jute mat! The result likely had little effect on the sound deadening but did good at trapping moisture on the pans. Everything was removed to look at the damage.
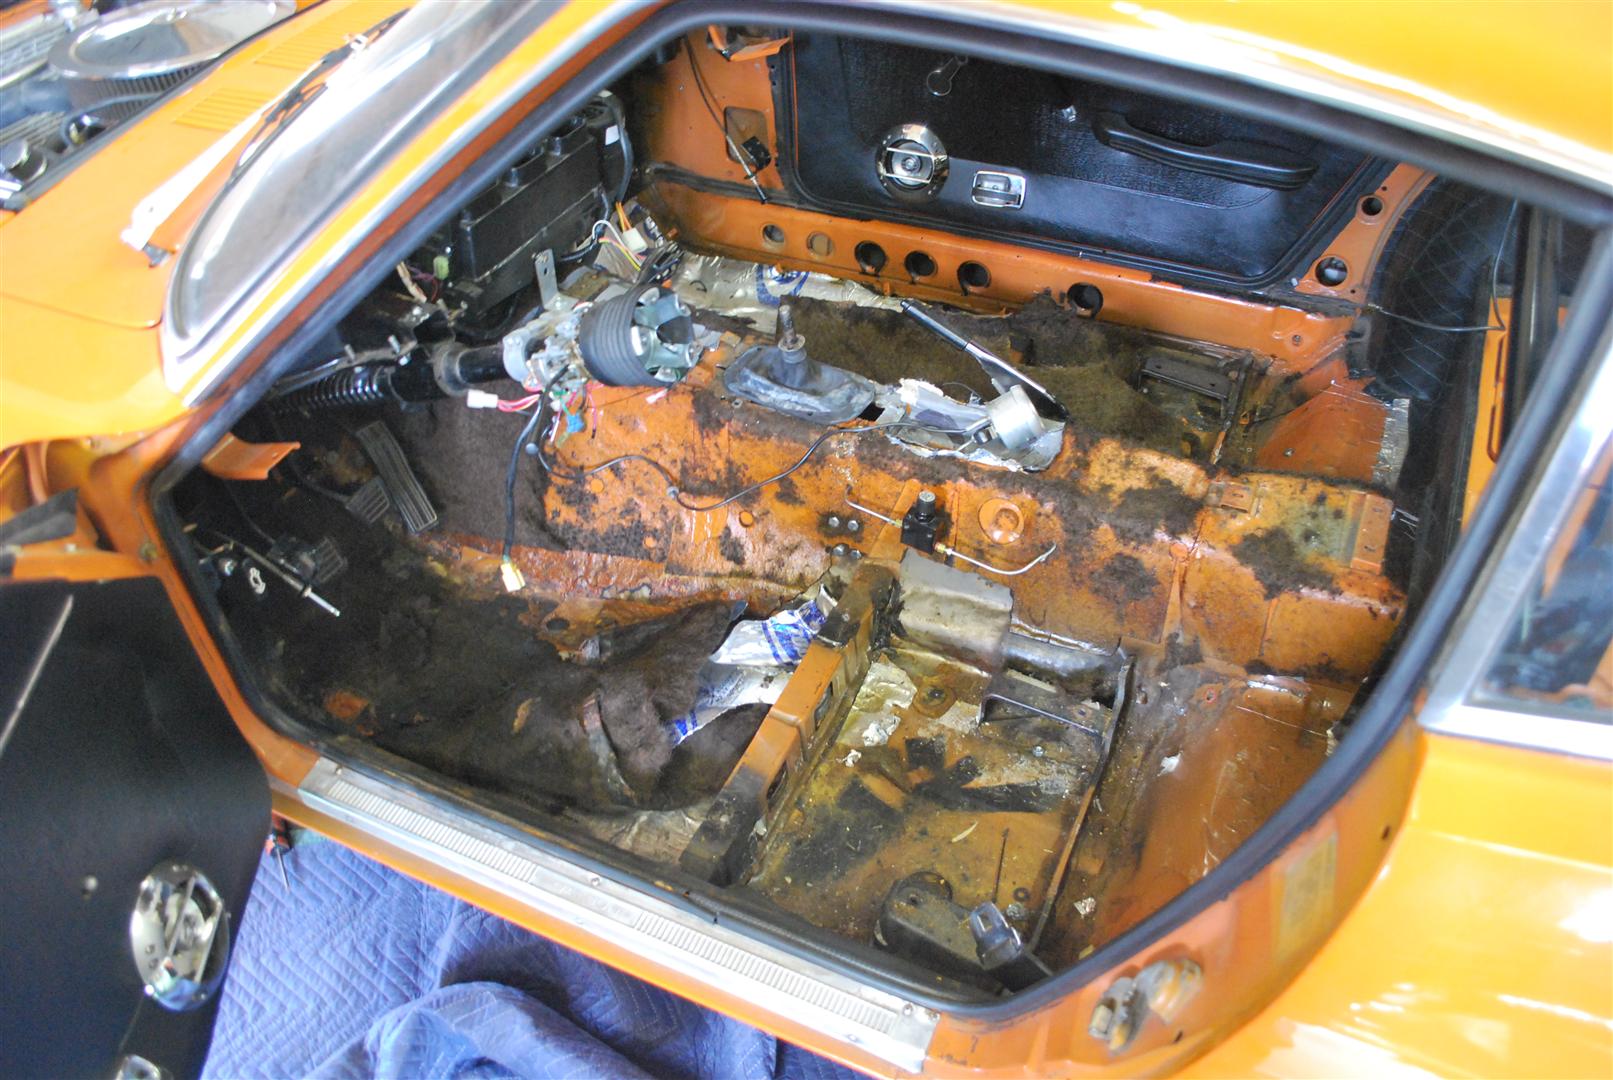
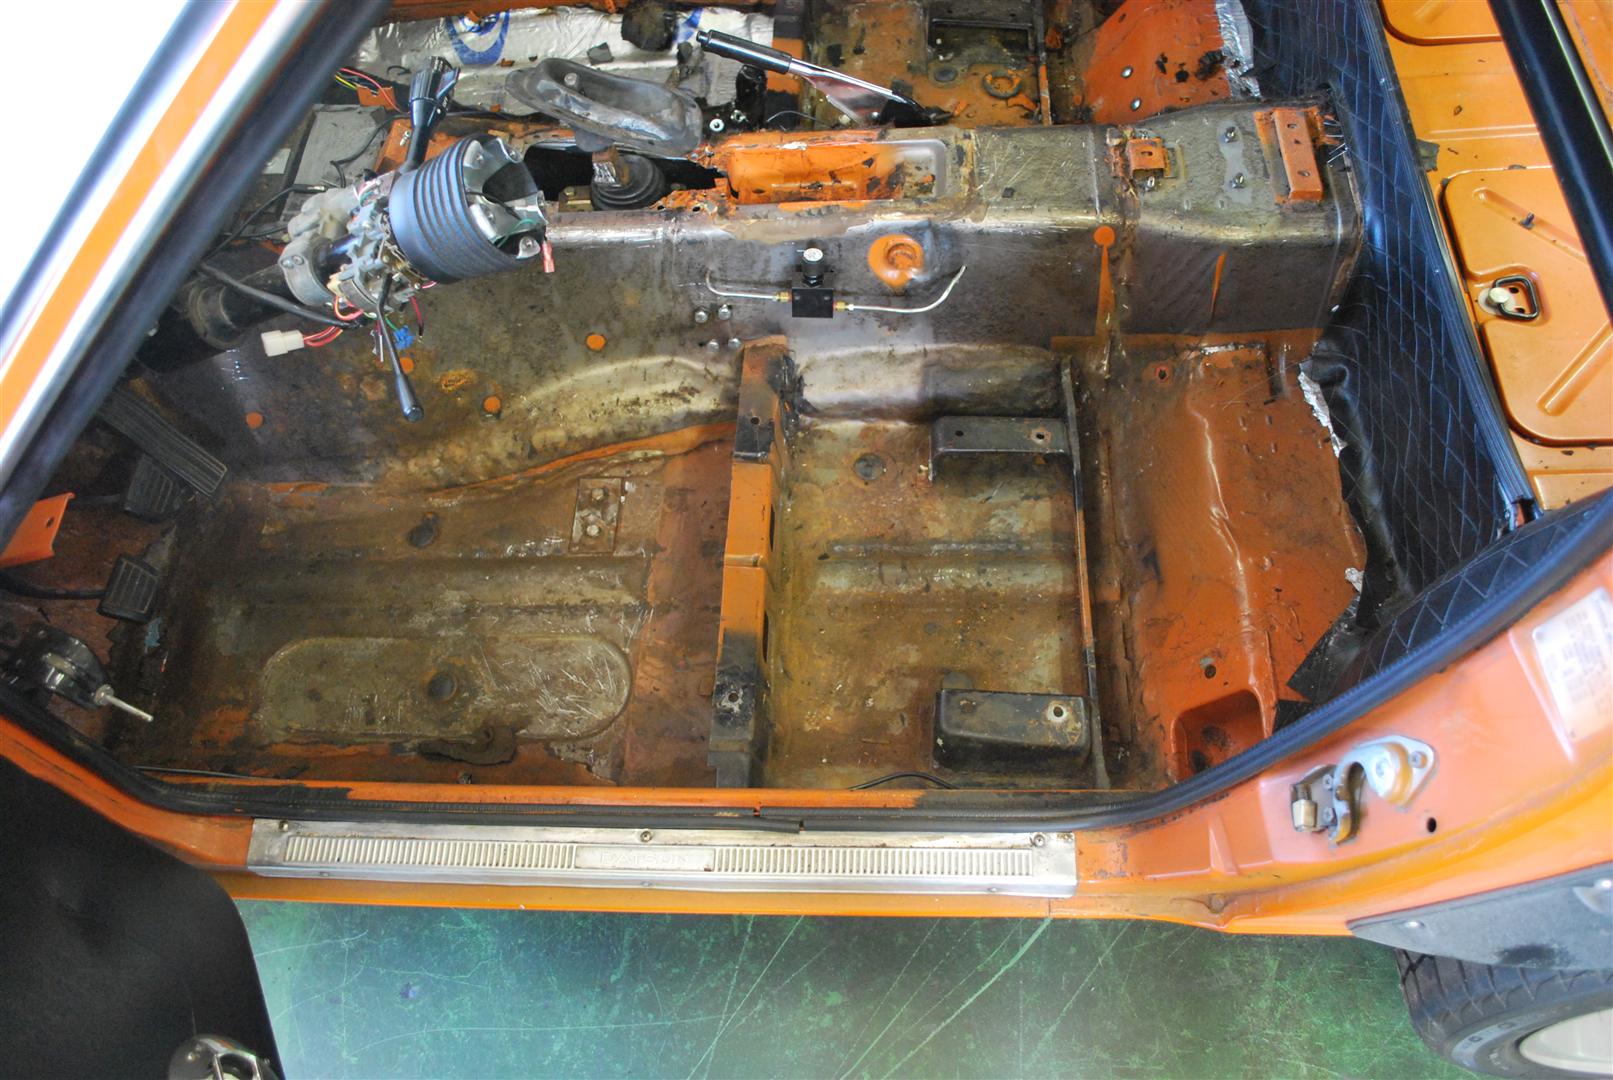
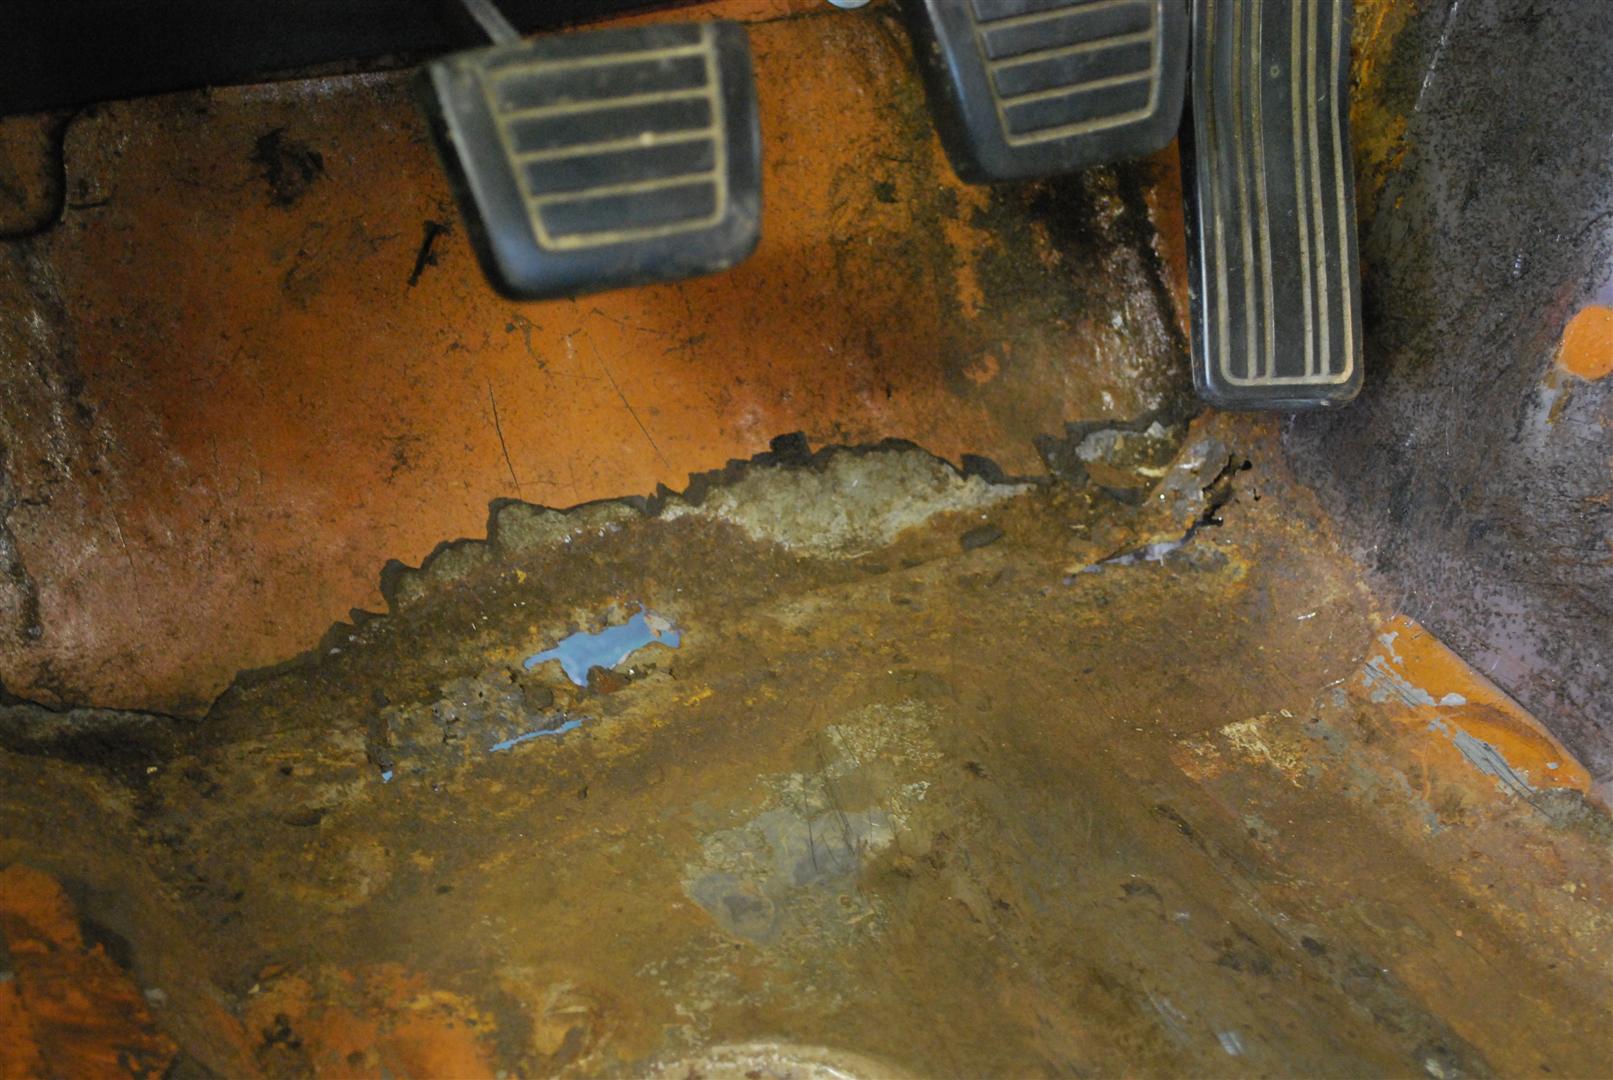
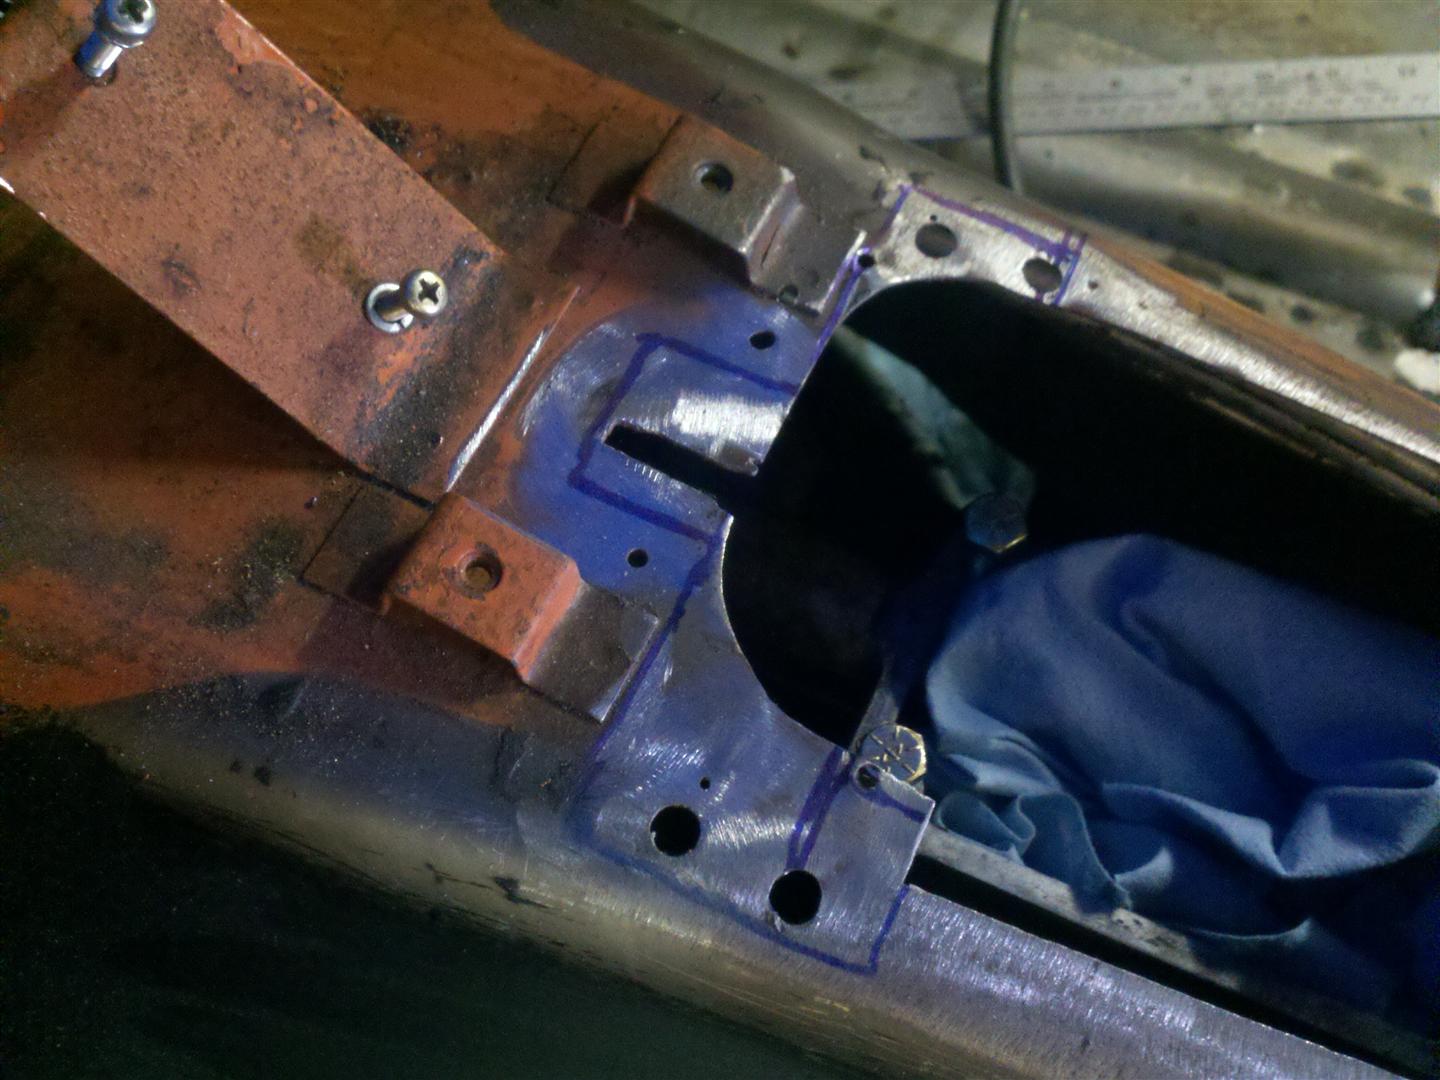
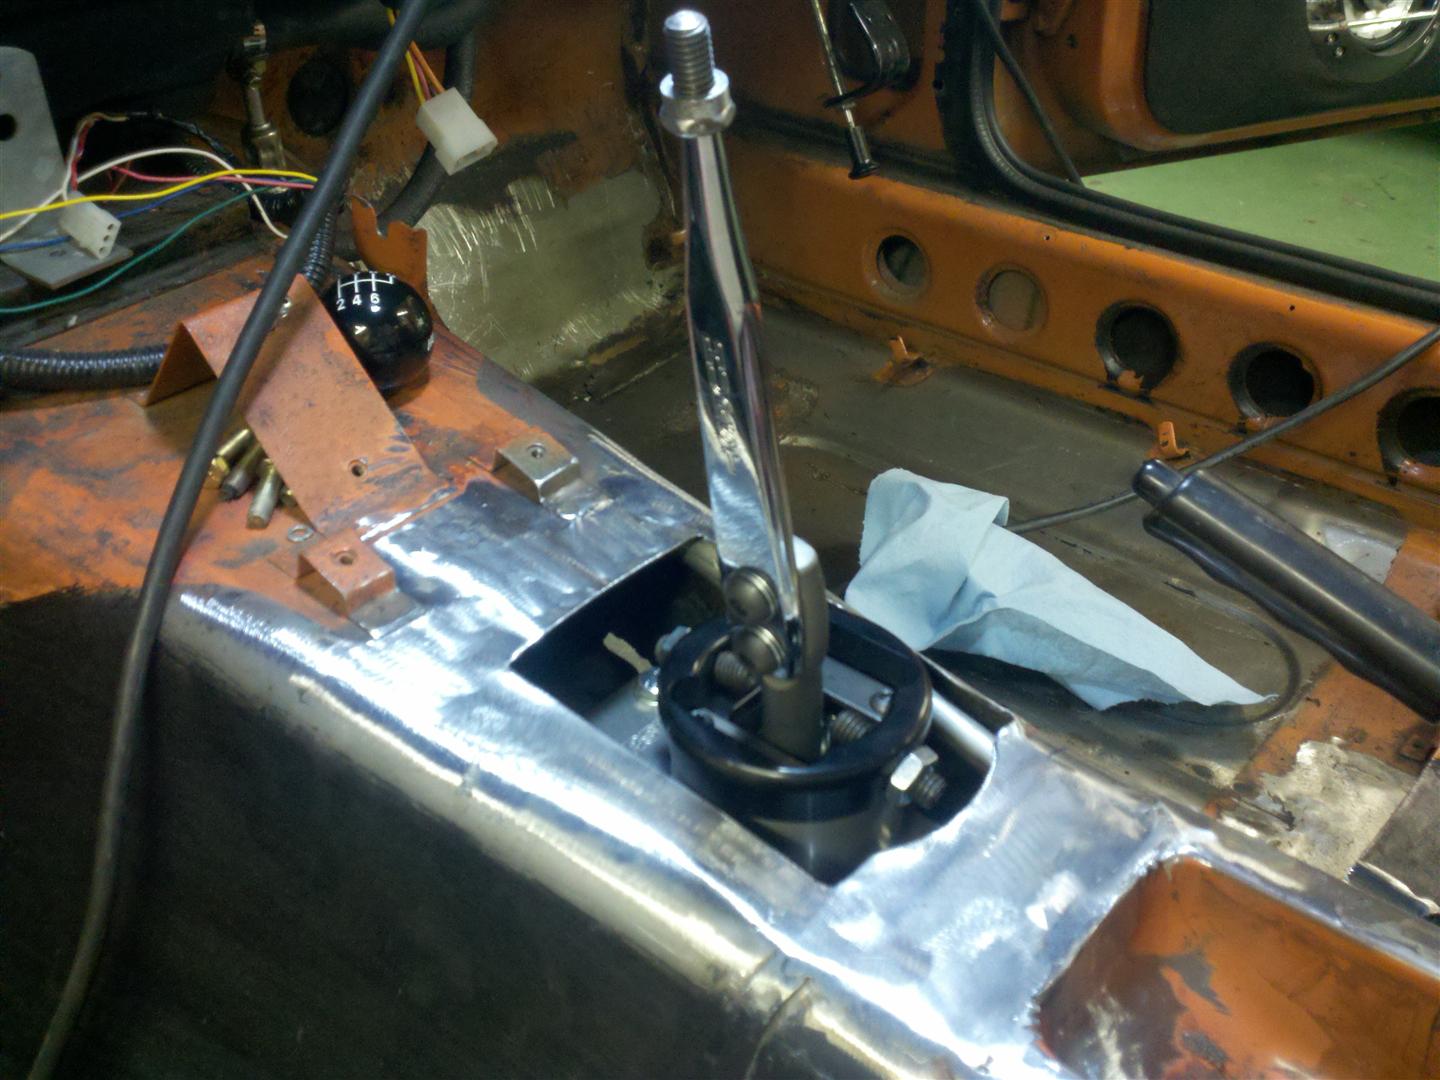
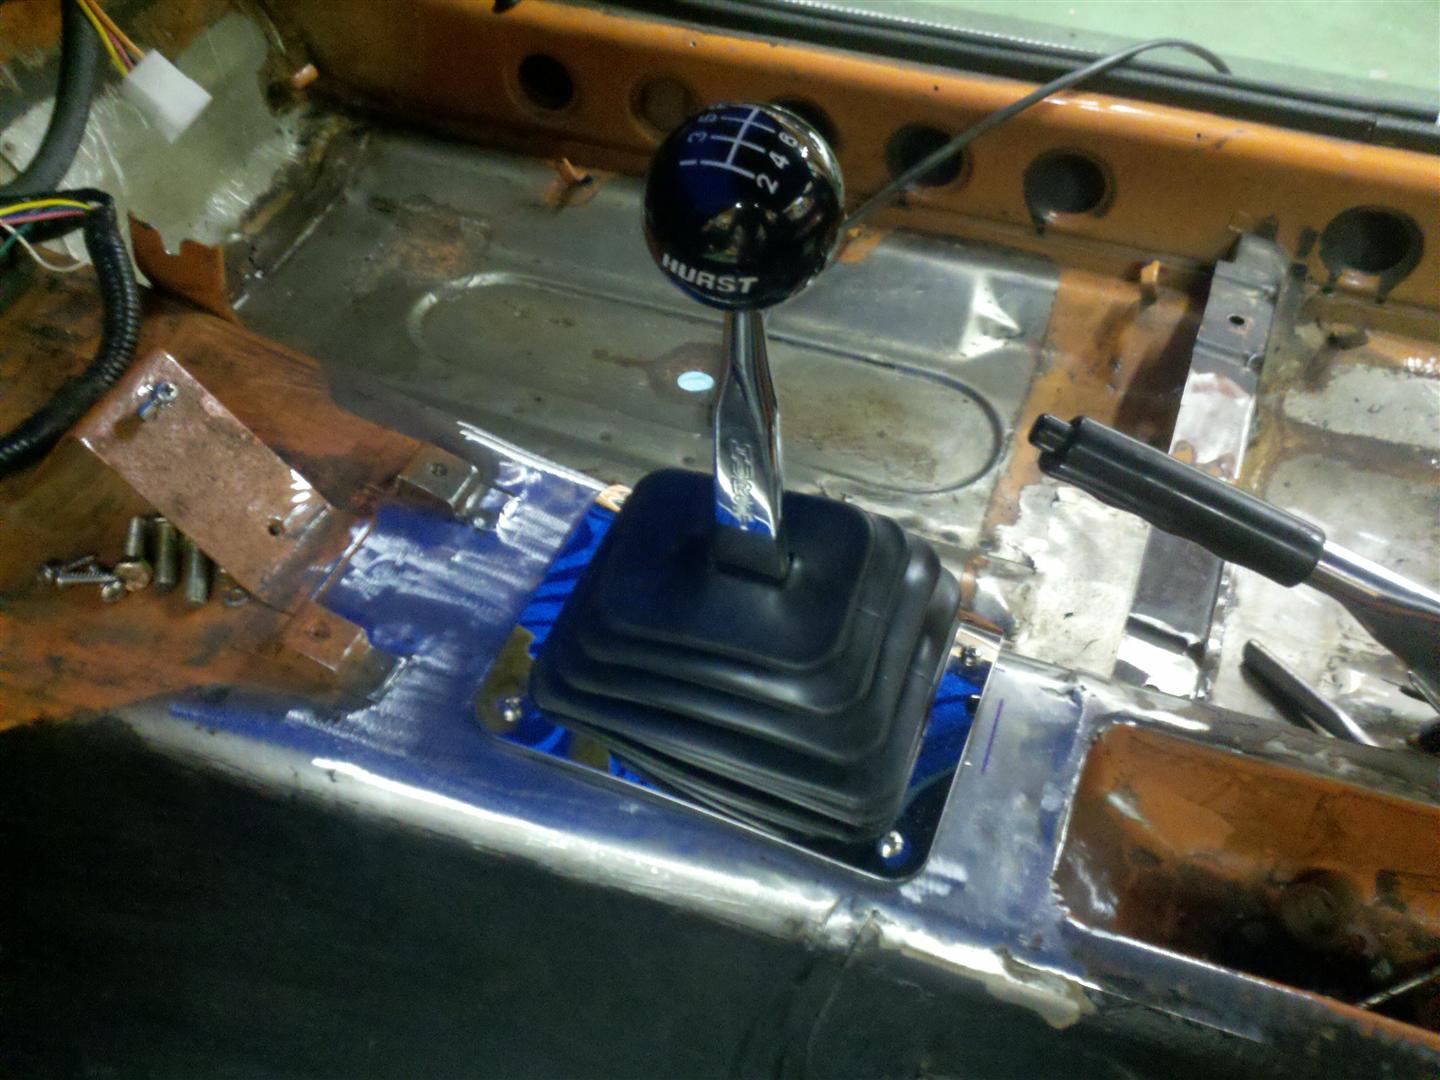
The rust was relatively minor but several spots needed attention. Particularly the drivers foot well. While not initially planned, the decision was made to fix the problem areas, and clean up the floor boards and interior before progressing with the electrical. The rust areas were cut out and replaced with new metal, areas with milder surface rust were cleaned up and painted. The previous owner had cut the shifter opening several times for different transmission installations, this was cleaned up as well so a boot could be installed and seal the opening. With all the rust fixed, the floors were given a heavy coat of rust preventative pant and then covered in sound deadening.
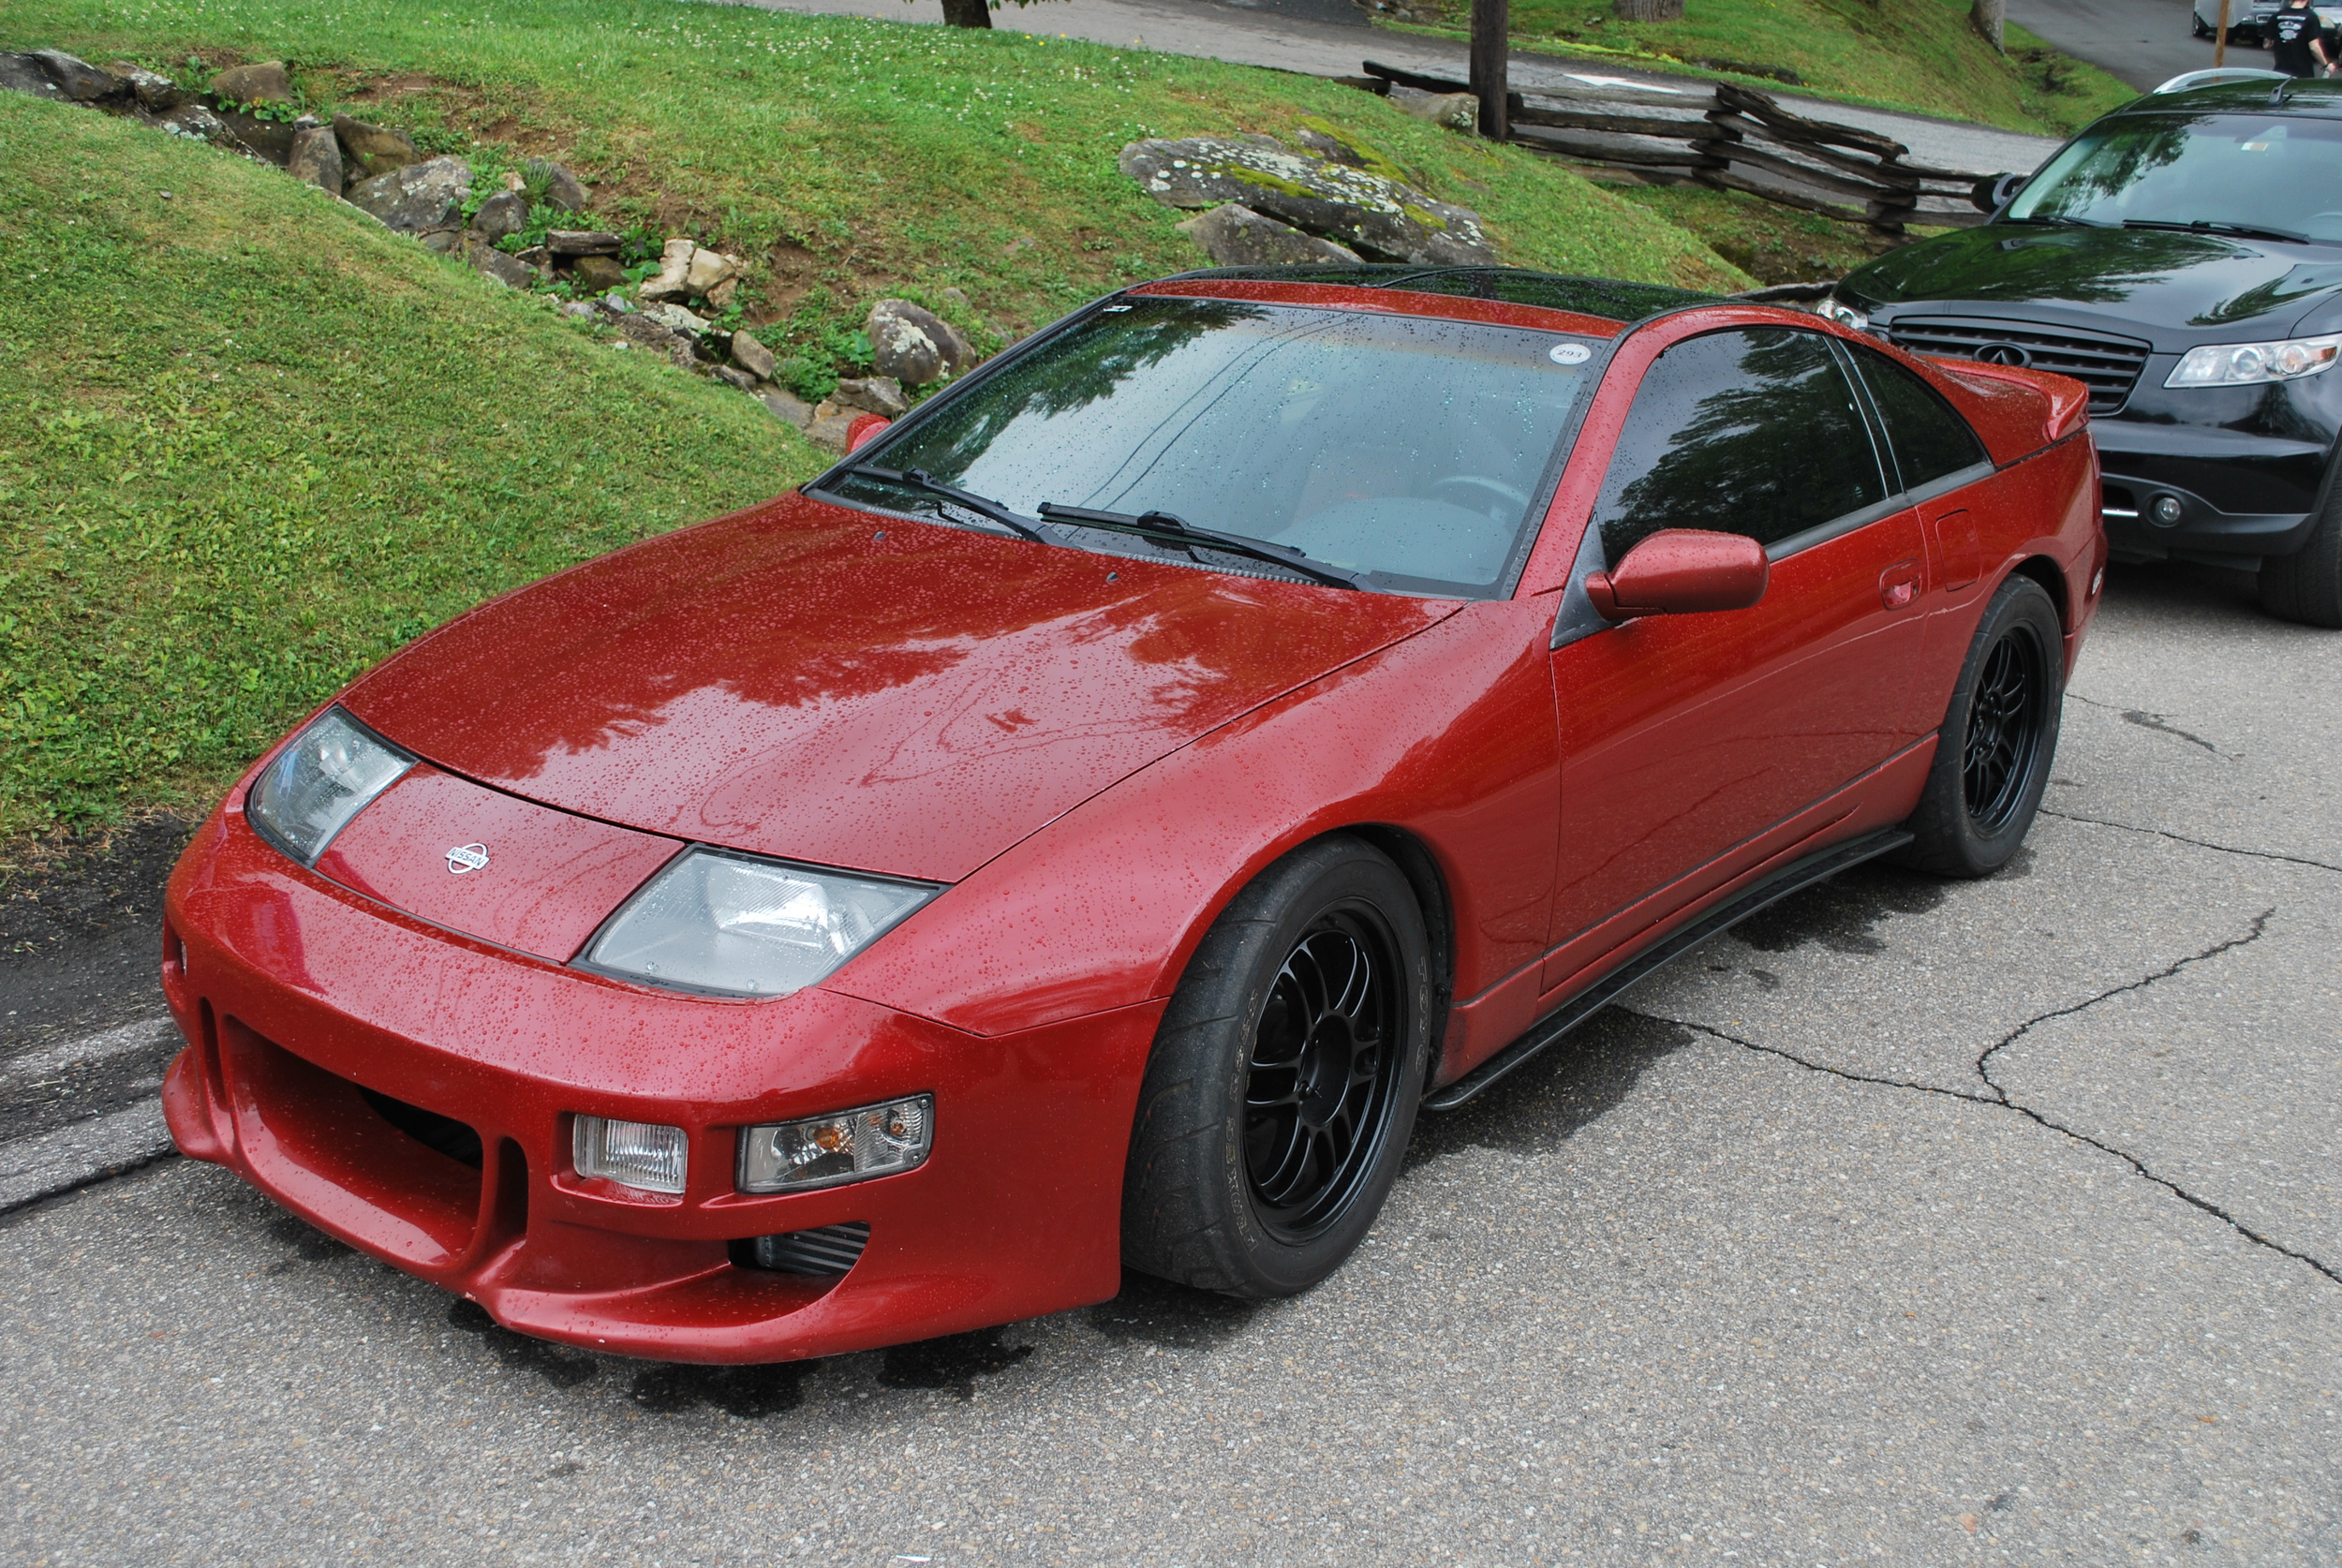
Original Condition and Wheel/Flare Installation
Matt purchased this Z off Ebay as a running and driving project from a fellow enthusiast. The hardware list made it hard to pass up and it had a great rust free (mostly) body from the midwest. The car looked great in the pictures and he had it transported back to NC sight unseen!
Some of the specs:
- 1972 240z
- Built Gen 1 Small Bock V8
- 6 Spd Transmission
- R200 CLSD w/ 300ZX CV axles
- MM Coilovers w/ Tockico Struts
- AZC Wilwood brakes in the front, 240sx in the rear
- Boze Wheels
When the car arrived Matt dropped by for me to look it over and go for a test ride, man was it quick! We quickly noticed however that it was a bit more of a 'project' then he had hoped, with many of the modifications being poorly executed. One of the worst problems was the electrical system which had been absolutely ruined through years of tinkering and modification. I'll get into this a bit later! here are a few beauty shots of the car:


Matt was OK with everything though and wanted to put some miles on it before doing anything further. Except for one thing; he wanted a more aggressive look and needed more tire with the V8 setup. He decided on ZG flares and Rota RBR wheels. The Rota's are 17x9F and 17x9.5R. I have always been a fan of smaller wheels on older cars and felt that 16's are the best size, however the widths are limited to 245 unless you are running race slicks. The 17" RBR's really open up your tire choice and are a nice look for the Z mixing the classic Panasport and Watanabe style. At 800 USD a set they are very affordable.
ZG flares were initially designed as 'over fenders' and many people install them without cutting the fenders, this limits the travel and tire width. It is always tough to cut into a rust free car like Matt's but we knew the result would be worth it.
The rear lips were cut and the inner fender was rolled out and re-welded to the quarter panel. The fronts were a much easier task and just required trimming. Nut-serts were installed in the rear quarter panels to secure the flares. The install was finished out with stainless hardware and rubber fender welting.
I need to dig out the in progress pictures but for now here is a picture of the finished result

I thought the installation turned out nice and the gunmetal/orange combo was stunning. It convinced me to sell my Wantanbe setup and do the same thing! 275's in the rear are really nice. The only real issue I have with the wheels is the front center caps can not be installed. There is not enough clearance between the center hole and hub. Custom Caps are in order.